Usage Example on Raspberry Pi
Last revision 2026/01/09
This project demonstrates how to acquire data from the HPS-3D160-U LiDAR module on a Raspberry Pi, including installing necessary dependencies, cloning the SDK from GitHub, compiling the code, and running the demo to view device details or perform continuous measurements.
Hardware Preparation
- HPS-3D160-U Area Array Lidar x1
- Raspberry Pi 4B x1
Software Preparation
- Raspberry Pi OS (with internet connection)
- Git
- Build-essential, Python-dev, Python-smbus (installed via
sudo apt-get install build-essential python-dev python-smbus git) - HPS3D SDK (cloned from https://github.com/DFRobotdl/DFR0728_HPS3D_SDK-HPS3D160_SDK-V1.8.git)
Wiring Diagram
Connect the HPS-3D160-U LiDAR module to the Raspberry Pi via a USB cable.
Other Preparation Work
Ensure the Raspberry Pi is connected to the internet to install dependencies and clone the SDK.
Steps
-
Install Python dependency library and git. Make sure Raspberry Pi is connected to the Internet. Skip this step if you have installed already.
Input the following commands in the terminal and press "Enter":
sudo apt-get install build-essential python-dev python-smbus git -
Kindly acquire the code from GitHub and proceed with its compilation.
cd Desktop
git clone https://github.com/DFRobotdl/DFR0728_HPS3D_SDK-HPS3D160_SDK-V1.8.git
cd HPS3D_SDK-HPS3D160_SDK-V1.8/V1.8/Example/HPS3D160-Raspberry-C_Demo/
make
-
Run:
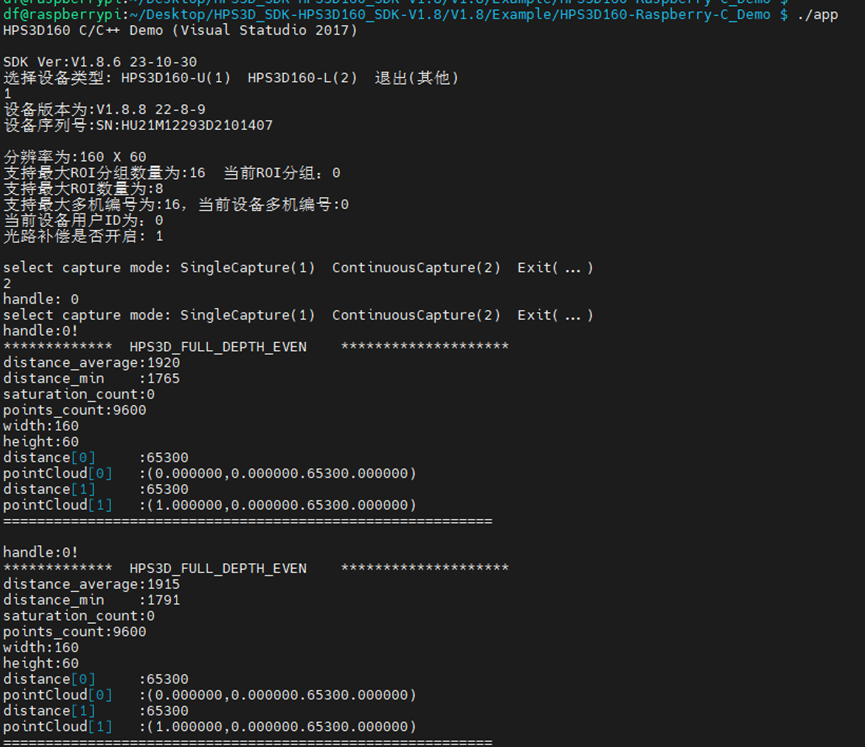
./app
Result
After running ./app, you can choose option 1 to view device details or option 2 for continuous measurements. The expected results include seeing the device's intricate details or a continuous sequence of LiDAR measurements. Screenshots of the terminal output are provided below:
Was this article helpful?