Install the development environment
This article offers a detailed guide on installing and configuring a development environment for the Arduino IDE with a focus on ESP32 board setup, featuring step-by-step instructions for URL configuration and board updates.
Configure URL to the Arduino IDE
-
Open Arduino IDE and click File->Preferences, as shown below.

-
In the newly opened interface, click the button in the red circle as shown below

-
Copy the following link into the new pop-up dialog box: https://raw.githubusercontent.com/espressif/arduino-esp32/gh-pages/package_esp32_index.json
Note: If you have installed another environment before, you can press Enter key at the beginning or end of the previous link and paste the link at a new line.

-
Click OK. Update the board. Open Tools->Board:->Boards Manager... as shown below:

-
Boards Manager will automatically update the boards as shown below:

-
After completing the update, you can enter esp32 at the top, select esp32 and click install when the following occurs (It's recommended to install the latest version):

-
Wait for the end of the following progress bar:

-
After completing the installation, the list will show that the esp32 has been installed, as shown below:

-
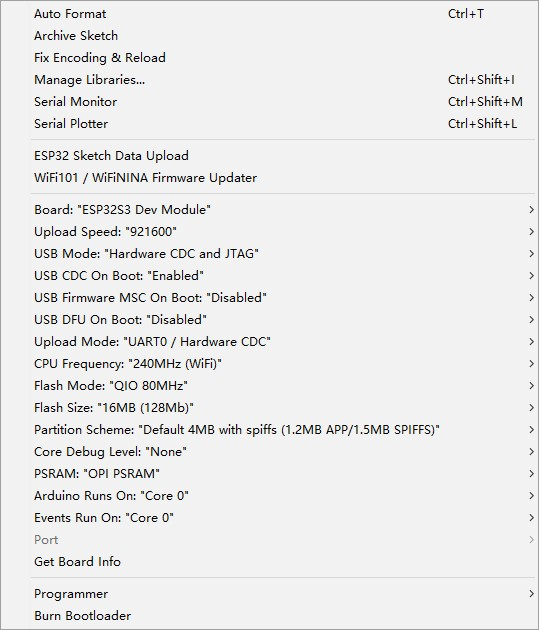
Select the development board and set the development board parameters as shown in the picture below, select the correct port.
4.7-inch E Ink display for ESP32

4.7-inch E Ink display for ESP32-S3
Was this article helpful?