Example for LattePanda-Connecting Thunderbolt Docking Station
This tutorial guides you through connecting a Thunderbolt docking station to a LattePanda Sigma, detailing required accessories, connection steps, and verification processes for seamless multi-screen setup and hot swapping.
Tutorial
Requirements
Required accessories
-
Graphics card x1
-
PD adapter or chassis power supply x1
-
Thunderbolt to PCIEx16 docking station(DFR1169) x1
-
LattePanda Sigma motherboard x1
-
240W/40Gbps USB4 data cable(FIT0990) x1
Connection Diagram
-
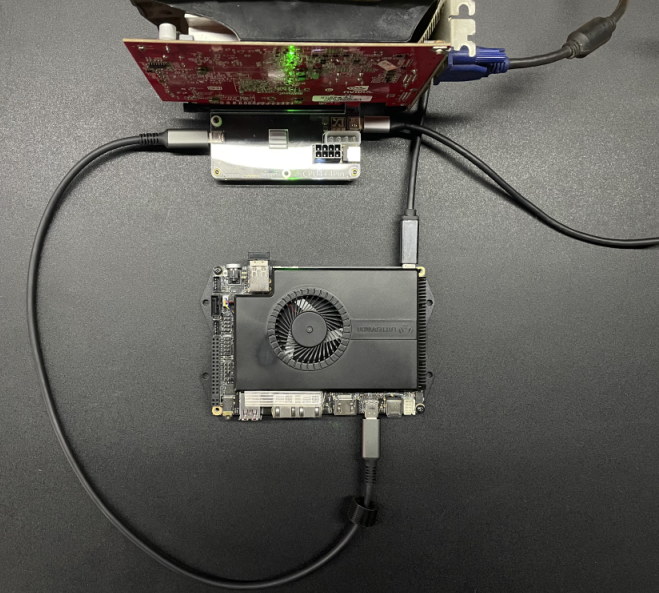
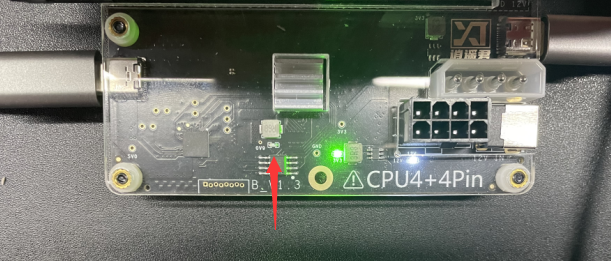
Install the graphics card on the docking station and use an HDMI cable or AVG cable to connect the graphics card to the display. You can also use the LattePanda Sigma's HDMI port and Thunderbolt port to connect multiple screens. First power the docking station and use Choose one of four power supplies: PD-12V, DC5.5*2.1-12V, large 4Pin interface, and CPU4+4Pin interface. LattePanda Sigma can be powered by an official adapter. Finally, use a USB4 data cable to connect any Thunderbolt port of LattePanda Sigma to the docking station.
-
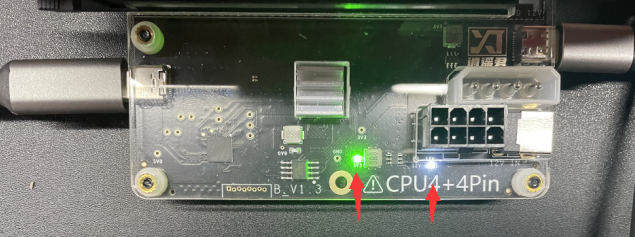
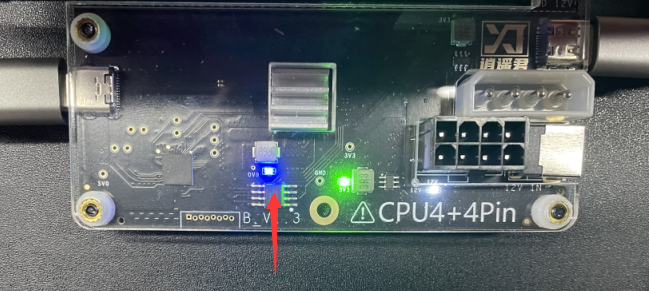
After all devices are connected, the dock will light up white and green indicators. The white indicator light is the dock power indicator light, and the green indicator light is the Thunderbolt port connection indicator light. Press the LattePanda Sigma power-on button to turn on LattePanda Sigma. At this time, the blue indicator light of the docking station will light up, and LattePanda Sigma and the docking station will start normally.
-
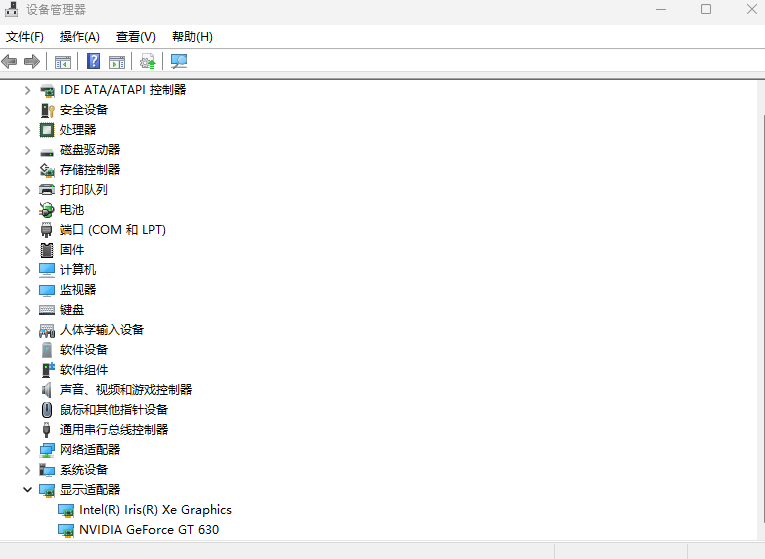
After LattePanda Sigma is turned on, you can check the graphics card model through the display adapter under the device manager.
-
The Thunderbolt docking station supports hot swapping. After LattePanda Sigma is shut down, the blue indicator light of the docking station will go out. At this time, the power can be turned off, and the device can be safely unplugged.
Was this article helpful?