Getting Started
Last revision 2025/12/29
Getting Started
Hardware Included
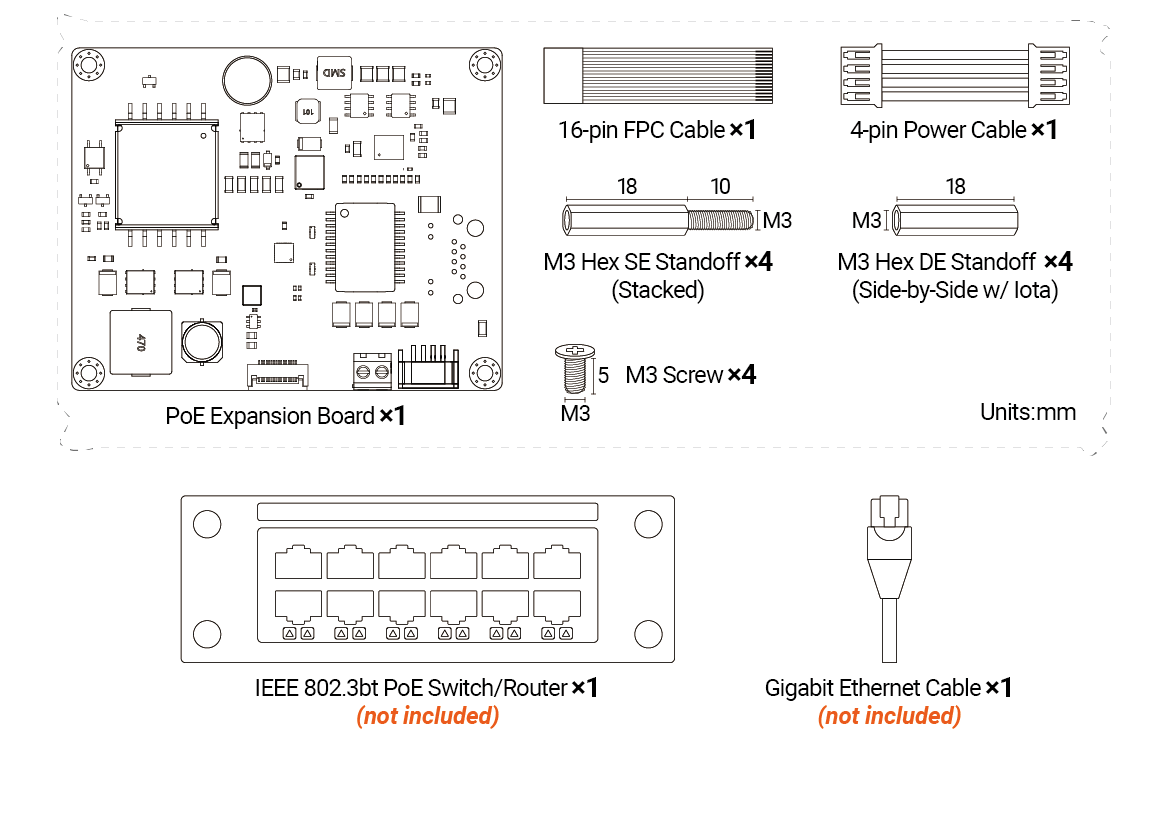
Before use, ensure you have the following components:
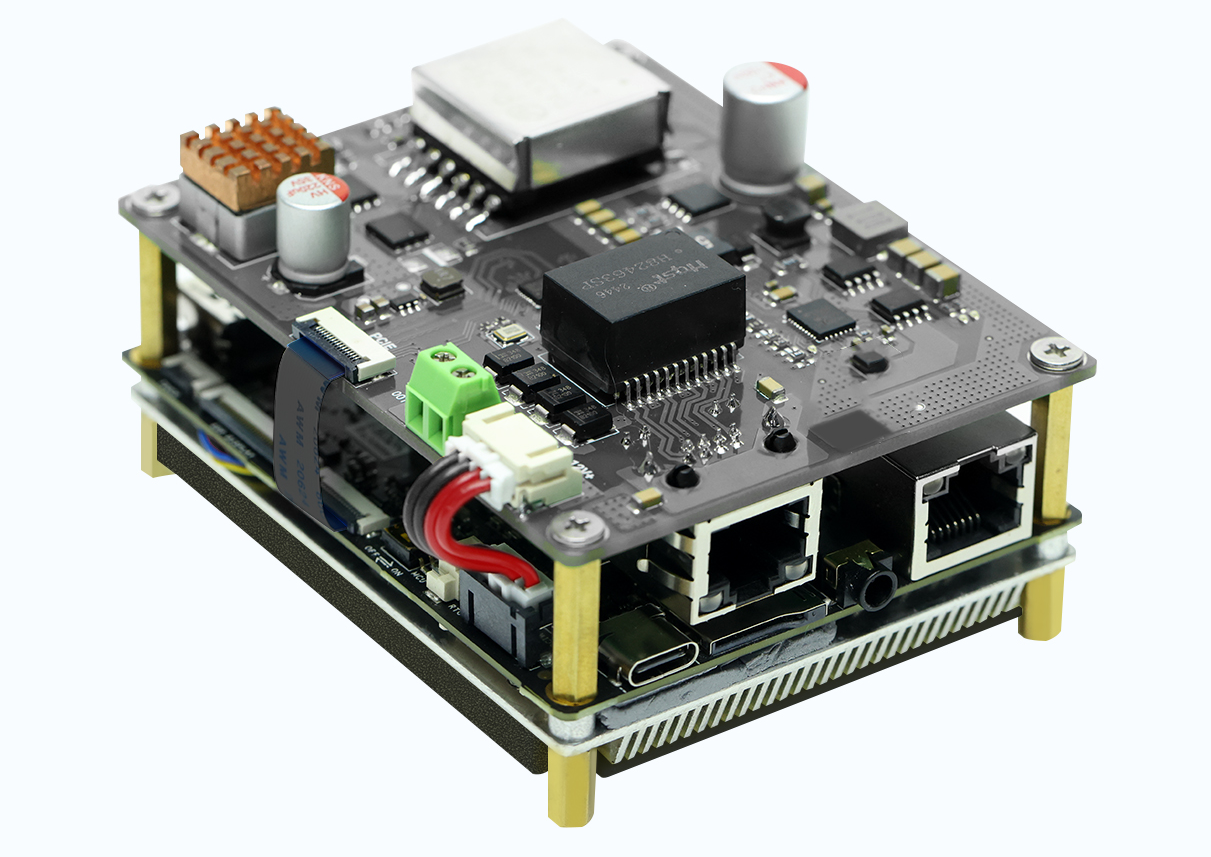
- 1x 51W PoE Expansion Board
- 1x 16-Pin FPC Cable
- 1x 4-Pin Power Cable
- 4x M3 Double-ended Hex Standoff (for side-by-side mounting)
- 4x M3 Single-ended Hex Standoff (for stacking on top)
- 4x M3 Screws
- PoE Switch/Router (must support IEEE 802.3bt standard, not included)
- Gigabit Ethernet Cable (not included)
⚙️ Hardware Installation Steps
⚠️ Always disconnect all power from the LattePanda Iota before starting!
1. Power Off
Disconnect all power from LattePanda Iota.
2. Install Hex Standoff
- Remove the four M3 screws securing the heatsink/fan on the LattePanda Iota.
- Install four M3 single-ended hex standoffs in their place.
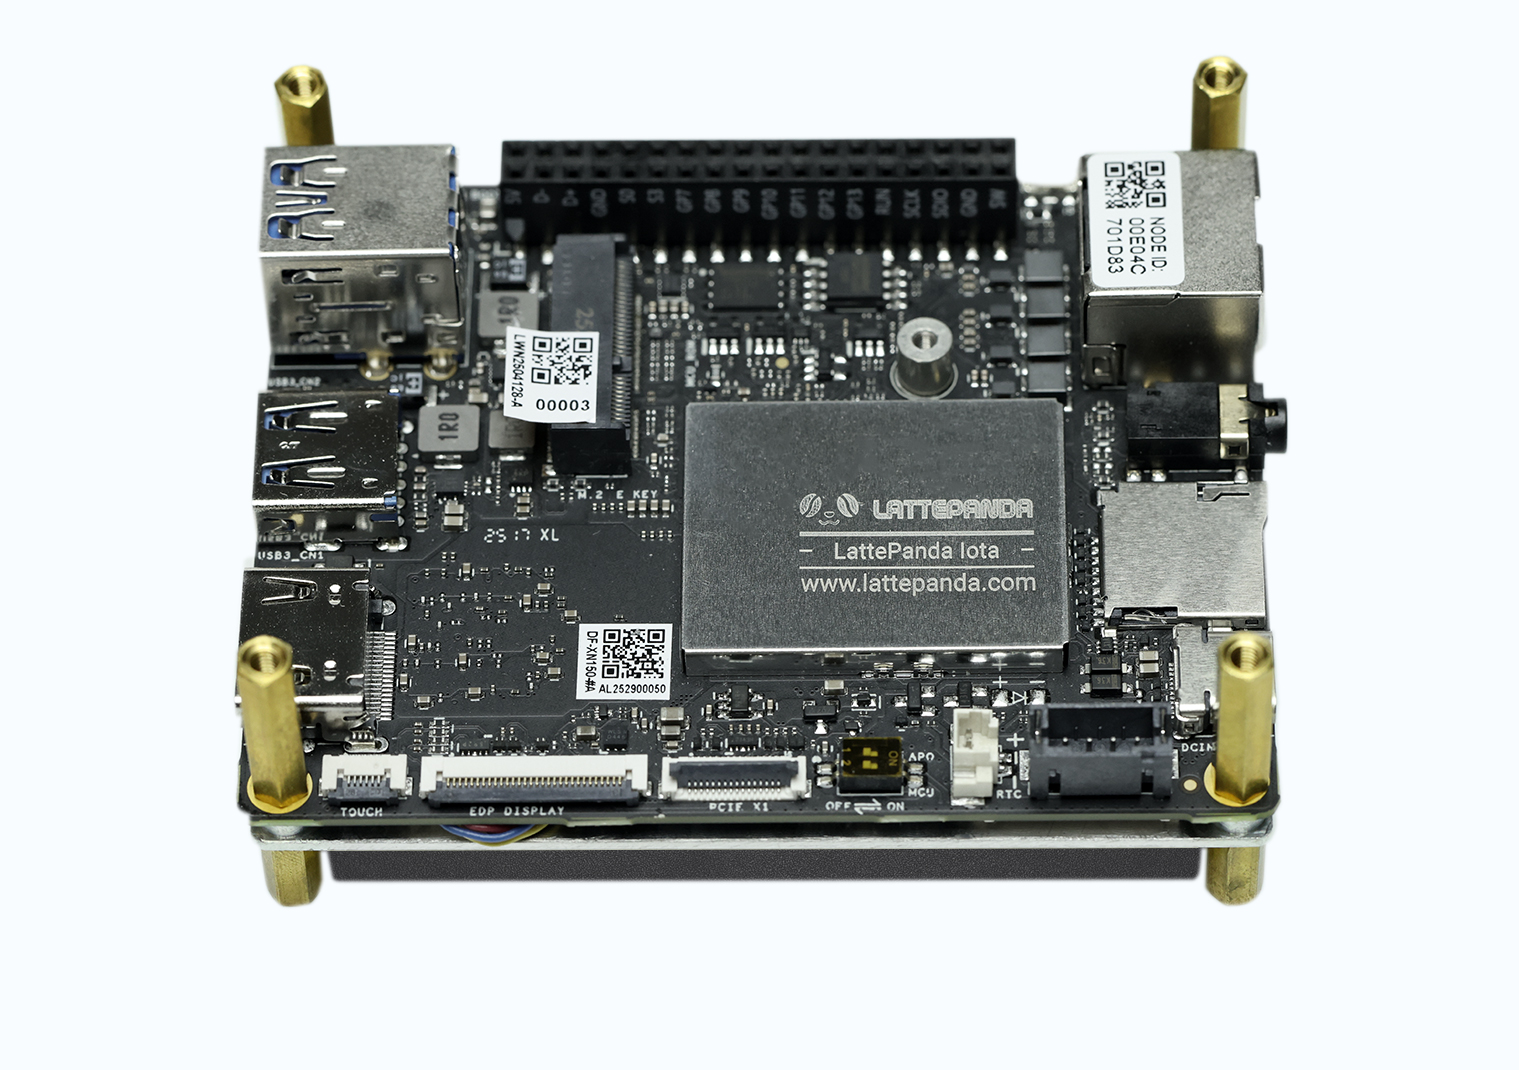
For side-by-side mounting, use M3 Double-ended Hex Standoff instead.
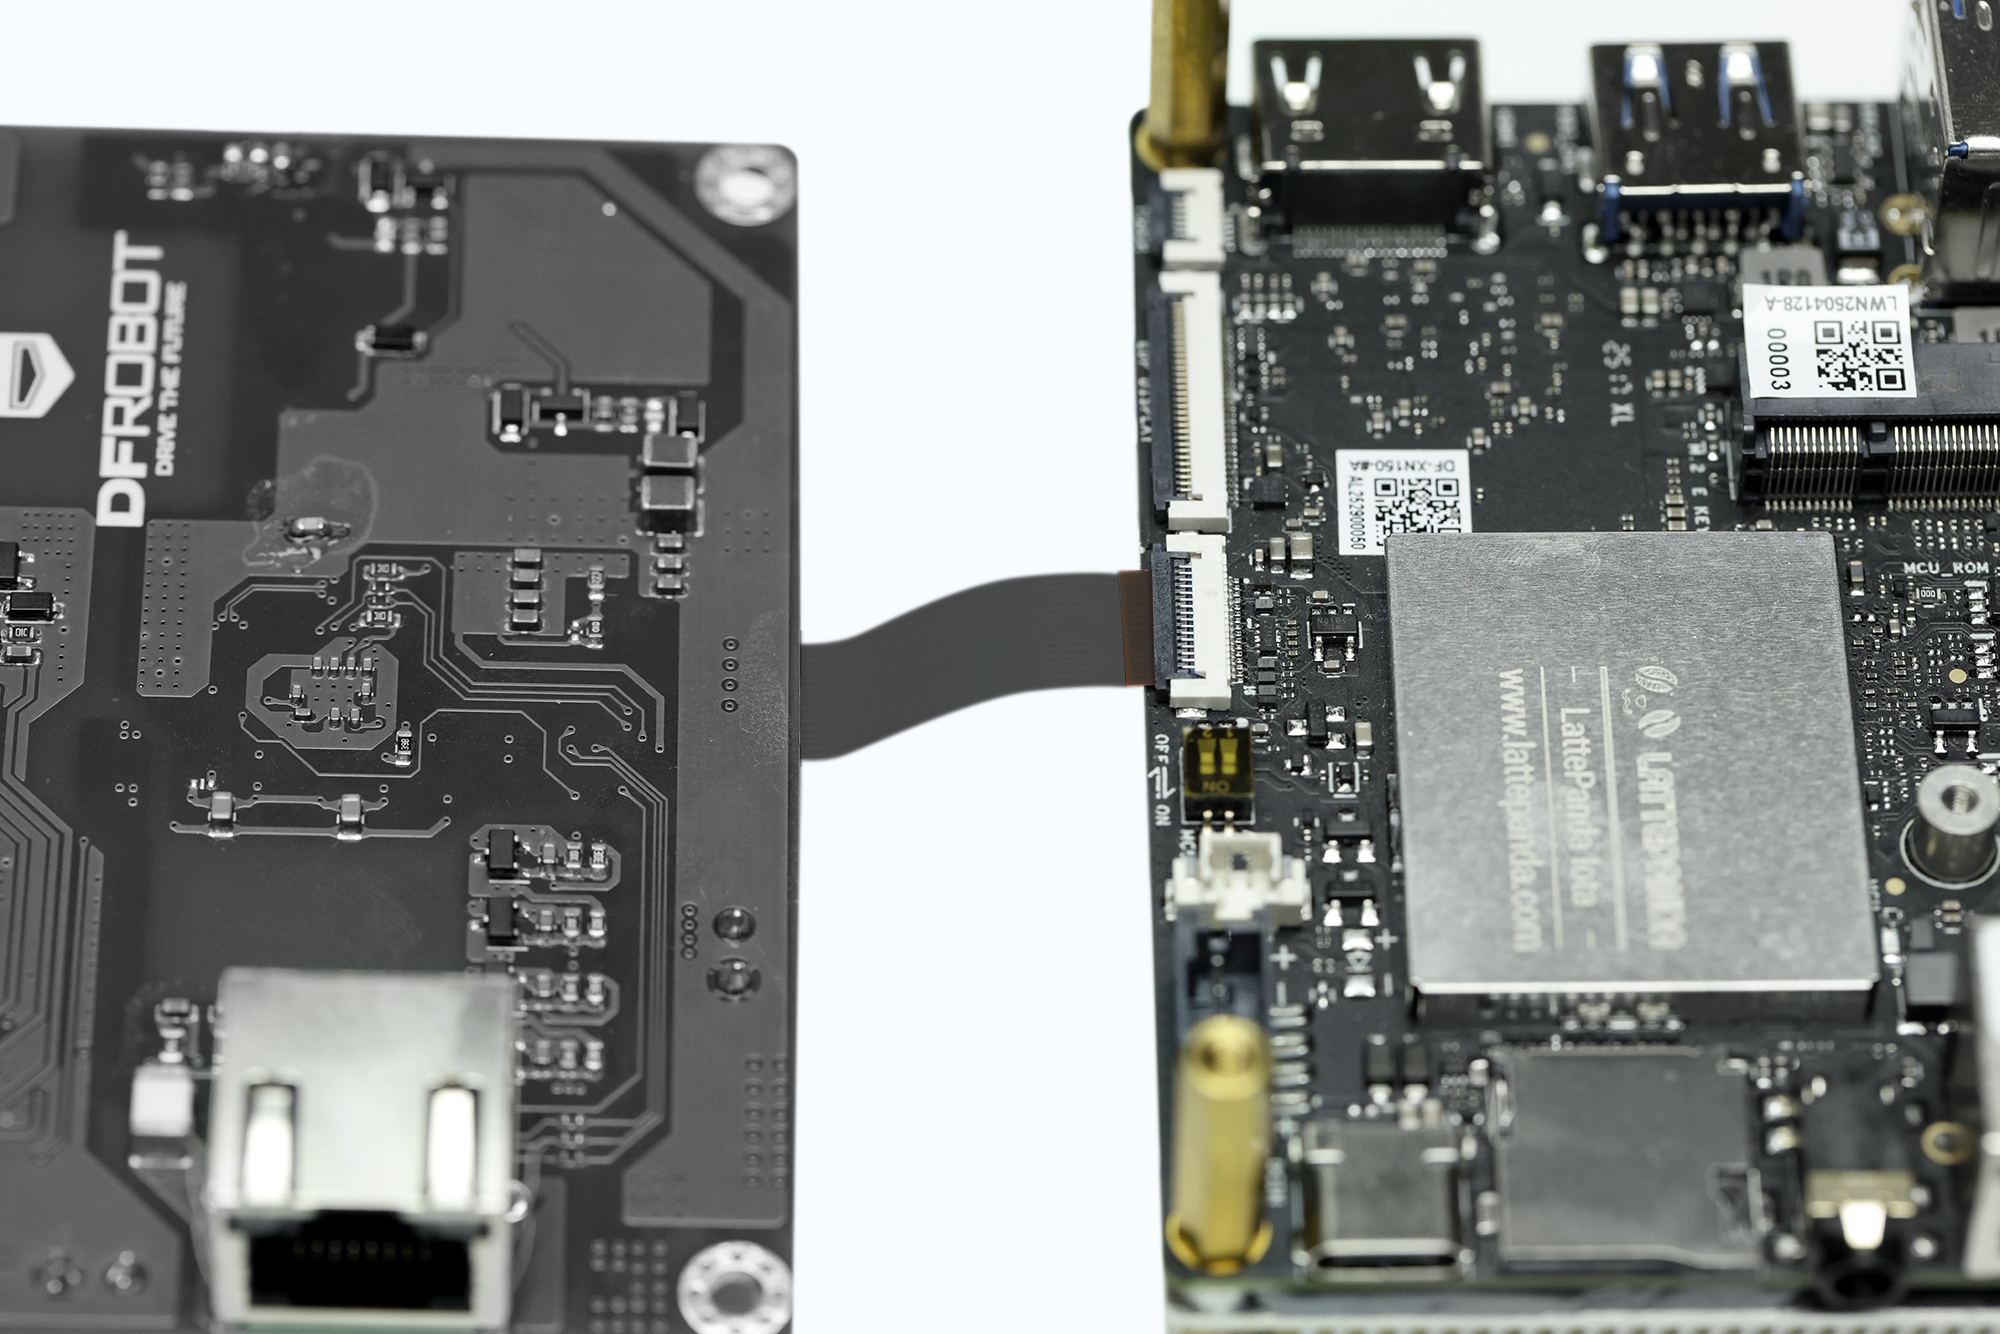
3. Connect FPC Cable
- Insert FPC cable end into LattePanda's 16-pin FPC connector(Gold contacts FACING DOWN)
- Lock connector latch firmly
- Repeat the above steps, insert the other end of the FPC cable into the expansion board's 16-pin FPC connector(Gold contacts FACING DOWN)
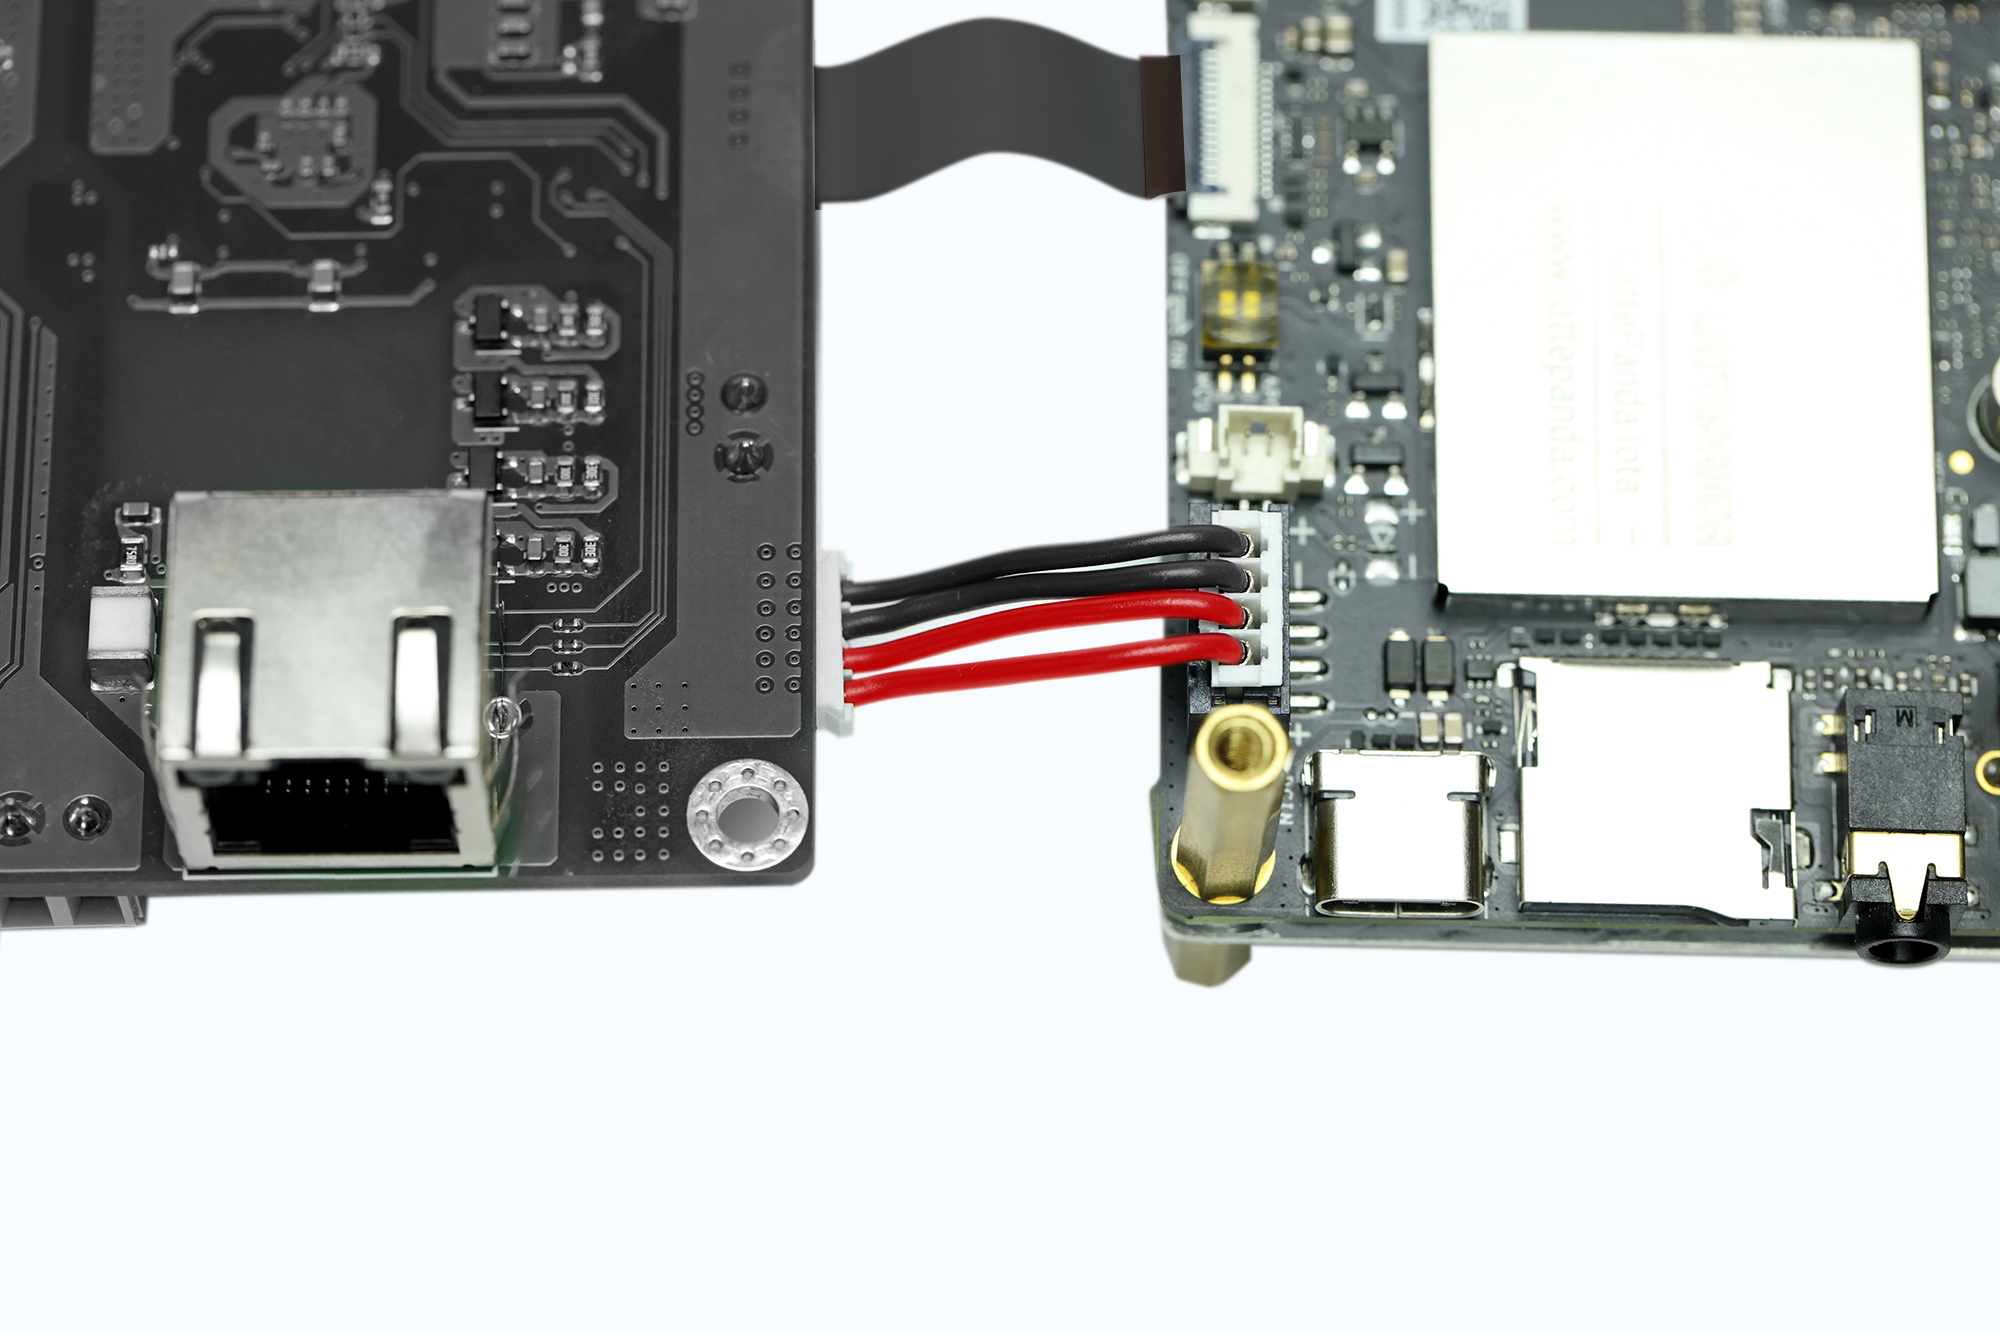
4. Connect 4-pin Power Cable
- Use the 4-pin power cable to connect the expansion board's 4-pin power output to the LattePanda's PH2.0 4-pin power port.
- Check the silkscreen markings at the connector to ensure correct polarity.
5. Mount the Expansion Board
- Align the expansion board (RJ45 port facing down) with the standoffs, ensuring the Ethernet port positions above the TF card slot.
- Secure the board using 4 M3 screws.
6. Final Check
- Confirm all screws are tightened.
- Ensure the FPC cable is fully latched and secure.
- Double-check power cable polarity.
- Connect PoE power and verify the PWR LED lights up, indicating normal power delivery.
Driver Installation
1. Automatic Detection
- Most operating systems (e.g., Windows, Linux) will automatically detect the new RTL8111H network adapter.
- If the system shows an "Unknown Device", please visit Realtek's official website to manually install the driver.
2. Network Connection Verification
After successful installation:
- A new wired network adapter should appear in Device Manager.
- Two wired connections should be visible in the system’s network settings (original port + expansion port).
- When connected to a live PoE switch, the LattePanda will automatically establish a network connection.
Was this article helpful?