Getting Started
Last revision 2025/12/29
This guide offers a detailed step-by-step process for installing a 4G LTE module on the LattePanda Iota, covering driver installation, hardware setup, SIM card insertion, and network configuration to ensure optimal device compatibility and performance.
Required Components (Not Included)
Before using this expansion board, ensure you have the following:
| Component | Requirement |
|---|---|
| M.2 4G LTE Module | Must meet all hardware specifications below |
| Nano-SIM Card | Standard Nano size, inserted with contacts down |
| Antenna(s) | At least one main antenna; GPS/diversity antennas may be required depending on module |
M.2 4G LTE Module Requirements
A. Mandatory Hardware Specifications:
| Feature | Requirement |
|---|---|
| Interface | M.2 B-Key |
| Protocol | USB 2.0 |
| Form Factor | 3042 (30.0mm × 42.0mm) |
B. Verified & Tested Modules:
| Module Model | Manufacturer |
|---|---|
| Quectel EM05-CE | Quectel |
| Simcom SIM7600H-G-M2 | Simcom |
We recommend using one of the above tested modules for optimal compatibility and stability.
✅ Compatibility
- Officially Supported Device:
- ✔️ LattePanda Iota
- Not Compatible With:
- ❌ Any other board (including other LattePanda models)
Installation Guide
Required Items:
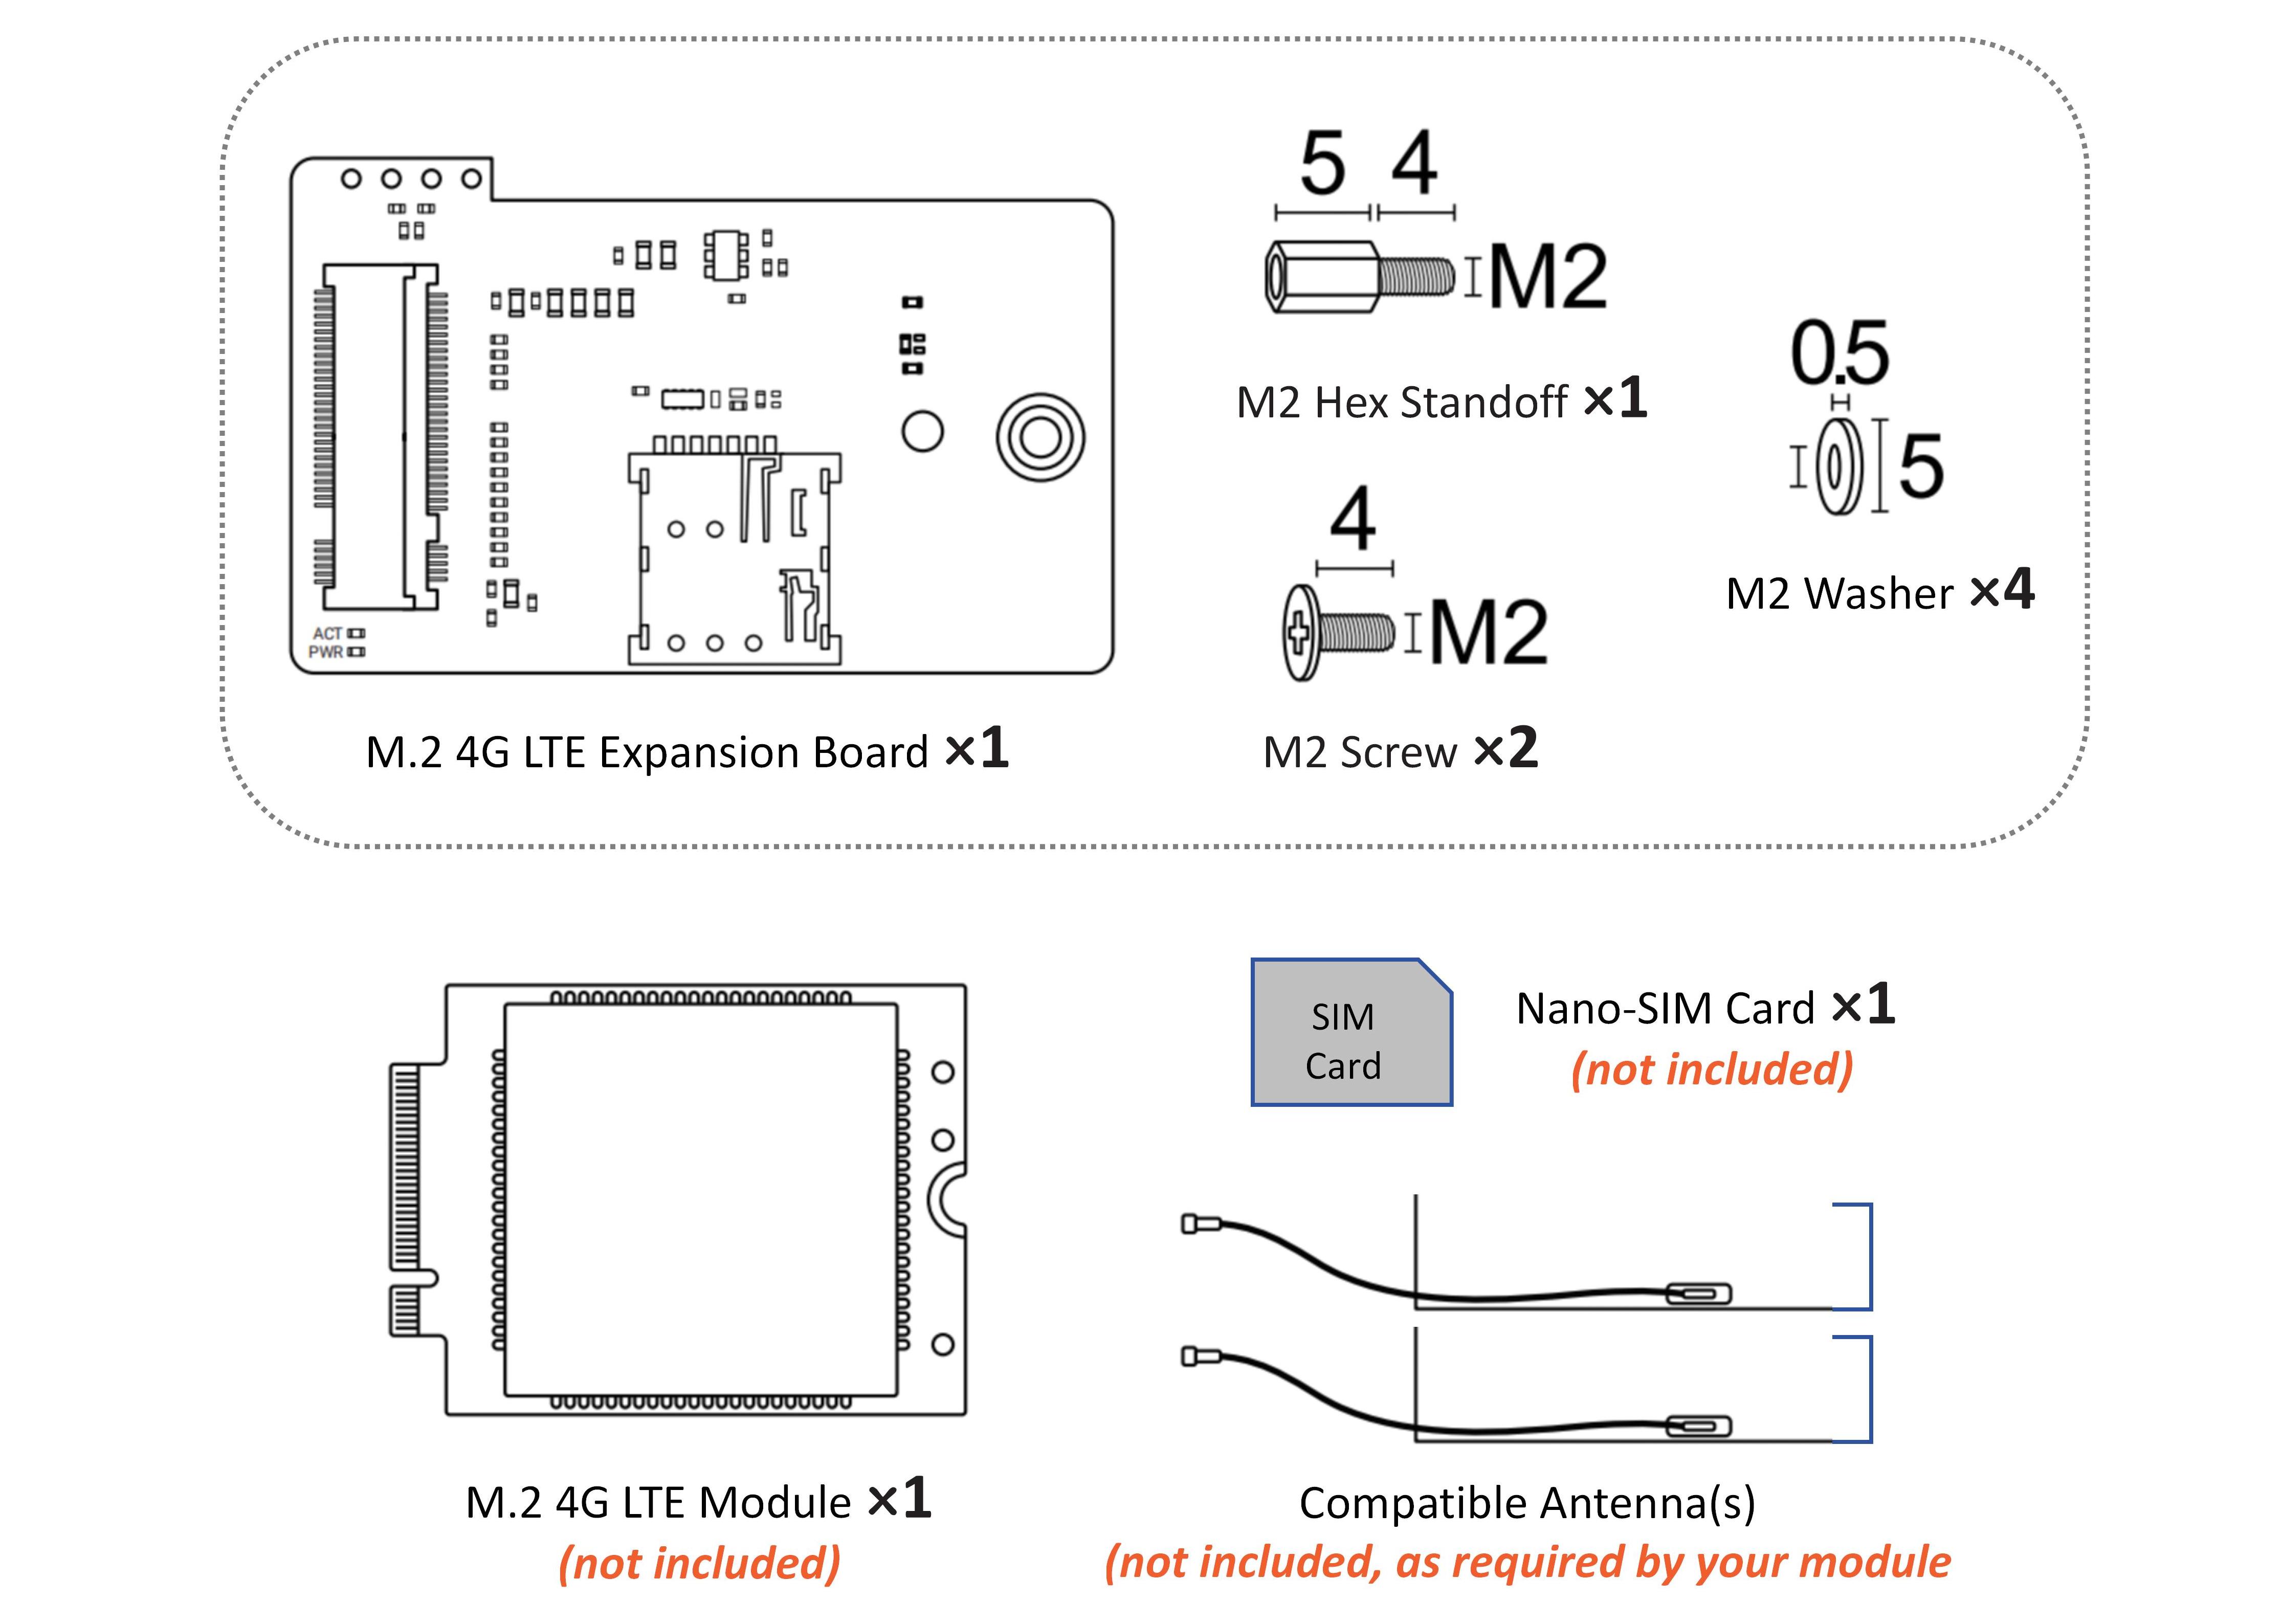
- M.2 4G LTE Expansion Board ×1
- M2 Hex Standoff ×1
- M2 Screw ×2
- M2 Washer ×4
- M.2 4G LTE Module ×1 (not included)
- Nano-SIM Card ×1 (not included)
- Compatible Antenna(s) (not included, as required by your module)
Hardware Installation Steps
⚠️ Always disconnect power from the LattePanda Iota before installation!
1. Power Off
Shut down and disconnect all power sources from the LattePanda Iota.
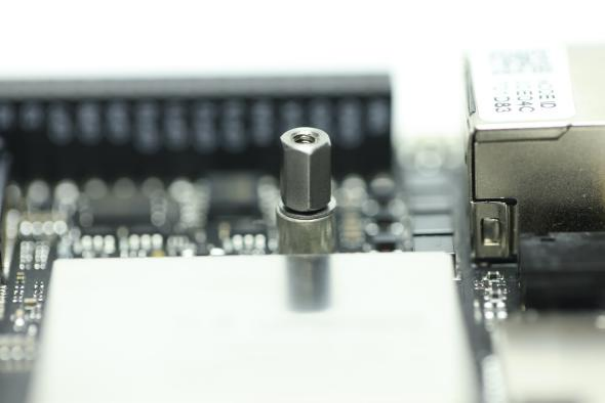
2. Install the M2 Hex Standoff
Choose the correct method based on whether you have a Wi-Fi module installed.
a) With Wi-Fi Module Installed:
- Remove the existing M2 screw from the M.2 E-Key standoff.
- Slide one M2 washer over the half-hole on the Wi-Fi module side.
- Install the M2 hex standoff and secure with a screw.
b) Without Wi-Fi Module:
- Stack three M2 washers onto the M.2 E-Key standoff.
- Place the hex standoff over the washers to ensure the expansion board mounts flush.
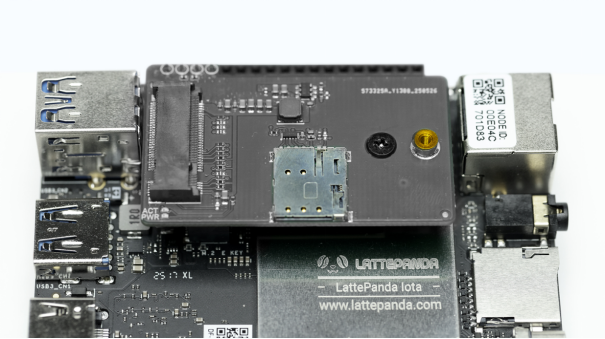
3. Connect the Expansion Board
- Align the 4-pin header on the expansion board with the USB 2.0 header on the LattePanda Iota.
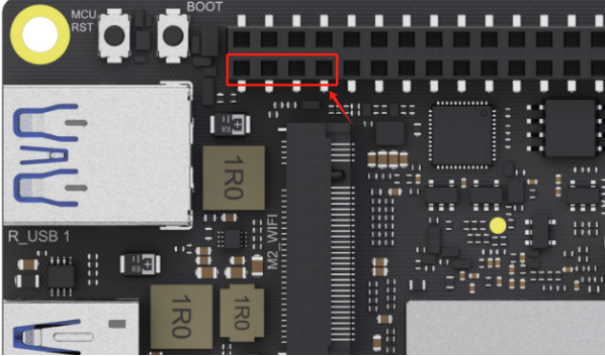
- Press down firmly until fully seated and securely connected.
4. Secure the Board
- Align the mounting hole on the expansion board with the installed hex standoff.
- Fasten using one M2 screw.
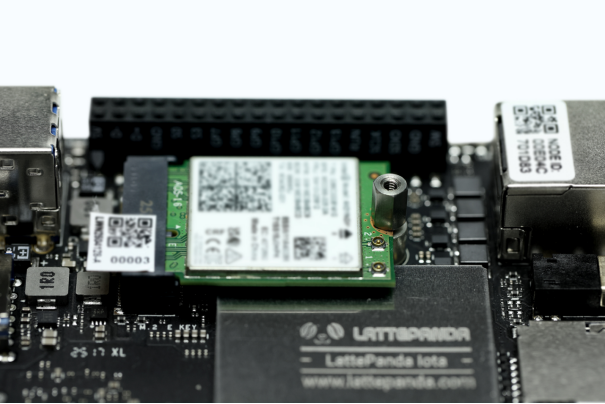
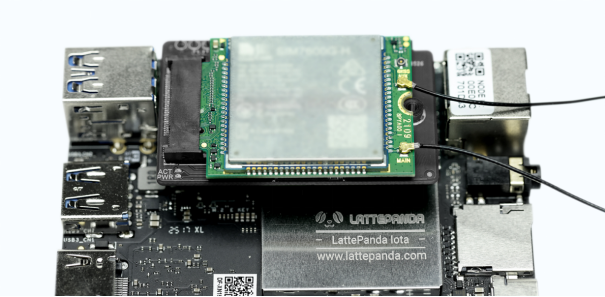
5. Install the 4G LTE Module
- Attach the required antenna(s) to the 4G module (check labels for MAIN, GPS, etc.).
- Insert the module into the M.2 B-Key slot on the expansion board.
- Press down firmly and secure with the provided M2 screw.
6. Insert the Nano-SIM Card
- Correct Orientation:
- ✅ Metal contacts facing DOWN
- ✅ Notch (chamfered corner) facing INWARD (toward the center of the board)
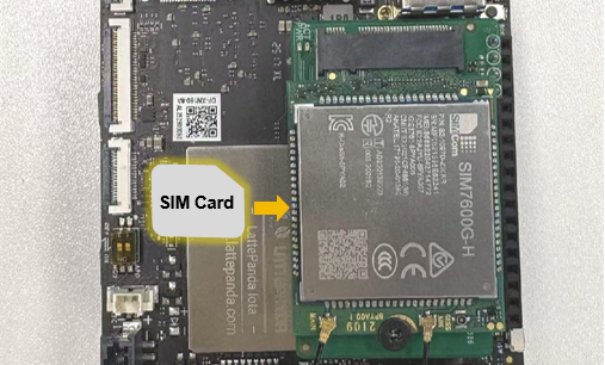
⚠️ Important: Always power off before inserting or removing the SIM card. Some 4G modules do not support hot-swapping and may fail to detect the SIM.
7. Final Check
- Double-check all connections (power, antennas, SIM, screws).
- Reconnect power to the LattePanda Iota.
- Confirm the PWR LED on the board illuminates, indicating normal power supply.
Driver Installation & Network Setup
1. Install Drivers
- After booting the system, the 4G module may appear as an "Unknown Device" in Device Manager.
- Download the official driver from your 4G module manufacturer’s website.
- Follow the included instructions to install the driver.
2. Verify Connection
After successful installation:
- The module should be recognized in Device Manager (e.g., as "Quectel USB AT Port" or "Simcom Serial Port").
- "Cellular" or "Mobile Network" options should appear in system network settings.
- You can now configure an APN and connect to your mobile network.
3. (Optional) AT Command Configuration
Some modules require AT commands for initialization or APN setup.
Refer to your module’s AT Command Manual for full command reference.
Was this article helpful?