Example Code for Arduino-Read O2 Concentration
Last revision 2025/12/17
Download the program to Arduino UNO and open the serial monitor to check the O2 concentration.
Hardware Preparation
- DFRduino UNO R3 (or similar) x 1
- Gravity: I2C Oxygen / O2 Sensor x 1
Software Preparation
- Arduino IDE
- Download and install the DFRobot_OxygenSensor Library. (About how to install the library?)
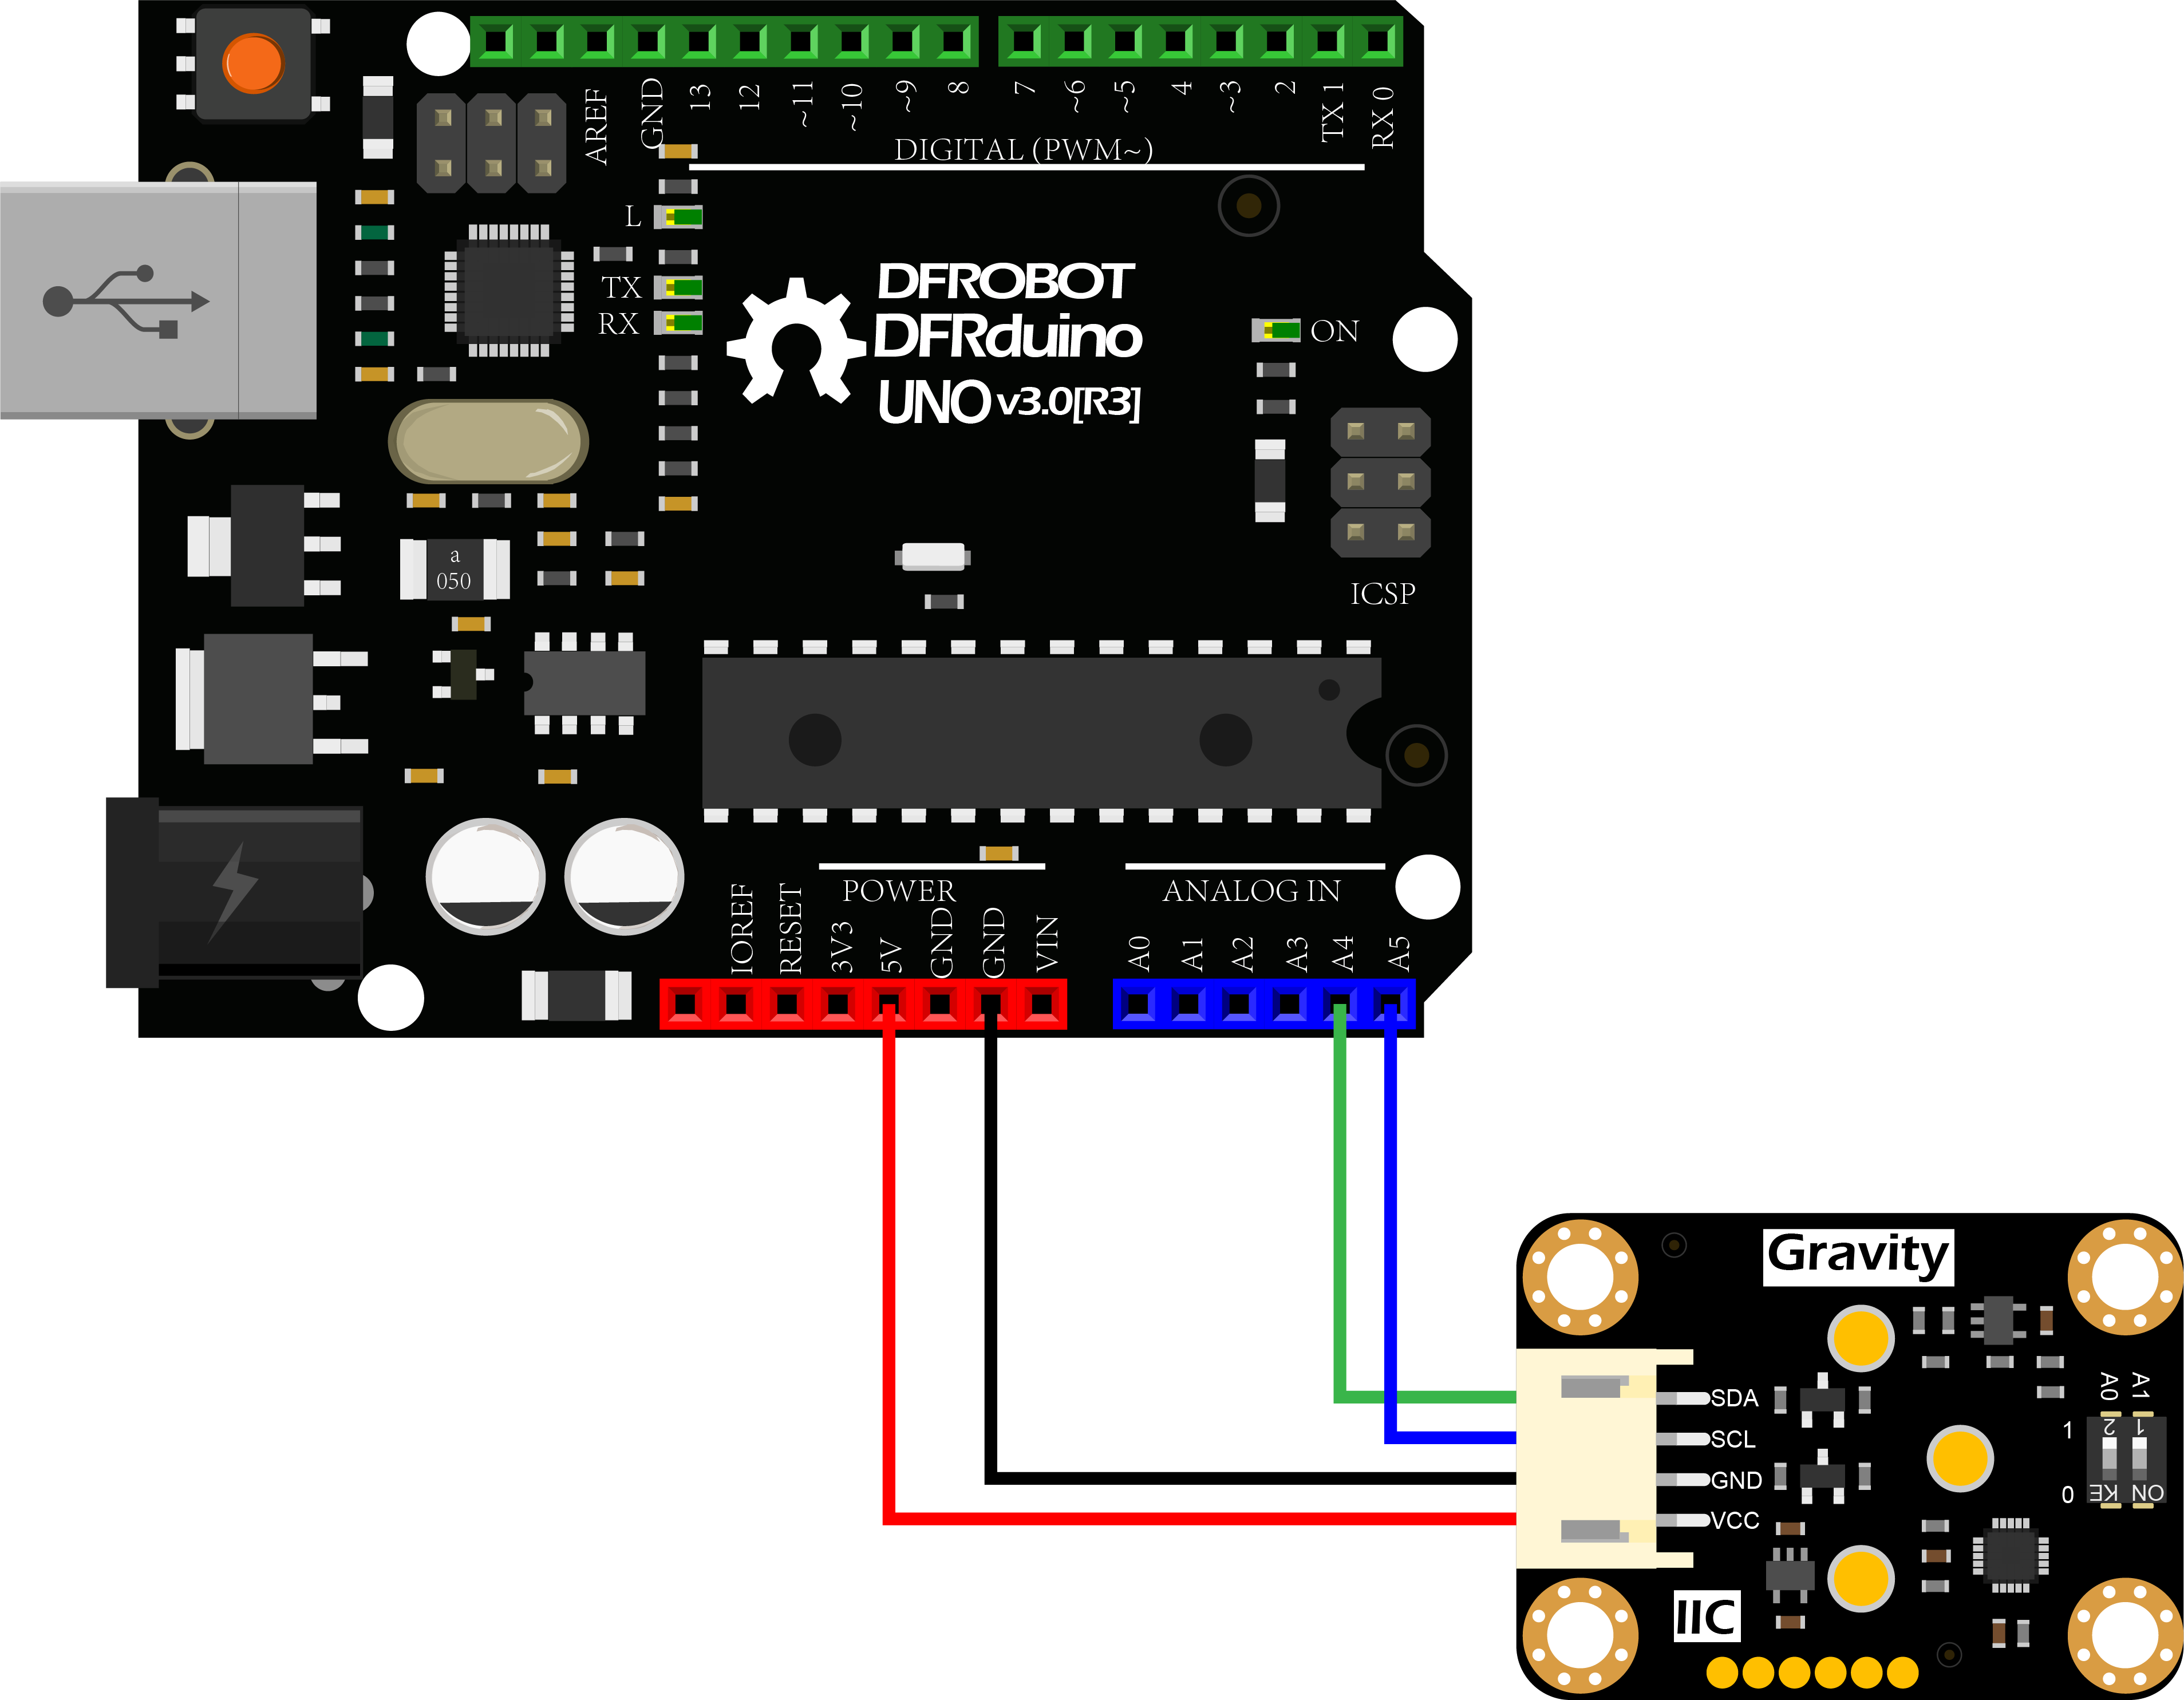
Wiring Diagram
Other Preparation Work
1.According to the connection diagram to connect the module to Arduino UNO. In default, the I2C address is 0x73 which corresponds to the ADDRESS_3 in the code. If you want to modify the I2C address, please configure the hardware I2C address by the dial switch and modify the IIC address part: ADDRESS_X in the sample code.
The relationship between the dial switch and I2C address is shown as below:
- ADDRESS_0:0x70, A0=0, A1=0(V1.0 is not available, upgrade to V1.1 on 2021/12/13)
- ADDRESS_1:0x71, A0=1, A1=0(V1.0 is not available, upgrade to V1.1 on 2021/12/13)
- ADDRESS_2:0x72, A0=0, A1=1
- ADDRESS_3:0x73, A0=1, A1=1
2.Download and install the DFRobot_OxygenSensor Library. (About how to install the library?)
3.Open Arduino IDE and upload the code below to Arduino UNO.
4.Open the Arduino IDE's serial monitor, adjust the baud rate to 9600, and observe the serial print results.
Sample Code
/*!
 * @file getOxygenData.ino
 * @brief Read oxygen concentration ,The unit is concentration percent (% vol).
 * @n step: we must first determine the iic device address, will dial the code switch A0, A1 (ADDRESS_0 for [0 0]), (ADDRESS_1 for [1 0]), (ADDRESS_2 for [0 1]), (ADDRESS_3 for [1 1]).
 * @n Then calibrate the oxygen sensor
 * @n note: it takes time to stable oxygen concentration, about 10 minutes.
 * @n The experimental phenomenon is that a certain percentage of oxygen concentration is printed on the serial port.
 * @n Because the oxygen concentration in oxygen air is certain, the data will not be greater than 25% vol.
 * @copyright Copyright (c) 2010 DFRobot Co.Ltd (http://www.dfrobot.com)
 * @license The MIT License (MIT)
 * @author ZhixinLiu([email protected])
 * @version V1.0
 * @date 2021-10-22
 * @url https://github.com/DFRobot/DFRobot_OxygenSensor
 */
#include "DFRobot_OxygenSensor.h"

/**
 * i2c slave Address, The default is ADDRESS_3.
 * ADDRESS_0   0x70  i2c device address.
 * ADDRESS_1   0x71
 * ADDRESS_2   0x72
 * ADDRESS_3   0x73
 */
#define Oxygen_IICAddress ADDRESS_3
#define COLLECT_NUMBER  10             // collect number, the collection range is 1-100.
DFRobot_OxygenSensor oxygen;

void setup(void)
{
  Serial.begin(9600);
  while(!oxygen.begin(Oxygen_IICAddress)){
    Serial.println("I2c device number error !");
    delay(1000);
  }
  Serial.println("I2c connect success !");
}

void loop(void)
{
  float oxygenData = oxygen.getOxygenData(COLLECT_NUMBER);
  Serial.print(" oxygen concentration is ");
  Serial.print(oxygenData);
  Serial.println(" %vol");
  delay(1000);
}
Result
Turn on the serial monitor and heat it up for about 3 minutes to get the final data. (Test environment: closed environment with ozone generator)

Additional Information
The oxygen / O2 sensor can be calibrated using the characteristic that the oxygen content in the atmosphere is 20.9%.
**Calibration Method:**Place the oxygen / O2 sensor in the outdoor environment, after the sensor data is stable, long press the calibration button on the sensor for 2 seconds, the sensor will be calibrated.

Was this article helpful?