Example Code for Arduino-Acquire data in initiative mode
Last revision 2026/01/21
In this routine, the sensor will actively return data once a second, and the controller will receive and parse the data. Users will learn how to configure the sensor for initiative mode and read data automatically.
Hardware Preparation
- DFRuino UNO R3 x1
- DFR0784 Smart Gas Sensor Terminal x1
- Gas probe x1
- Jumper wires
Software Preparation
- Arduino IDE
- Download and install the DFRobot_GasSensor Library. (About how to install the library?)
The initial power-on requires more than 5 minutes of preheating. It is recommended to preheat more than 24 hours if it has not been used for a long time.
After switching the communication mode or changing the I2C address, the system needs to be powered off and on again.
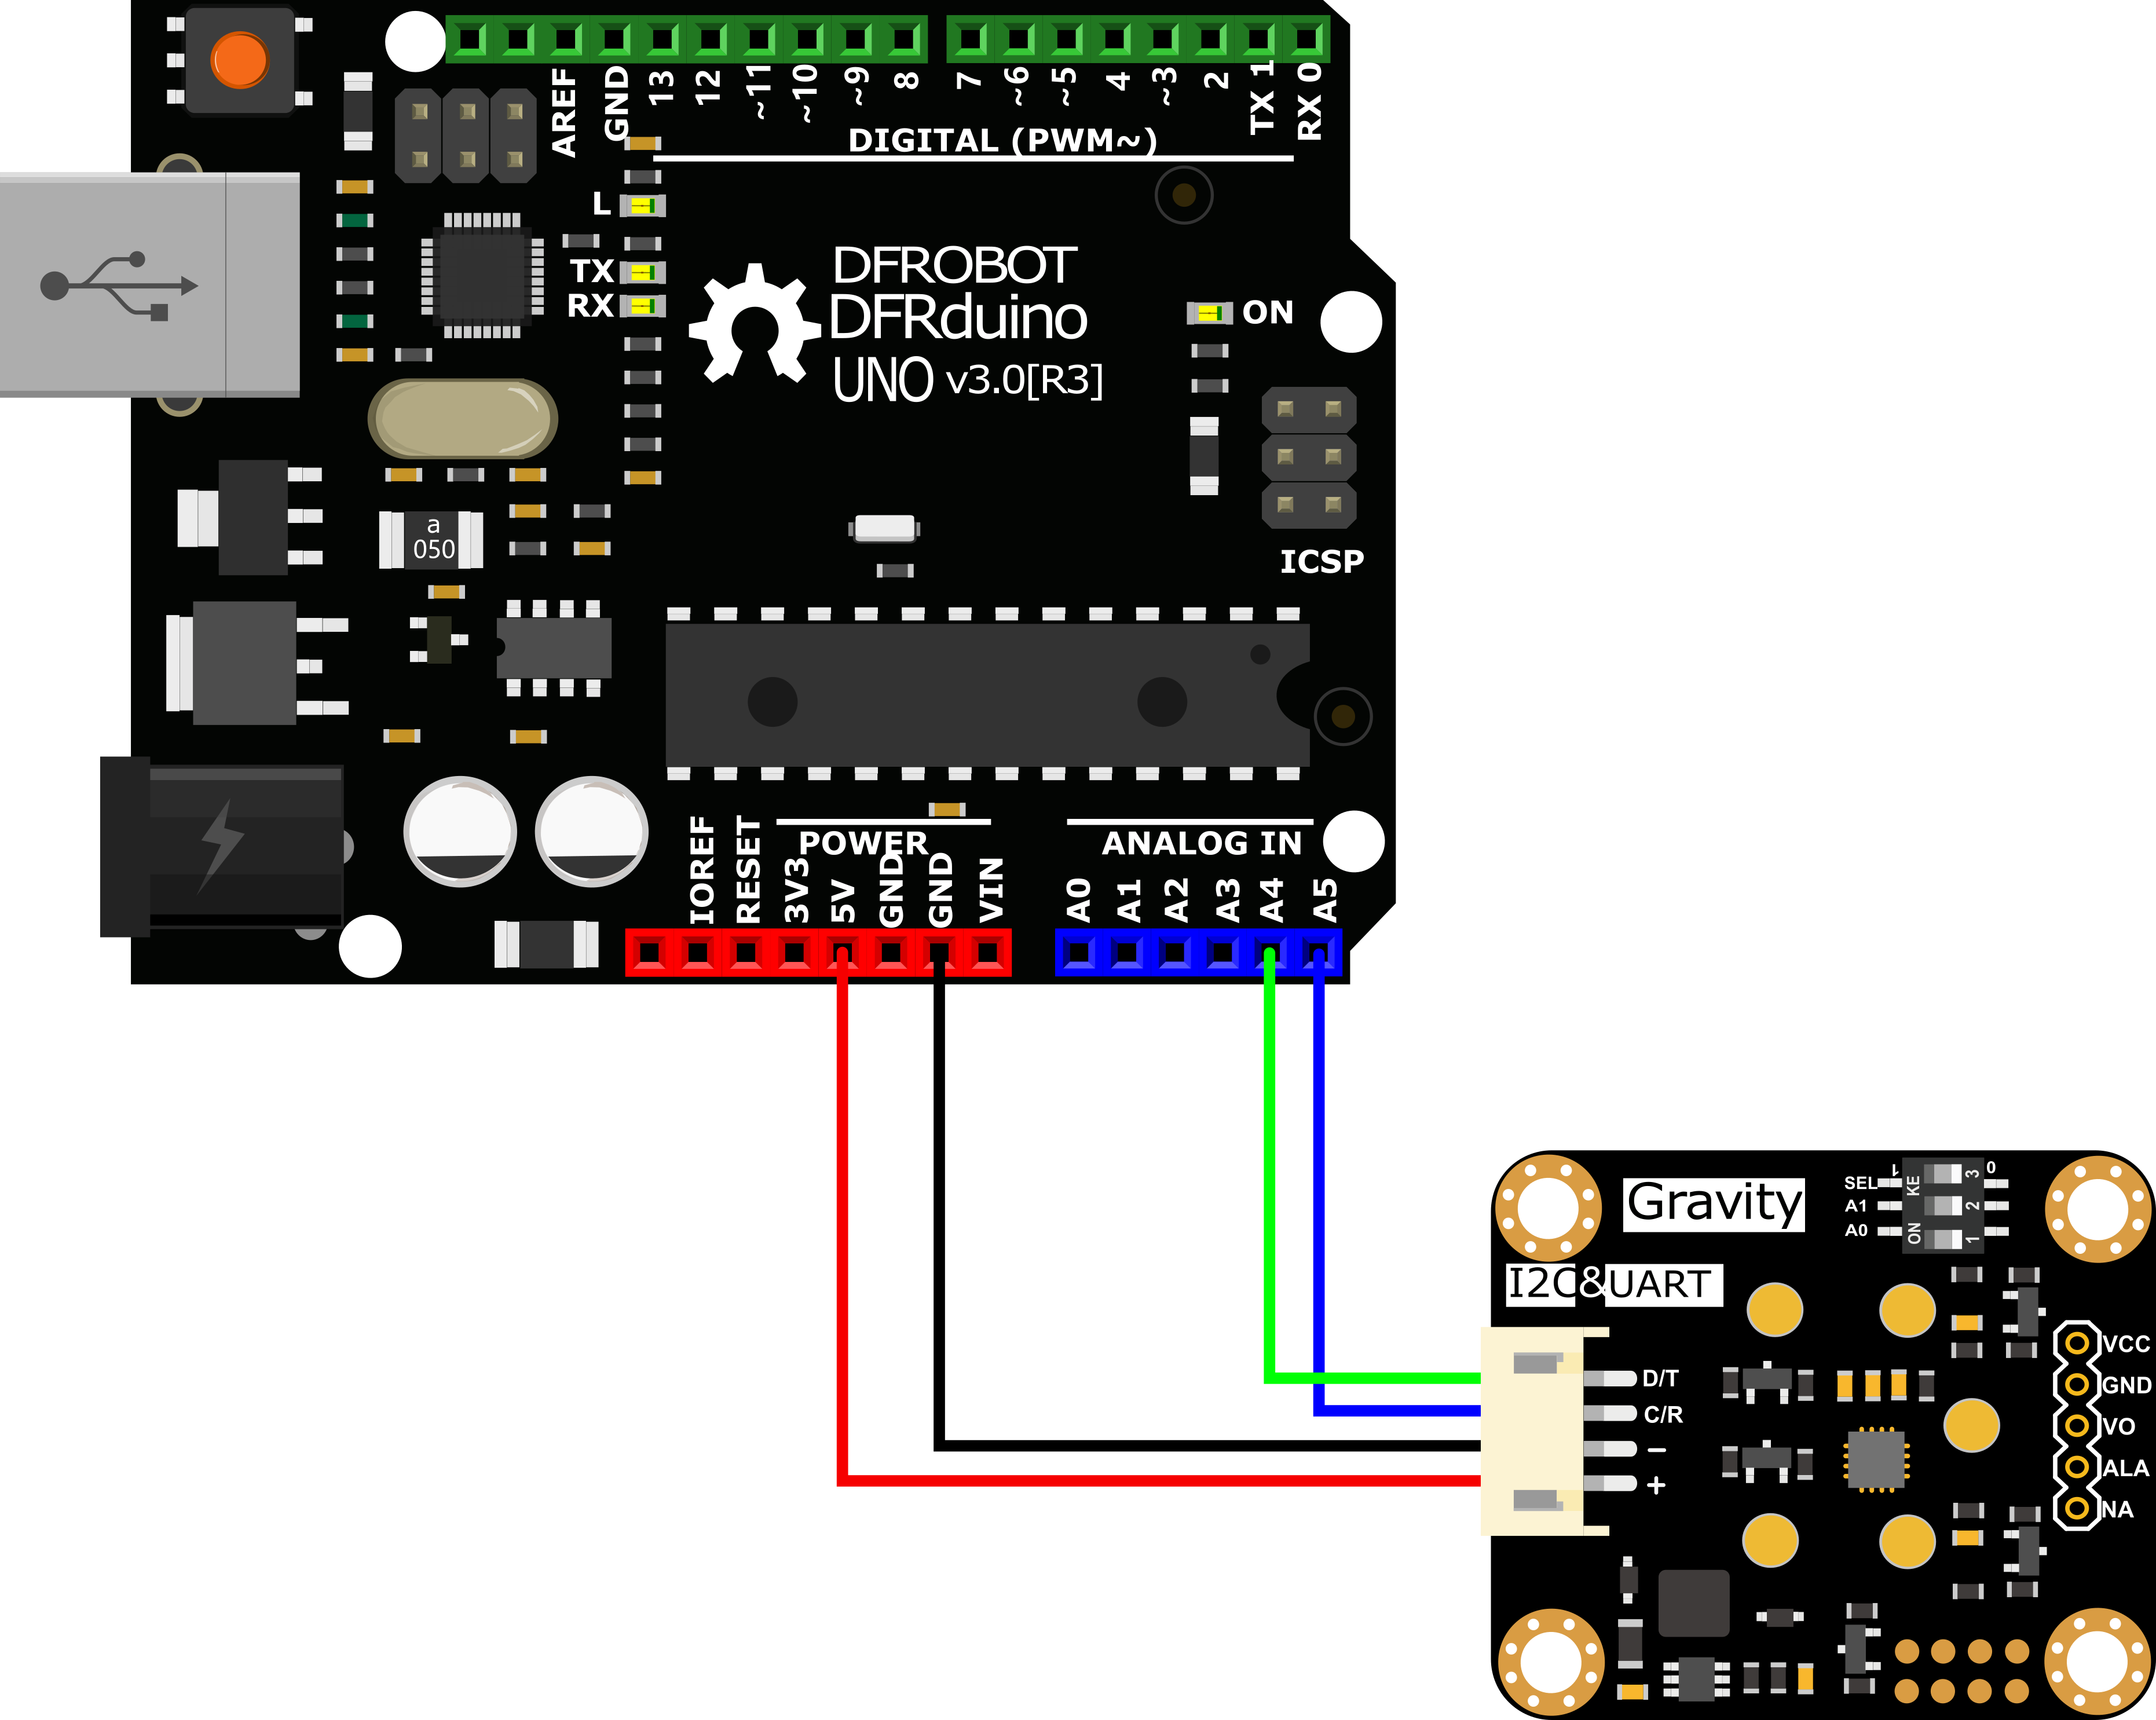
Wiring Diagram
Other Preparation Work
-
Connect the module to the Arduino according to the connection diagram above. Of course, you can also use it with Gravity I/O Expansion Board to build the project prototype more conveniently and quickly.
-
Set the DIP switch SEL on the sensor to 0, and use I2C communication by default.
-
The default I2C address is 0x74. If you need to modify the I2C address,You can configure the hardware I2C address through the DIP switch on the module, or run the code to modify the address group to modify the address. The corresponding relationship between the DIP switch and the I2C address parameter is as follows:
- ADDRESS_0: 0x74, A0=0, A1=0
- ADDRESS_1: 0x75, A0=0, A1=1
- ADDRESS_2: 0x76, A0=1, A1=0
- ADDRESS_3: 0x77, A0=1, A1=1
-
Download and install the DFRobot_GasSensor Library. (About how to install the library?)
-
Open Arduino IDE and upload the following code to Arduino UNO.
-
Open the serial port monitor of Arduino IDE, adjust the baud rate to 115200, and observe the serial port print result.
Statement
- In this routine, the sensor will actively return data once a second, and the controller will receive and parse the data.
-
Default use I2C communication, mask `#define I2C_COMMUNICATION in the code, and set the dip switch SEL to 1, the sensor is connected to the corresponding port defined by the controller, if use UNO, the blue line is connected to D3 and the green line is connected to D2, if use ESP32, the blue line is connected to IO17 and the green line is connected to IO16. After re-uploading the code, the whole system will be re-powered and will switch to UART communication.
-
Turn off temperature compensation by default, modify the code
gas.setTempCompensation(gas.ON);, turn on temperature compensation after re-uploading the code
Sample Code
/*!
  * @file  readGasConcentration.ino
  * @brief Obtain the corresponding gas concentration in the current environment and output the concentration value
  * @n Experiment method: Connect the sensor communication pin to the main control and burn codes into it.
  * @n Communication mode selection, dial switch SEL:0: IIC, 1: UART
    @n i2c address selection, the default i2c address is 0x74, A1 and A0 are combined into 4 types of IIC addresses
                | A1 | A0 |
                | 0  | 0  |    0x74
                | 0  | 1  |    0x75
                | 1  | 0  |    0x76
                | 1  | 1  |    0x77   default i2c address
  * @n Experimental phenomenon: You can see the corresponding gas concentration value of the environment at this time by printing on the serial port
  */
#include "DFRobot_MultiGasSensor.h"

//Enabled by default, use IIC communication at this time. Use UART communication when disabled
#define I2C_COMMUNICATION

#ifdef I2C_COMMUNICATION
#define I2C_ADDRESS 0x74
DFRobot_GAS_I2C gas(&Wire, I2C_ADDRESS);
#else
#if (!defined ARDUINO_ESP32_DEV) && (!defined __SAMD21G18A__)
/**
  UNO:pin_2-----RX
      pin_3-----TX
*/
SoftwareSerial mySerial(2, 3);
DFRobot_GAS_SoftWareUart gas(&mySerial);
#else
/**
  ESP32:IO16-----RX
        IO17-----TX
*/
DFRobot_GAS_HardWareUart gas(&Serial2); //ESP32HardwareSerial
#endif
#endif

void setup() {

  Serial.begin(115200);

  while(!gas.begin())
  {
    Serial.println("NO Deivces !");
    delay(1000);
  }

  gas.setTempCompensation(gas.OFF);

  gas.changeAcquireMode(gas.INITIATIVE);
  delay(1000);
}

void loop() {
  if(true==gas.dataIsAvailable())
  {
    Serial.println("========================");
    Serial.print("gastype:");
    Serial.println(AllDataAnalysis.gastype);
    Serial.println("------------------------");
    Serial.print("gasconcentration:");
    Serial.print(AllDataAnalysis.gasconcentration);
    if (AllDataAnalysis.gastype.equals("O2"))
      Serial.println(" %VOL");
    else
      Serial.println(" PPM");
    Serial.println("------------------------");
    Serial.print("temp:");
    Serial.print(AllDataAnalysis.temp);
    Serial.println(" ℃");
    Serial.println("========================");
  }
  delay(1000);
}
Result
Open the serial monitor (baud rate 115200) to get the gas type, concentration, and temperature.
- The initial power-on requires more than 5 minutes of preheating. It is recommended to preheat more than 24 hours if it has not been used for a long time.
- After switching the communication mode and changing the I2C address, the system needs to be powered off and on again.

Was this article helpful?