Introduction
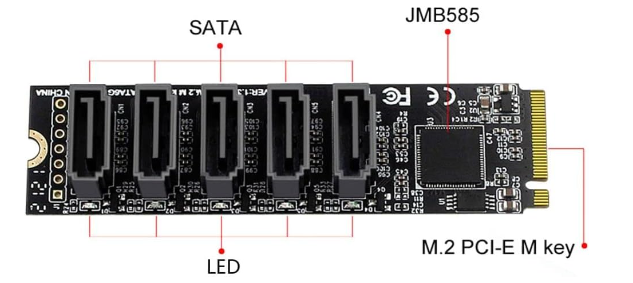
This is an M.2 M Key to SATA3.0 expansion card specially prepared for LattePanda Sigma users. It uses the latest JMB585 chip solution, no driver installation required, plug and play. It has high-speed transmission and stable performance. It has expanded 5 SATA interfaces and can be used with the sigma motherboard to connect external SATA interface hard drives to provide Sigma with more data storage space.
The expansion card is equipped with an indicator light. When the corresponding SATA device is connected, the indicator light will light up; when data is read or written, the indicator light will flash, allowing you to observe the status of the expansion card and hard disk in real time.
In order to enhance operational stability, the chip is also equipped with an aluminum alloy heat sink to provide better heat dissipation.
Features
- With 5 SATA3.0 interfaces
- With heat sink, the performance is more stable
- With indicator light to check status in real time
- Compatible with multiple systems
Specifications:
- Transmission protocol: PCIe3.0x2, supports up to two channels of PCIe
- Compatibility: Hard drives that support SATA protocol
- Speed: Uplink PCIe3.0 X2 16Gbps, Downlink SATA3.0 6Gbps*5
- Number of extensions: SATA3.0*5
- Compatible systems: Windows/Linux/Mac os
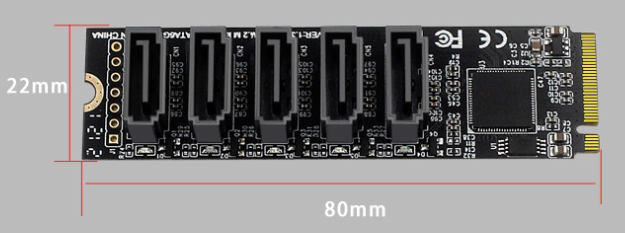
- Size: 22*80mm
Board Overview
Dimensional Drawing
Tutorial
Requirements
- Hardware
SATA interface hard disk x1~5
SATA to SATA data cable x1~5
sigma x1
Chassis power supply x1
M.2 M Key to SATA3.0 Expansion Card x1
ATX to DC5.5*2.5 Male Power Cable - 50cm x1
Connection Diagram
Note: When sigma needs to connect or unplug any powered equipment, sigma needs to be turned off and unplugged. It cannot be operated while it is powered on.
- The M.2 M Key to SATA3.0 expansion card is installed on the M.2 port of the sigma motherboard.
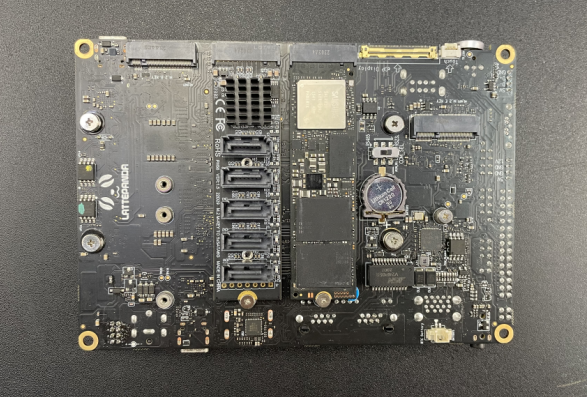
- Connect the hard drive to the M.2 M Key to SATA3.0 expansion card with a SATA to SATA data cable. You can connect 1-5 hard drives, and use the chassis power SATA-15Pin interface to power the hard drive.
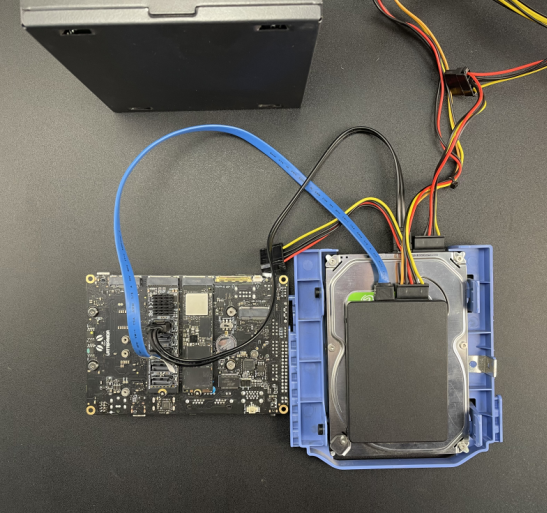
- Connect the sigma motherboard to the ATX to DC male power cable, connect the HDMI interface to the monitor, and use the ATX-24Pin interface of the chassis power supply to power the sigma motherboard.
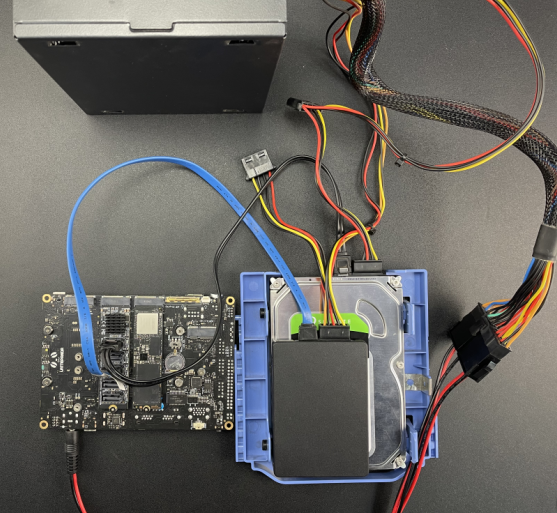
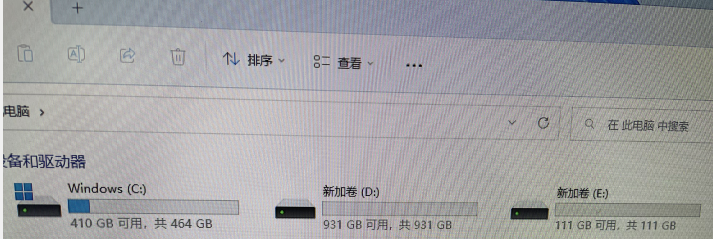
- After completing the connection of all devices, press the power button of the sigma motherboard. After booting, enter the system to check whether the hard drive is recognized normally. The corresponding indicator light of the hard drive connected to the adapter card will light up.
FAQ
For any questions, advice or cool ideas to share, please visit the DFRobot Forum.
