Example Code for Arduino-Driving an SPI Display
This project demonstrates how to connect and drive an SPI IPS display with the Romeo Mini to show text. Users can learn SPI communication, display library usage, and wiring for display modules.
Hardware Preparation
- 1.47" 172×320 IPS LCD Display Module
- Romeo Mini: x1
Software Preparation
- Arduino IDE (download link: https://www.arduino.cc/en/software)
- ESP32 board support package (version 2.0.0)
- DFRobot_GDL library (install via Arduino Library Manager or download from DFRobot's website)
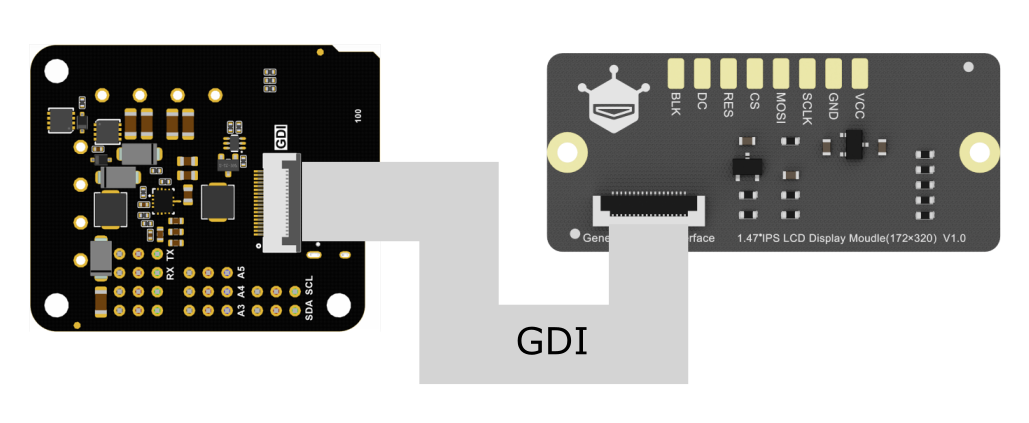
Wiring Diagram
Other Preparation Work
- Set up the Arduino IDE with ESP32 support (follow Arduino Environment Configuration)
- Install the DFRobot_GDL library for display control
- Ensure the display module is compatible (DFR0664, DFR0649, DFR0847, DFR0928, DFR0995 are supported)
- The DFR0664, DFR0649, DFR0847, DFR0928, and DFR0995 models are all compatible with the Romeo mini controller. For detailed usage instructions, please refer to the display's wiki page.
Sample Code
#include "DFRobot_GDL.h"
#define TFT_DC 8
#define TFT_CS 7
#define TFT_RST 9

DFRobot_ST7789_172x320_HW_SPI screen(/dc=/TFT_DC,/cs=/TFT_CS,/rst=/TFT_RST);
/* M0 mainboard DMA transfer */
//DFRobot_ST7789_172x320_DMA_SPI screen(/dc=/TFT_DC,/cs=/TFT_CS,/rst=/TFT_RST);

void setup() {
screen.begin();
screen.setTextSize(2);
screen.fillScreen(COLOR_RGB565_BLACK); // Set the background color
screen.setFont(&FreeMono24pt7b); // Set the font size (9, 12, 18, 24)
screen.setCursor(/x=/32, /y=/200); // Set the text position
screen.setTextColor(COLOR_RGB565_LIGHTGRAY); // Set the text color
screen.setTextWrap(true);
screen.print("DF"); // Display the English characters
}

void loop() {
// Empty loop as no further actions are required for this example
}
Result
Burn the sample program to display the gray English characters "DF" on the screen.

Was this article helpful?