Example Code for Arduino-Lightning Detection
Last revision 2026/01/15
This tutorial presents a basic usage of the module with Arduino UNO.
Hardware Preparation
- DFRduino UNO R3 (or similar) x 1
- DFRobot Gravity: Lightning Sensor x 1
- Gravity 4P sensor wire (or Dupont wires) x 1
Software Preparation
- Arduino IDE
- Download and install the DFRobot_AS3935 Library. (About how to install the library?)
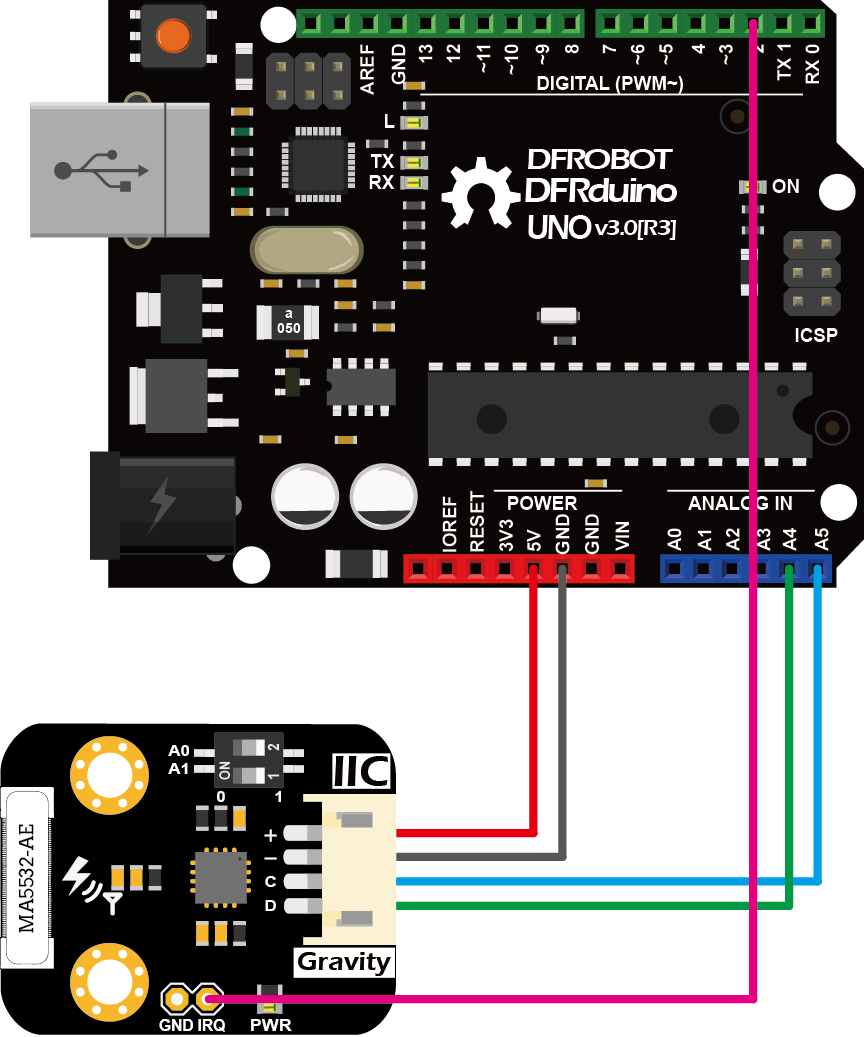
Wiring Diagram
Other Preparation Work
- Connect the module to the Arduino according to the connection diagram. The I2C address defaults to 0x03, which corresponds to “AS3935_ADD3” in the code. If you need to modify the I2C address, you can change it to 0x01 or 0x02 through the DIP switch on the module, and modify the macro definition of the I2C address in the software "#define AS3935_I2C_ADDR AS3935_ADDx", where x can be 1, 2, 3.
- Install DFRobot_AS3935 library.
- Open Arduino IDE, upload the following sample code to the Arduino UNO.
- Open the serial monitor of the Arduino IDE and set the baud rate to 115200.
Sample Code
/*!
 * @file DFRobot_AS3935_lightning_sensor_ordinary.ino
 * @brief SEN0290 Lightning Sensor
 * @n This sensor can detect lightning and display the distance and intensity of the lightning within 40 km
 * @n It can be set as indoor or outdoor mode.
 * @n The module has three I2C, these addresses are:
 * @n  AS3935_ADD1  0x01   A0 = 1  A1 = 0
 * @n  AS3935_ADD2  0x02   A0 = 0  A1 = 1
 * @n  AS3935_ADD3  0x03   A0 = 1  A1 = 1
 * @copyright   Copyright (c) 2010 DFRobot Co.Ltd (http://www.dfrobot.com)
 * @license     The MIT License (MIT)
 * @author [TangJie]([email protected])
 * @version  V1.0.2
 * @date  2019-09-28
 * @url https://github.com/DFRobor/DFRobot_AS3935
 */

#include "DFRobot_AS3935_I2C.h"

volatile int8_t AS3935IsrTrig = 0;

#if defined(ESP32) || defined(ESP8266)
#define IRQ_PIN       0
#else
#define IRQ_PIN       2
#endif

// Antenna tuning capcitance (must be integer multiple of 8, 8 - 120 pf)
#define AS3935_CAPACITANCE   96

// Indoor/outdoor mode selection
#define AS3935_INDOORS       0
#define AS3935_OUTDOORS      1
#define AS3935_MODE          AS3935_INDOORS

// Enable/disable disturber detection
#define AS3935_DIST_DIS      0
#define AS3935_DIST_EN       1
#define AS3935_DIST          AS3935_DIST_EN

// I2C address
#define AS3935_I2C_ADDR       AS3935_ADD3

void AS3935_ISR();

DFRobot_AS3935_I2C  lightning0((uint8_t)IRQ_PIN, (uint8_t)AS3935_I2C_ADDR);

void setup()
{

  Serial.begin(115200);
  Serial.println("DFRobot AS3935 lightning sensor begin!");

  while (lightning0.begin() != 0){
    Serial.print(".");
  }
  lightning0.defInit();

  #if defined(ESP32) || defined(ESP8266)
    attachInterrupt(digitalPinToInterrupt(IRQ_PIN),AS3935_ISR,RISING);
  #else
    attachInterrupt(/*Interrupt No*/0,AS3935_ISR,RISING);
  #endif

  // Configure sensor
  lightning0.manualCal(AS3935_CAPACITANCE, AS3935_MODE, AS3935_DIST);
  // Enable interrupt (connect IRQ pin IRQ_PIN: 2, default)

//  Connect the IRQ and GND pin to the oscilloscope.
//  uncomment the following sentences to fine tune the antenna for better performance.
//  This will dispaly the antenna's resonance frequency/16 on IRQ pin (The resonance frequency will be divided by 16 on this pin)
//  Tuning AS3935_CAPACITANCE to make the frequency within 500/16 kHz ± 3.5%
//  lightning0.setLcoFdiv(0);
//  lightning0.setIRQOutputSource(3);

}

void loop()
{
  // It does nothing until an interrupt is detected on the IRQ pin.
  while (AS3935IsrTrig == 0) {delay(1);}
  delay(5);

  // Reset interrupt flag
  AS3935IsrTrig = 0;

  // Get interrupt source
  uint8_t intSrc = lightning0.getInterruptSrc();
  if (intSrc == 1){
    // Get rid of non-distance data
    uint8_t lightningDistKm = lightning0.getLightningDistKm();
    Serial.println("Lightning occurs!");
    Serial.print("Distance: ");
    Serial.print(lightningDistKm);
    Serial.println(" km");

    // Get lightning energy intensity
    uint32_t lightningEnergyVal = lightning0.getStrikeEnergyRaw();
    Serial.print("Intensity: ");
    Serial.print(lightningEnergyVal);
    Serial.println("");
  }else if (intSrc == 2){
    Serial.println("Disturber discovered!");
  }else if (intSrc == 3){
    Serial.println("Noise level too high!");
  }
}
//IRQ handler for AS3935 interrupts
void AS3935_ISR()
{
  AS3935IsrTrig = 1;
}
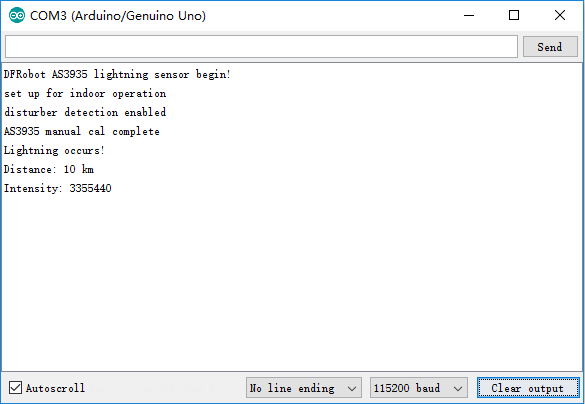
Result
- When lightning occurs, the interrupt alarm pin IRQ triggers the controller to display the lightning alarm "Lightning occurs!", and shows the estimated lightning distance and intensity.
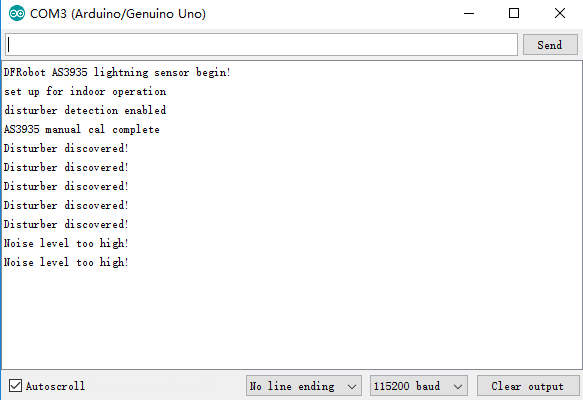
- When there is electromagnetic interference near the module, the module will issue an alarm “Disturber discovered!”. If the interference noise is too large, the module will issue the alarm “Noise level too high!” .
Was this article helpful?