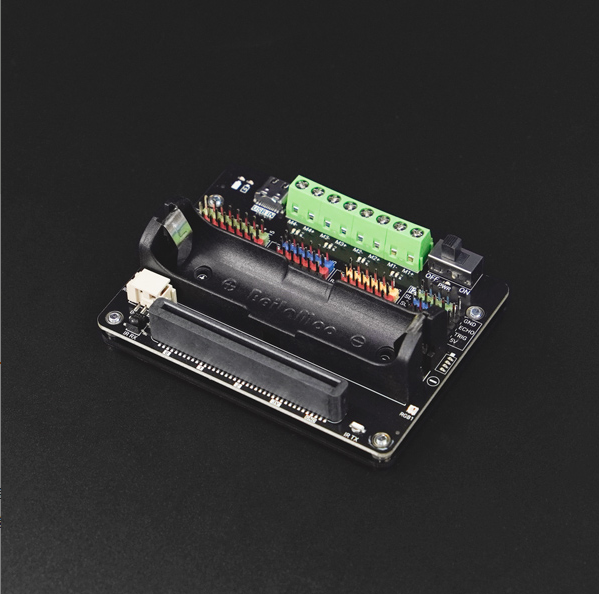
Introduction
This is a multi-functional expansion board deeply compatible with the Unihiker K10/M10. It also supports use in combination with motherboards such as microbit and control boards, solving problems such as insufficient multi-functional pins, the need for external power supply, and insufficient driving capabilities of servos/motors.
While adding a large number of multi-functional IO pins such as ADC, PWM, single bus, and ultrasonic to the board, it also retains the native gold finger interface of the motherboard and integrates on-board RGB lights and infrared transmission/reception functions. Integrating an 18650 battery socket and charging and discharging circuits, it eliminates the need for cables and external batteries. Meanwhile, it features an on-board power indicator light, ensuring safe power supply, convenient charging, and long-lasting battery life, significantly enhancing the mobility of the project. It integrates four DC motor drives. The servo interface uses an independent power supply and can simultaneously drive four motors and six servos. It provides one 5V I2C interface and can be used to drive high-power devices such as HUSKYLENS. The hole spacing of the M3 installation holes at the bottom is compatible with the size of Lego bricks, allowing for construction in combination with Lego. It integrates multiple indicator lights such as system power status, motor forward and reverse rotation status, battery power, and charging status, making it convenient to check the system's working status. All interfaces are clearly marked and distinguished by colored interfaces, making them intuitive to use.
In conjunction with DFRobot's powerful Gravity ecosystem, the Unihiker K10 can create more possibilities
Feature
- On-board 4-channel DC motor drive
- On-board 18650 rechargeable battery compartment and charging circuit, USB-C charging interface
- The on-board infrared transceiver module and RGB lights enhance the playability
- The coprocessor can be expanded with 6 GPIOs, allowing for the connection of more external sensors
- Supports 5V I2C, and the external power supply from HUSKYLENS/HUSKYLENS2 is more stable
Specifications
Digital Input/Output Numbers:8
Full function GPIO Numbers:6
Server interface numbers:6
I2C:4(Including 5V I2C * 1)
Battery Specifications:18650 rechargeable battery
Charging input:USB-C 5V
Motor interface:DC Motor * 4
On-board peripherals: RGB LED * 2;Infrared emission; Infrared receiver; TRIG/ECHO ultrasonic interface
Dimension: 65 * 88mm
Weight: 200g
Board overview

Unihiker K10 Tutorial
Hardware Prepare
- Unihiker K10 * 1
- Muti Function Expansion Board for UNIHIKER * 1
Note: The multi-functional expansion board requires separate power supply when IN use. It can be powered by installing an 18650 battery or from the USB IN of the expansion board, and the PWR power supply switch needs to be turned on.
Software Prepare
-
Use Mind+
Mind+ Download
Mind+ User Extension:
https://github.com/YeezB/ext-UnihikerExpansion -
Use Arduino IDE
Arduino IDE Download
Arduino library:
https://github.com/dfrobot/DFRobot_UnihikerExpansion
Example 1 Digital Input/Output
Extra hardware
Gravity: Digital LED Light Module * 1
Gravity: Digital Push Button * 1
Hardware connection
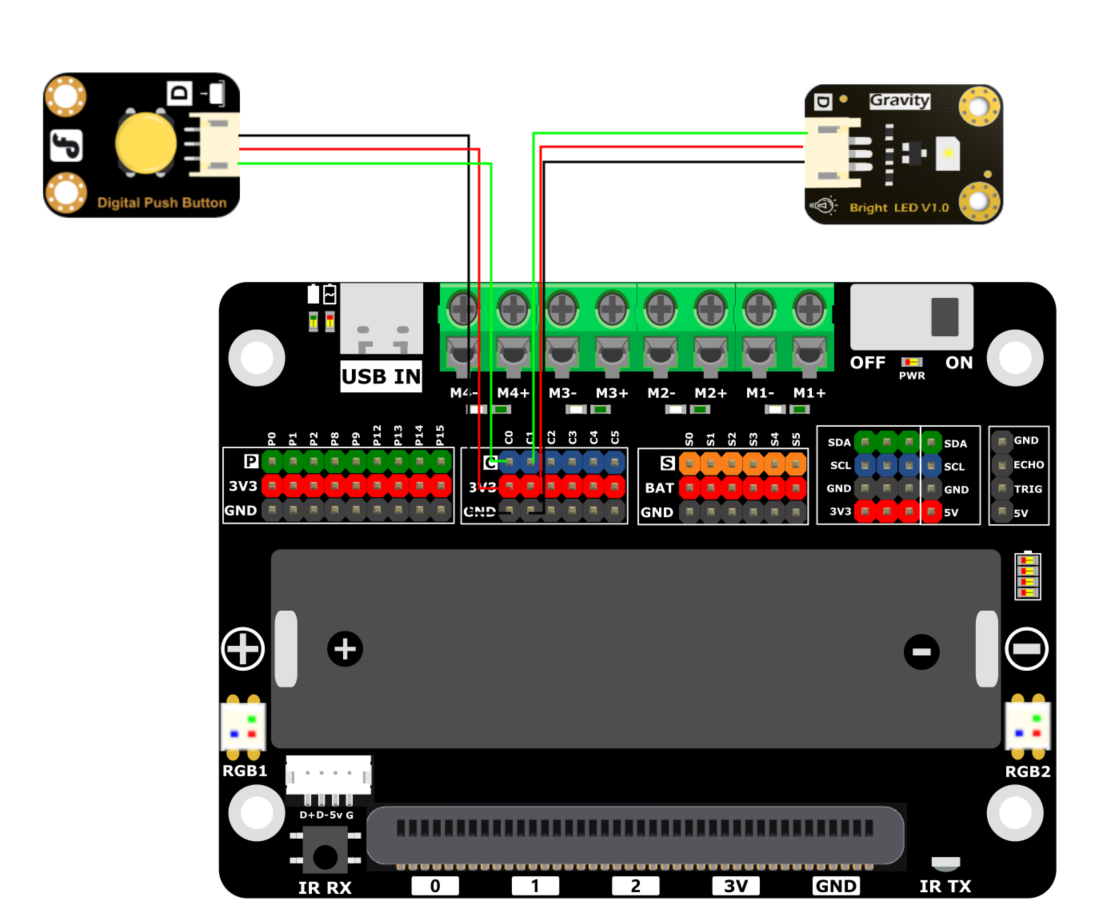
Mind+

Arduino IDE
#include "DFRobot_UnihikerExpansion.h"
DFRobot_UnihikerExpansion_I2C eunihiker(&Wire);
void setup()
{
	Serial.begin(115200);
	while(!eunihiker.begin()){
		Serial.println("NO Deivces !");
		delay(1000);
	}
	Serial.println("Device connected !");
	eunihiker.setMode(eC0, eReadGpio);
	eunihiker.setMode(eC1, eWriteGpio);
}

void loop()
{
	if(eunihiker.getGpioState(eC0) == 1){
		eunihiker.setGpioState(eC1, eHIGH);
	}
	else{
		eunihiker.setGpioState(eC1, eLOW);
	}
}
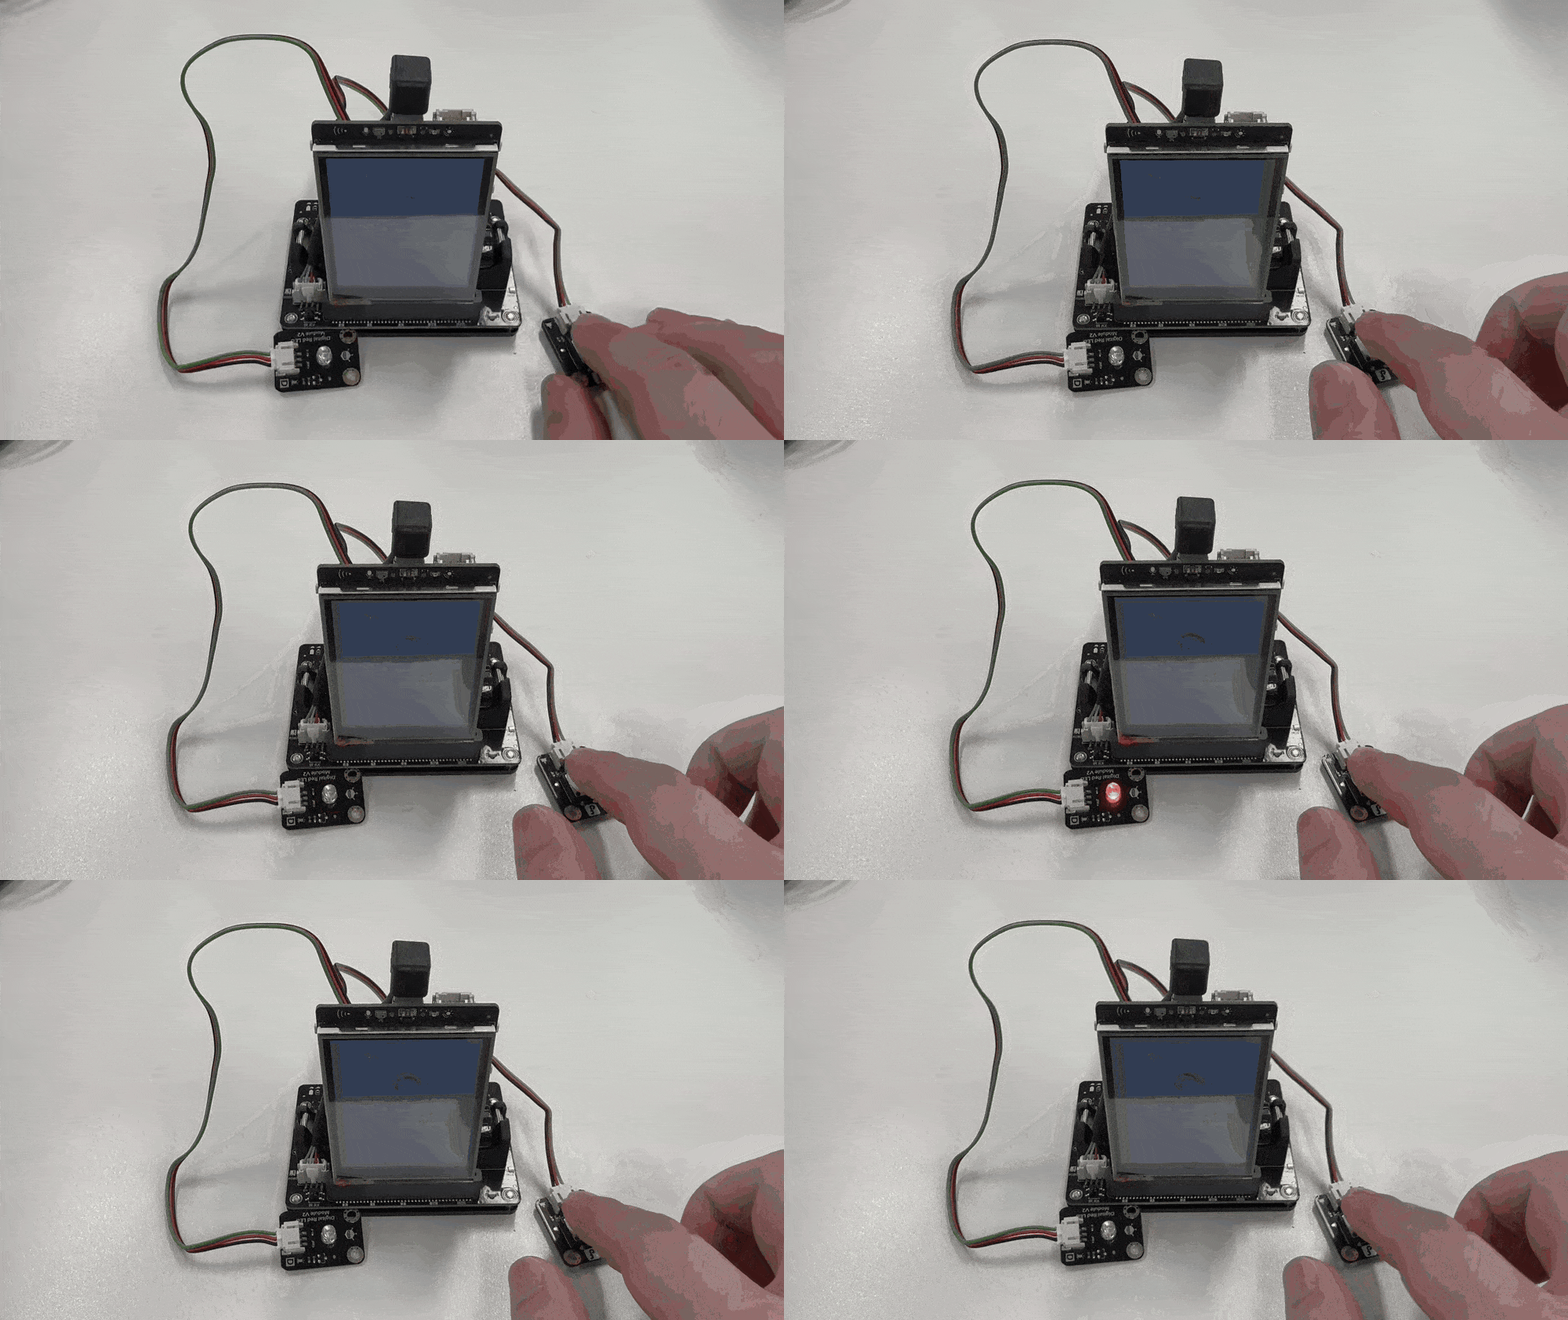
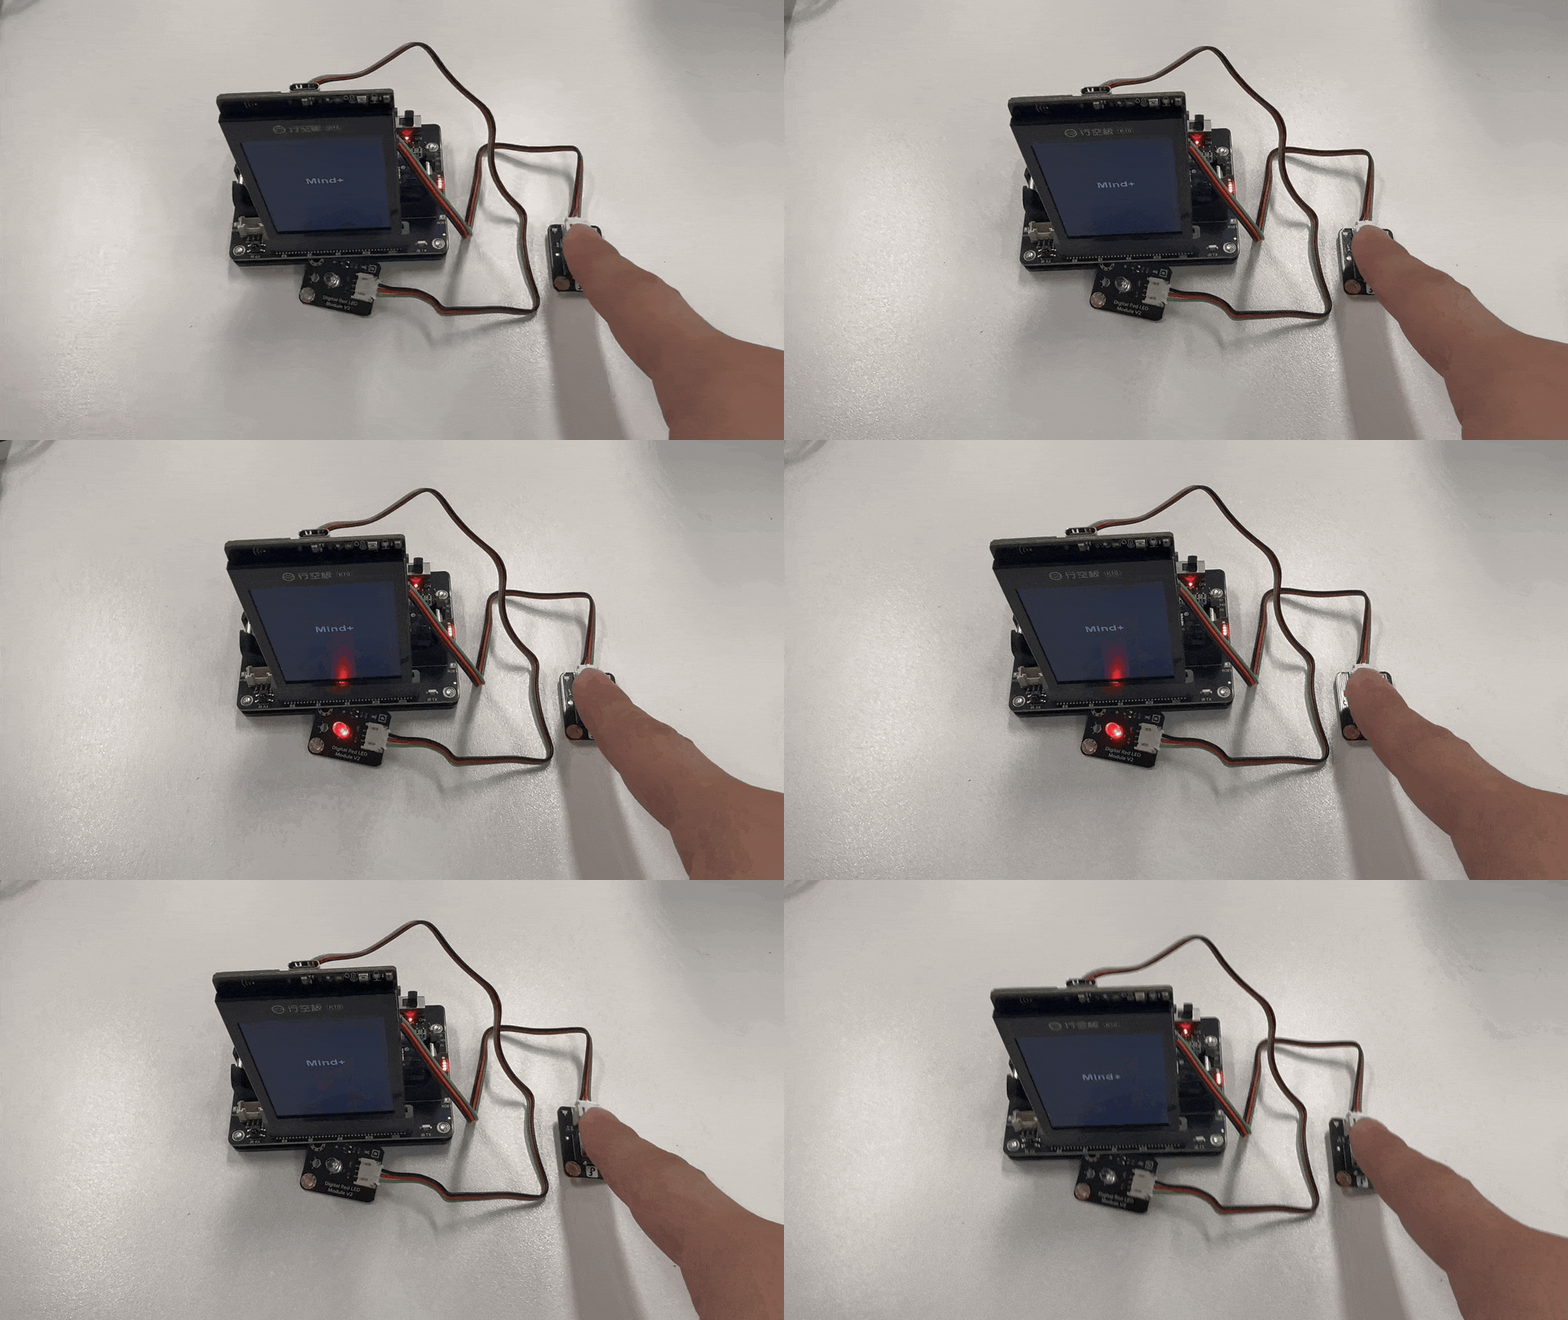
Effect
Light on when the button has been pushed down.
Light off when the button has been released.
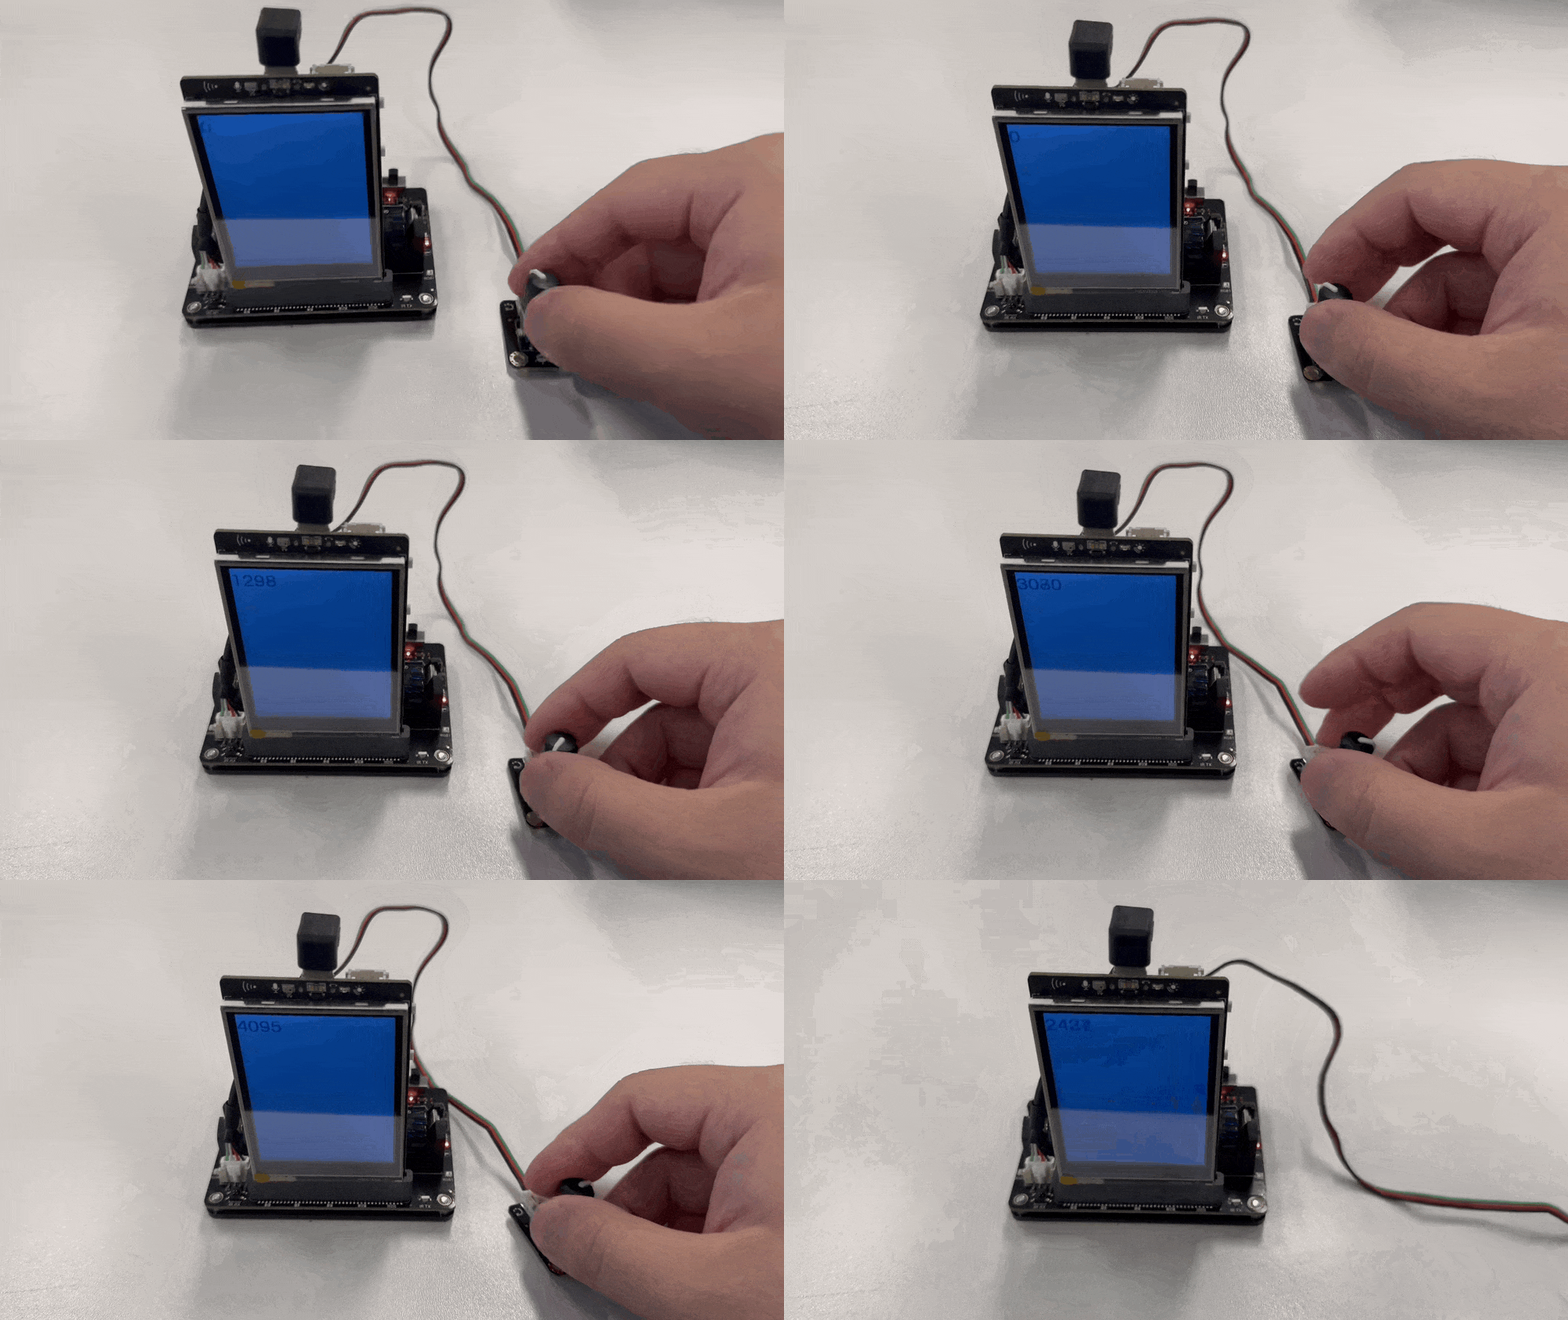
Example 2 Analog input/output
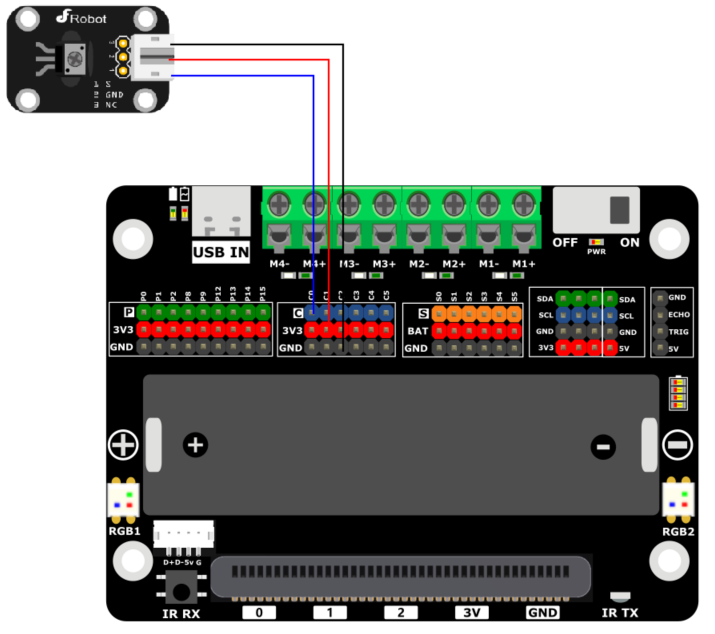
Addition hardware prepare
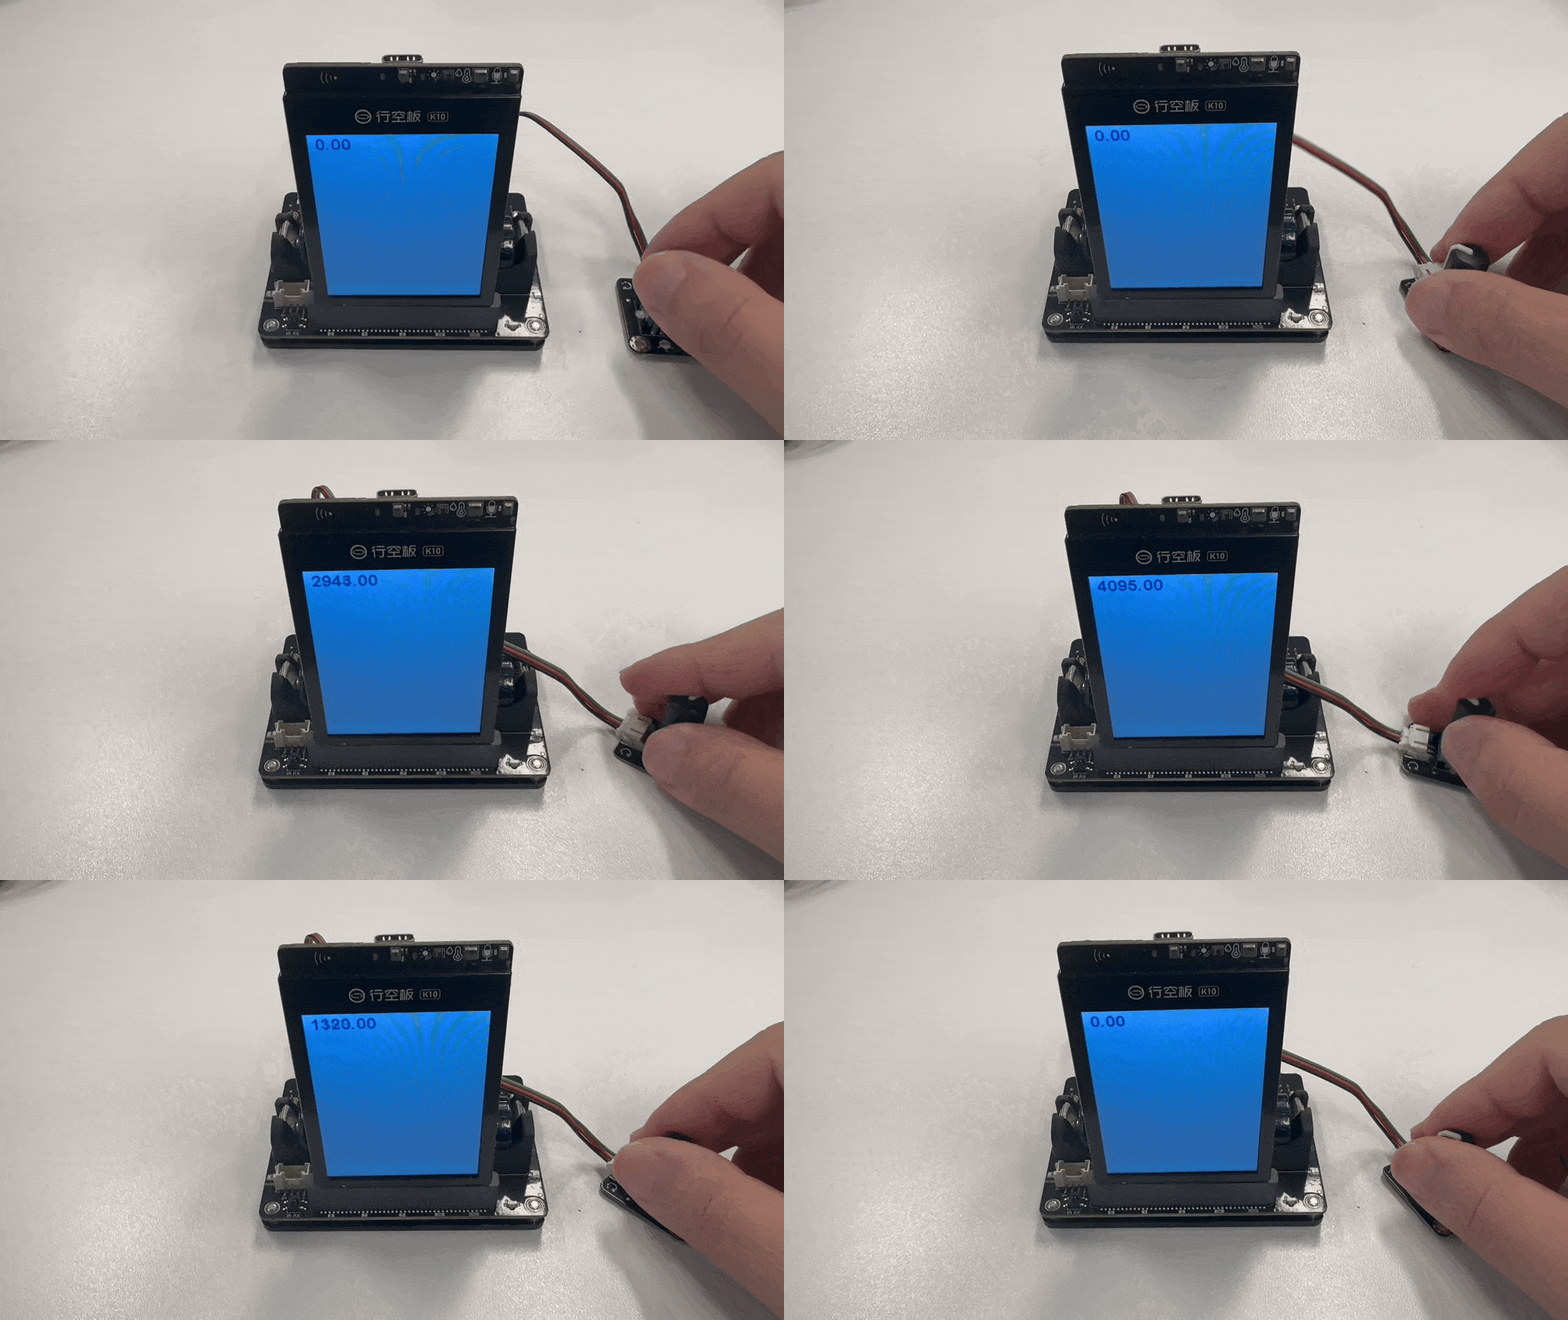
Gravity: Analog Rotation Potentiometer Sensor * 1
Mind+

Arduino IDE
#include "unihiker_k10.h"
#include "DFRobot_UnihikerExpansion.h"
DFRobot_UnihikerExpansion_I2C eunihiker(&Wire);
UNIHIKER_K10 k10;
uint8_t screen_dir=2;

void setup() {
  k10.begin();
  while(!eunihiker.begin()){
    Serial.println("NO Deivces !");
    delay(1000);
  } Serial.println("Device connected !");
  eunihiker.setMode(eC0, eADC);
  k10.initScreen(screen_dir);
  k10.creatCanvas();
}
void loop() {
  k10.canvas->canvasText((eunihiker.getADCValue(eC0)), 1, 0x0000FF);
  k10.canvas->updateCanvas();
}
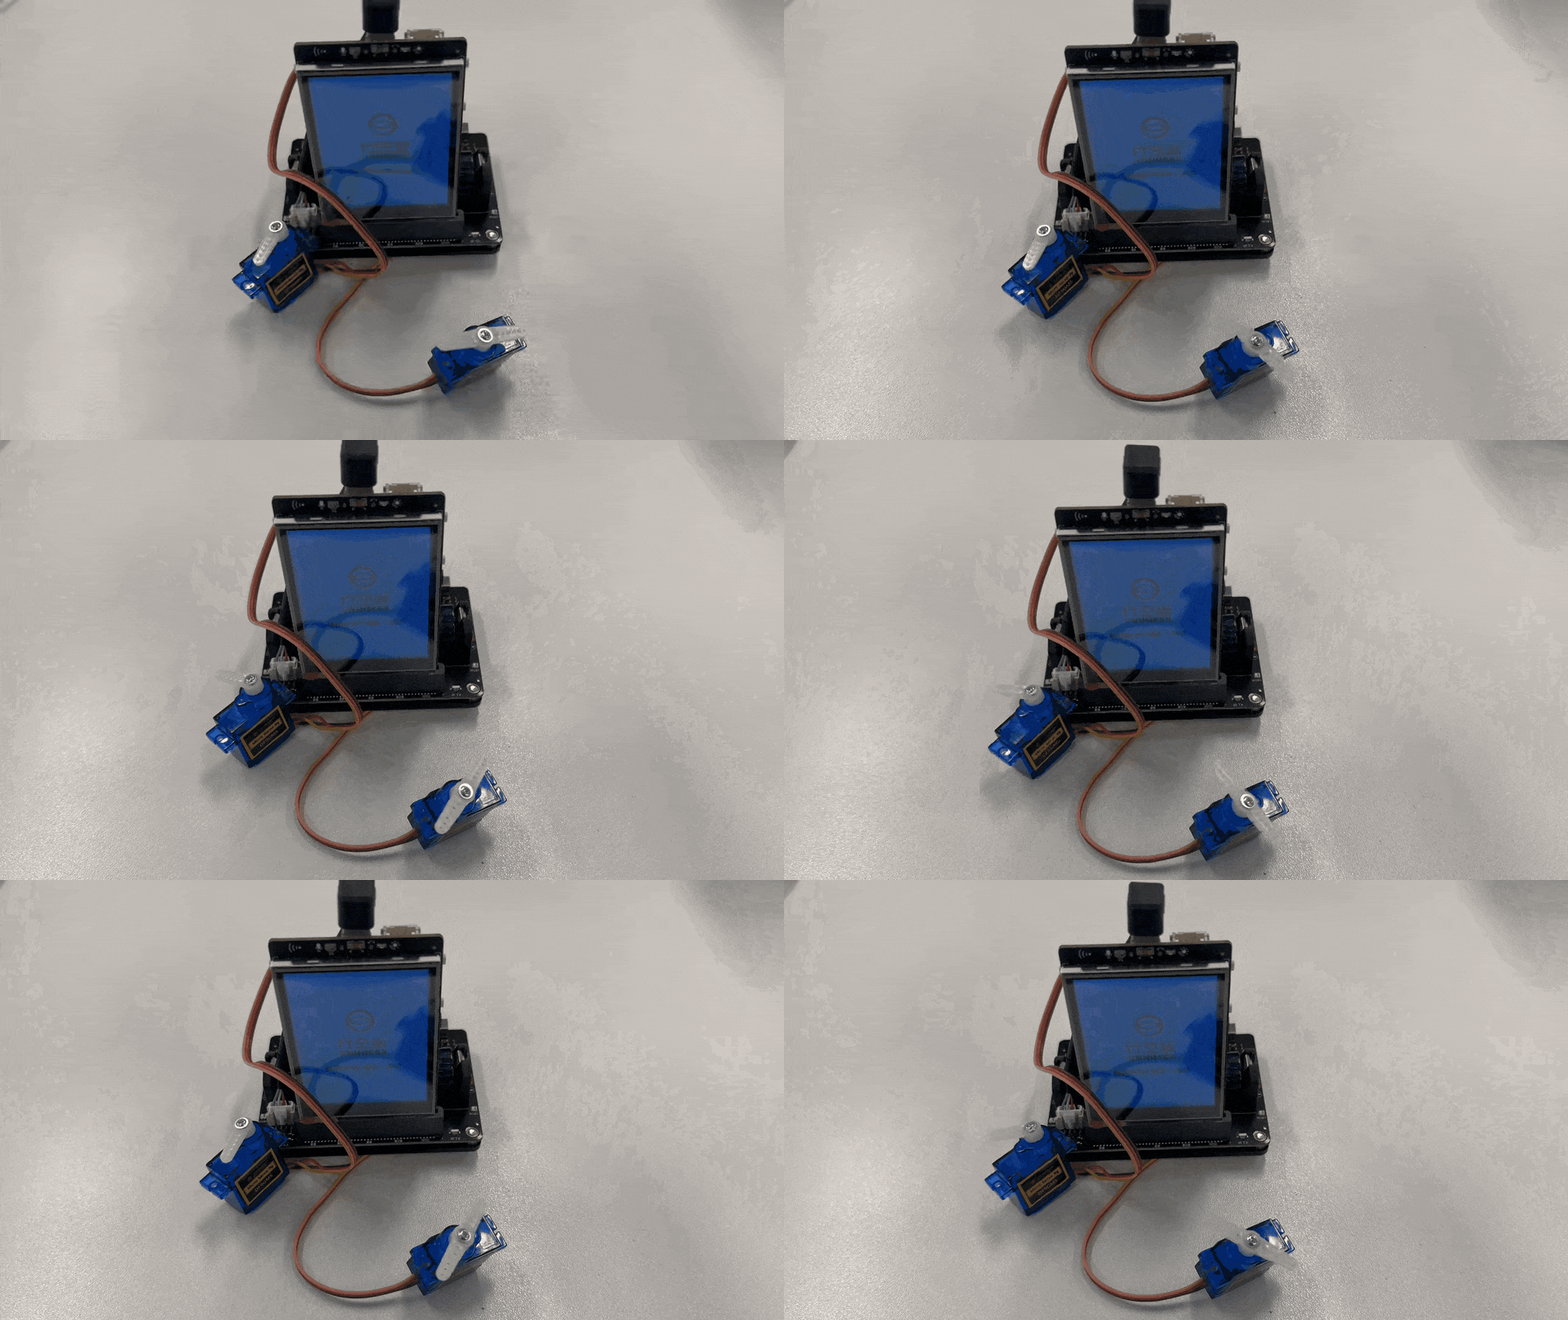
Example 3 Servo
Extra hardware
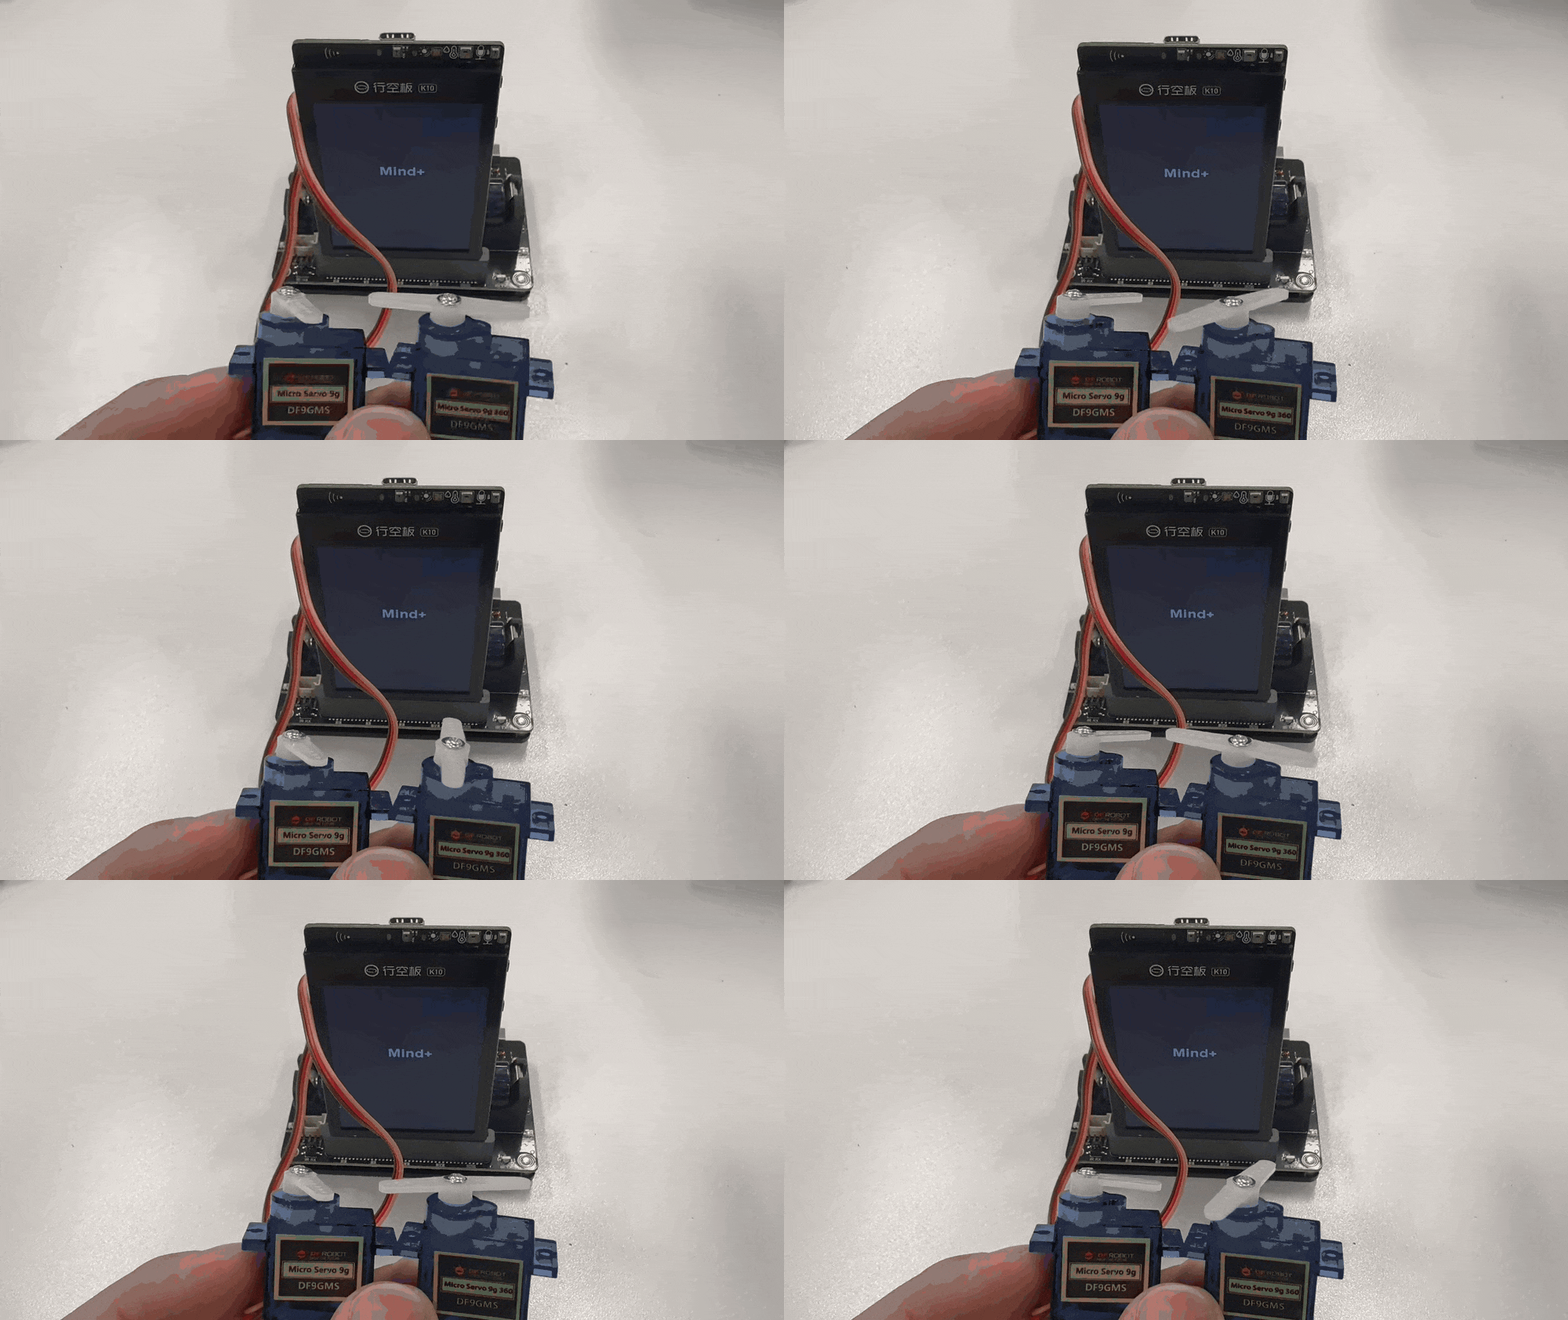
DFRobot DF9GMS 180° Servo * 1
DFRobot DF9GMS 360° Servo * 1
Mind+

Arduino IDE
#include "DFRobot_UnihikerExpansion.h"
DFRobot_UnihikerExpansion_I2C eunihiker(&Wire);
void setup()
{
	Serial.begin(115200);
	while(!eunihiker.begin()){
		Serial.println("NO Deivces !");
		delay(1000);
		}
	Serial.println("Device connected !");
	eunihiker.setServo360(eServo0, eForward, 50);
}

void loop()
{
	eunihiker.setServoAngle(eServo1, 90);
	delay(1000);
	eunihiker.setServoAngle(eServo1, 180);
	delay(1000);
}
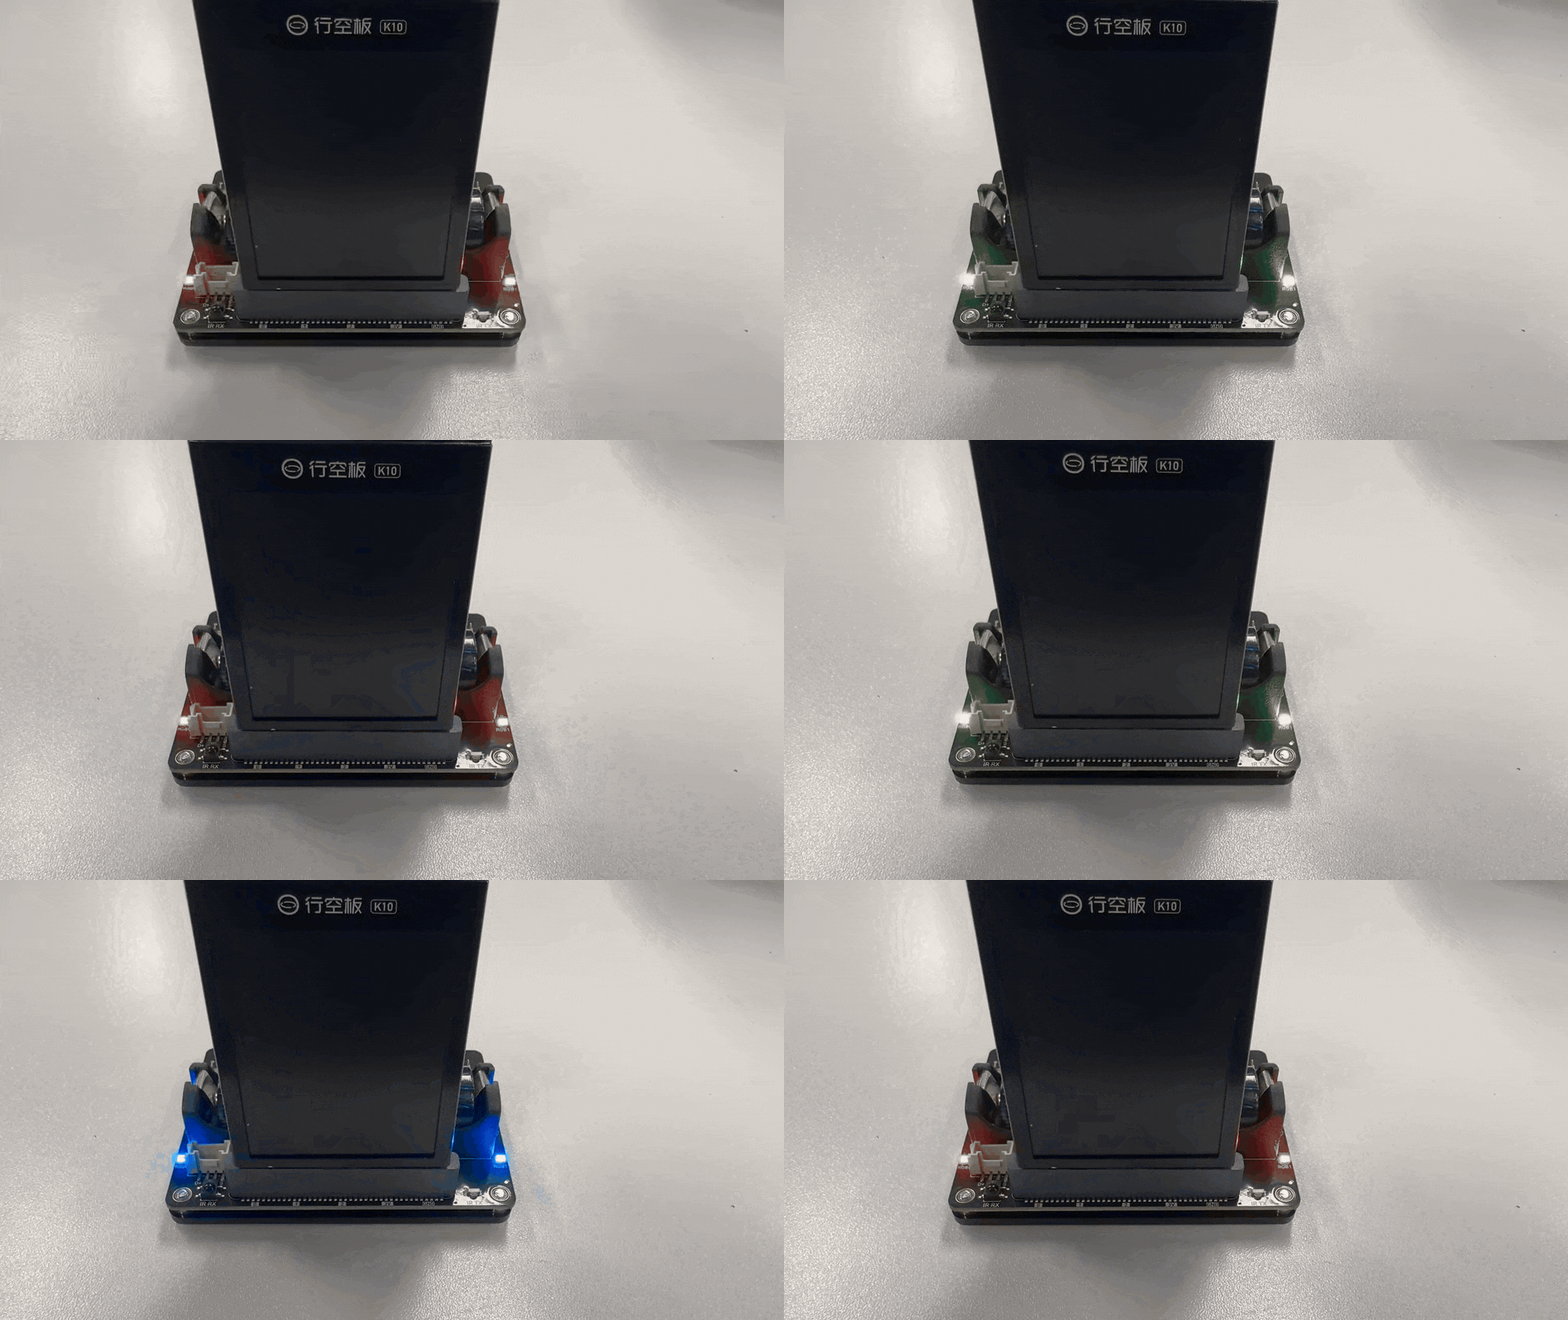
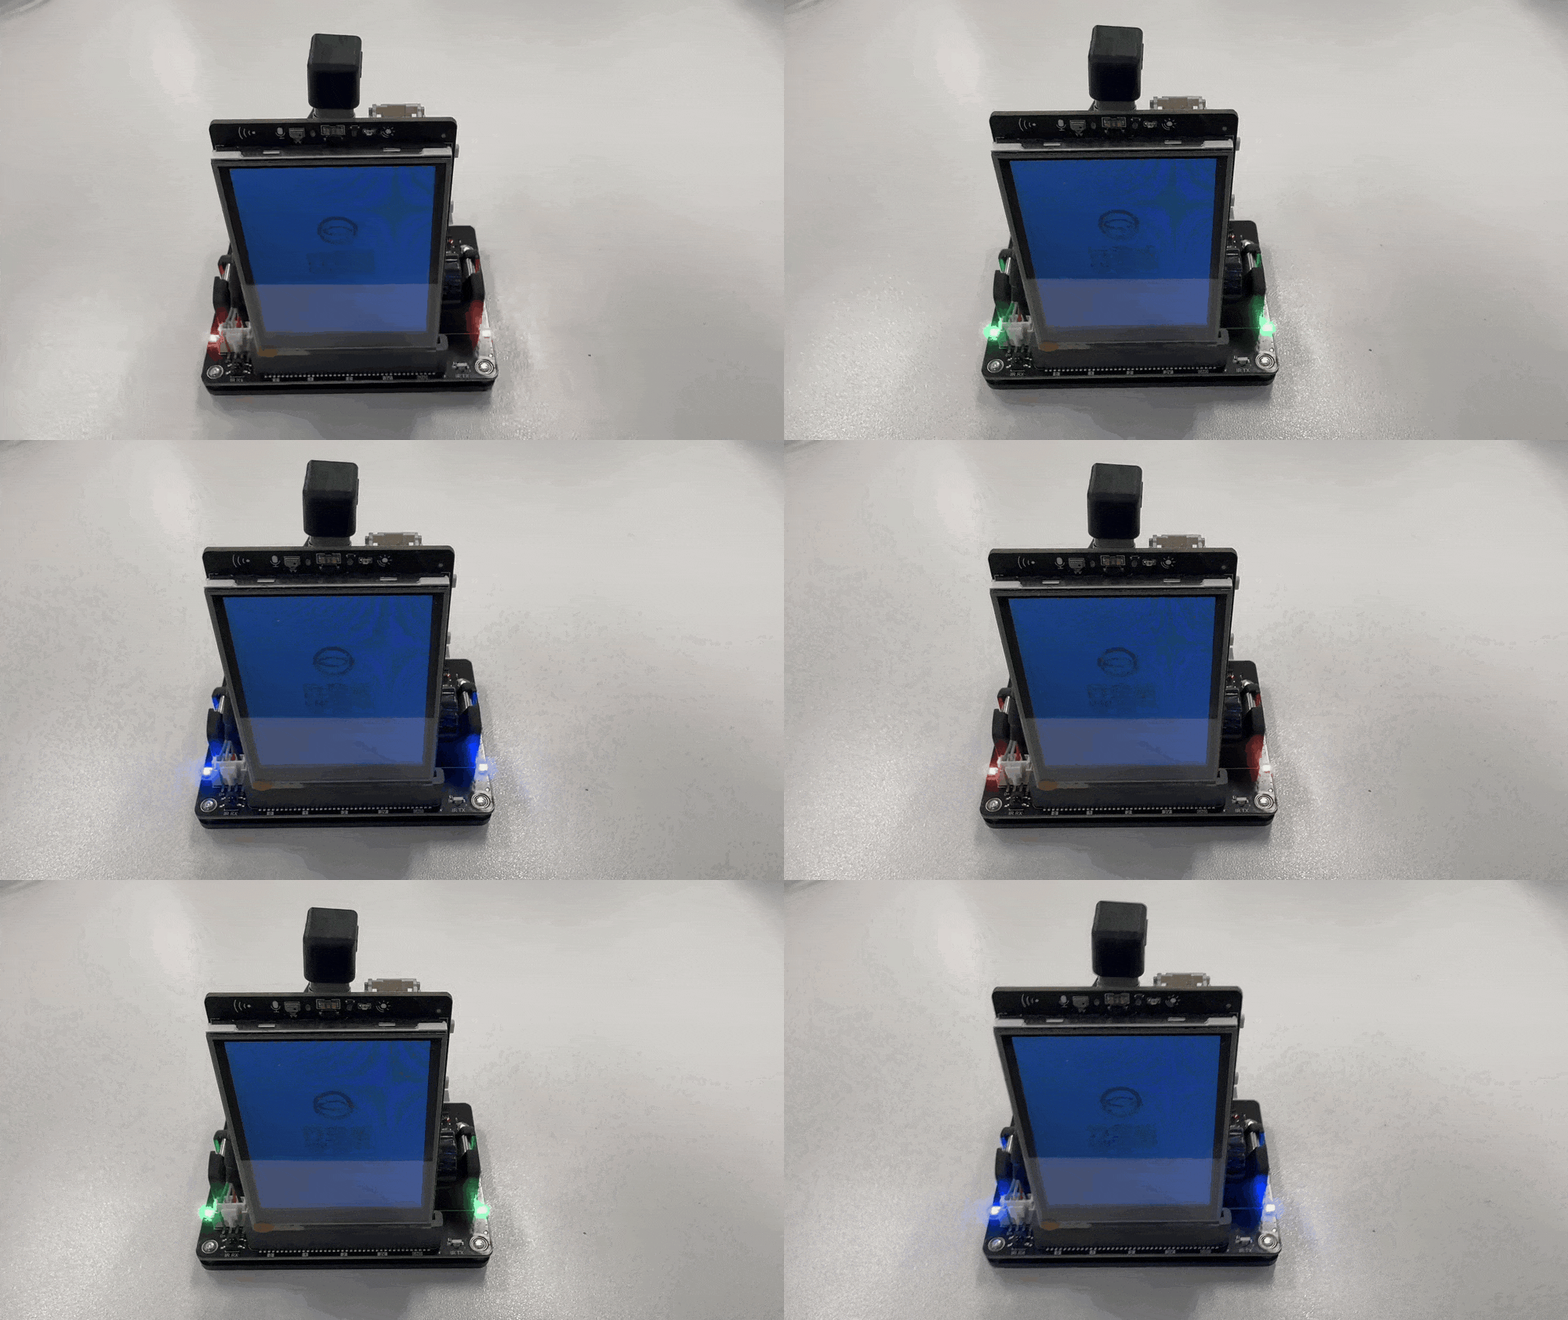
Example 4 On-board RGB LED
Mind+

Arduino IDE
#include "DFRobot_UnihikerExpansion.h"
DFRobot_UnihikerExpansion_I2C eunihiker(&Wire);
uint32_t led[2] = {0x000000, 0x000000};

void setup()
{
	Serial.begin(115200);
	while(!eunihiker.begin()){
		Serial.println("NO Deivces !");
		delay(1000);
		}
}

void loop()
{
	led[0] = 0x0000FF;
	eunihiker.setWS2812((uint32_t*)led, 5*25);
	led[1] = 0x0000FF;
	eunihiker.setWS2812((uint32_t*)led, 5*25);
	delay(1000);

	led[0] = 0xFF0000;
	eunihiker.setWS2812((uint32_t*)led, 5*25);
	led[1] = 0xFF0000;
	eunihiker.setWS2812((uint32_t*)led, 5*25);
	delay(1000);

	led[0] = 0x33CC00;
	eunihiker.setWS2812((uint32_t*)led, 5*25);
	led[1] = 0x33CC00;
	eunihiker.setWS2812((uint32_t*)led, 5*25);
	delay(1000);
}
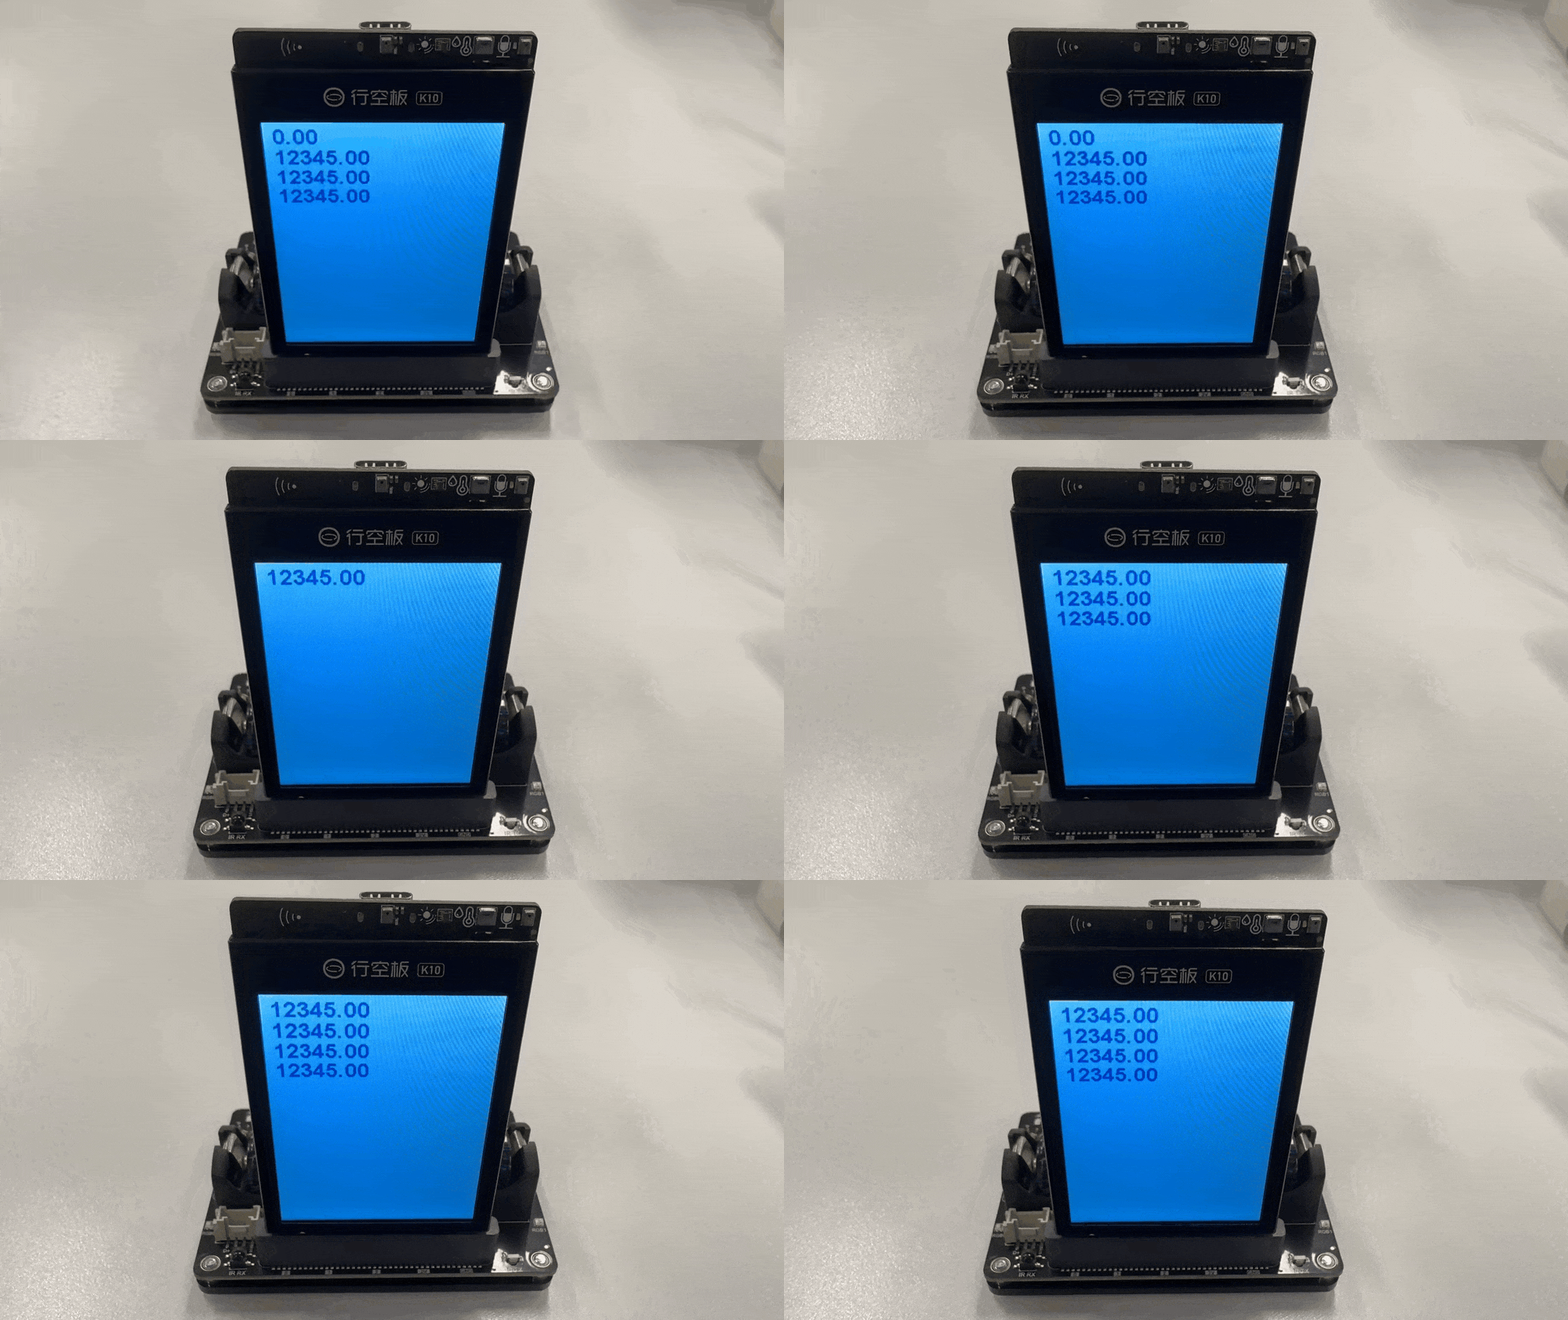
Example 5 IR message send/receive
Mind+

Arduino IDE
#include "DFRobot_UnihikerExpansion.h"
#include "unihiker_k10.h"

DFRobot_UnihikerExpansion_I2C eunihiker(&Wire);
UNIHIKER_K10 k10;
uint8_t screen_dir=2;

int times;

void setup()
{
	k10.begin();
	Serial.begin(115200);
	while(!eunihiker.begin()){
		Serial.println("NO Deivces !");
		delay(1000);
	}
	k10.initScreen(screen_dir);
	k10.creatCanvas();
}

void loop()
{
	times = 1;
	while (!(times==5)) {
		eunihiker.sendIR(12345);
		k10.canvas->canvasText(eunihiker.getIRData(), times, 0x0000FF);
		k10.canvas->updateCanvas();
		times += 1;conglai
		delay(1000);
	}
	delay(1000);
	k10.canvas->canvasClear();
}
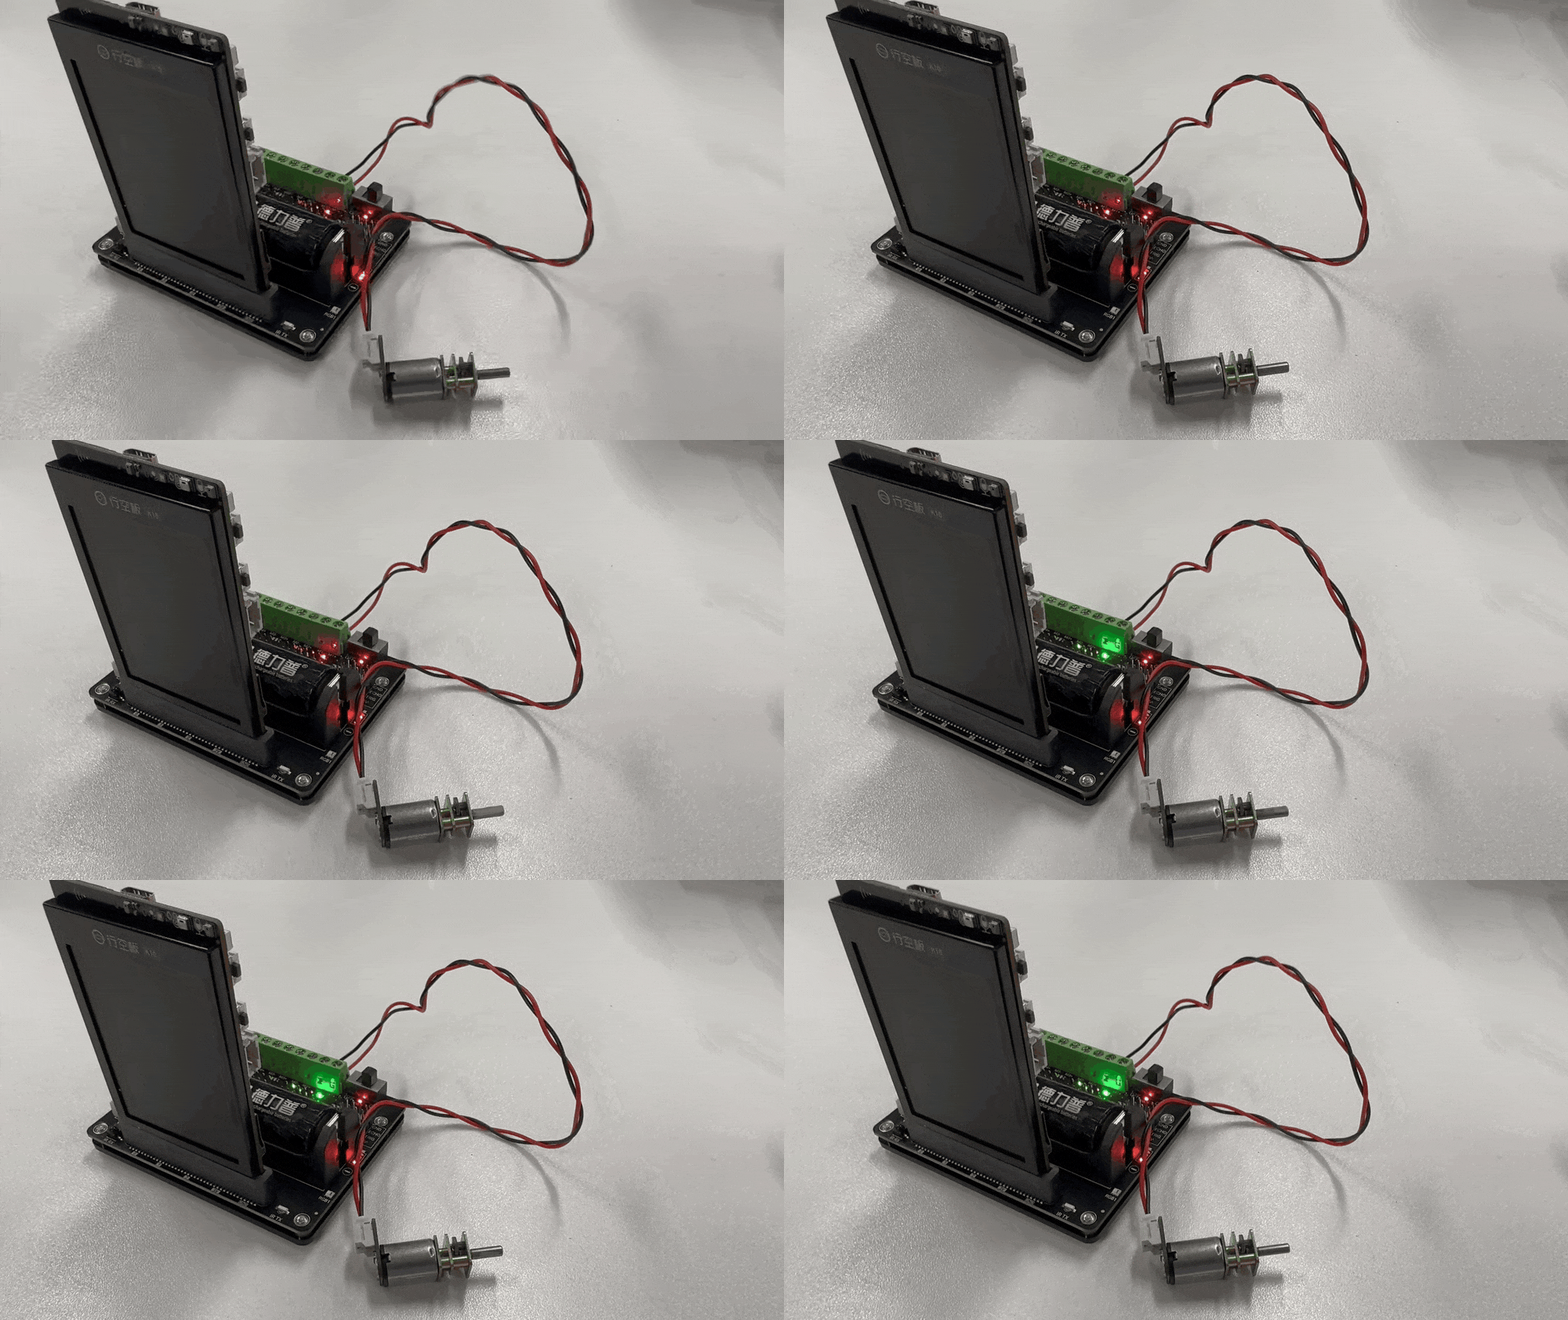
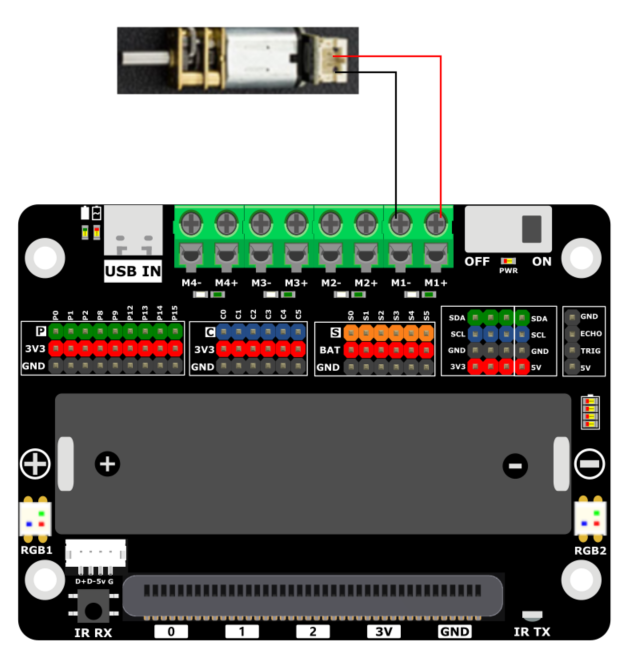
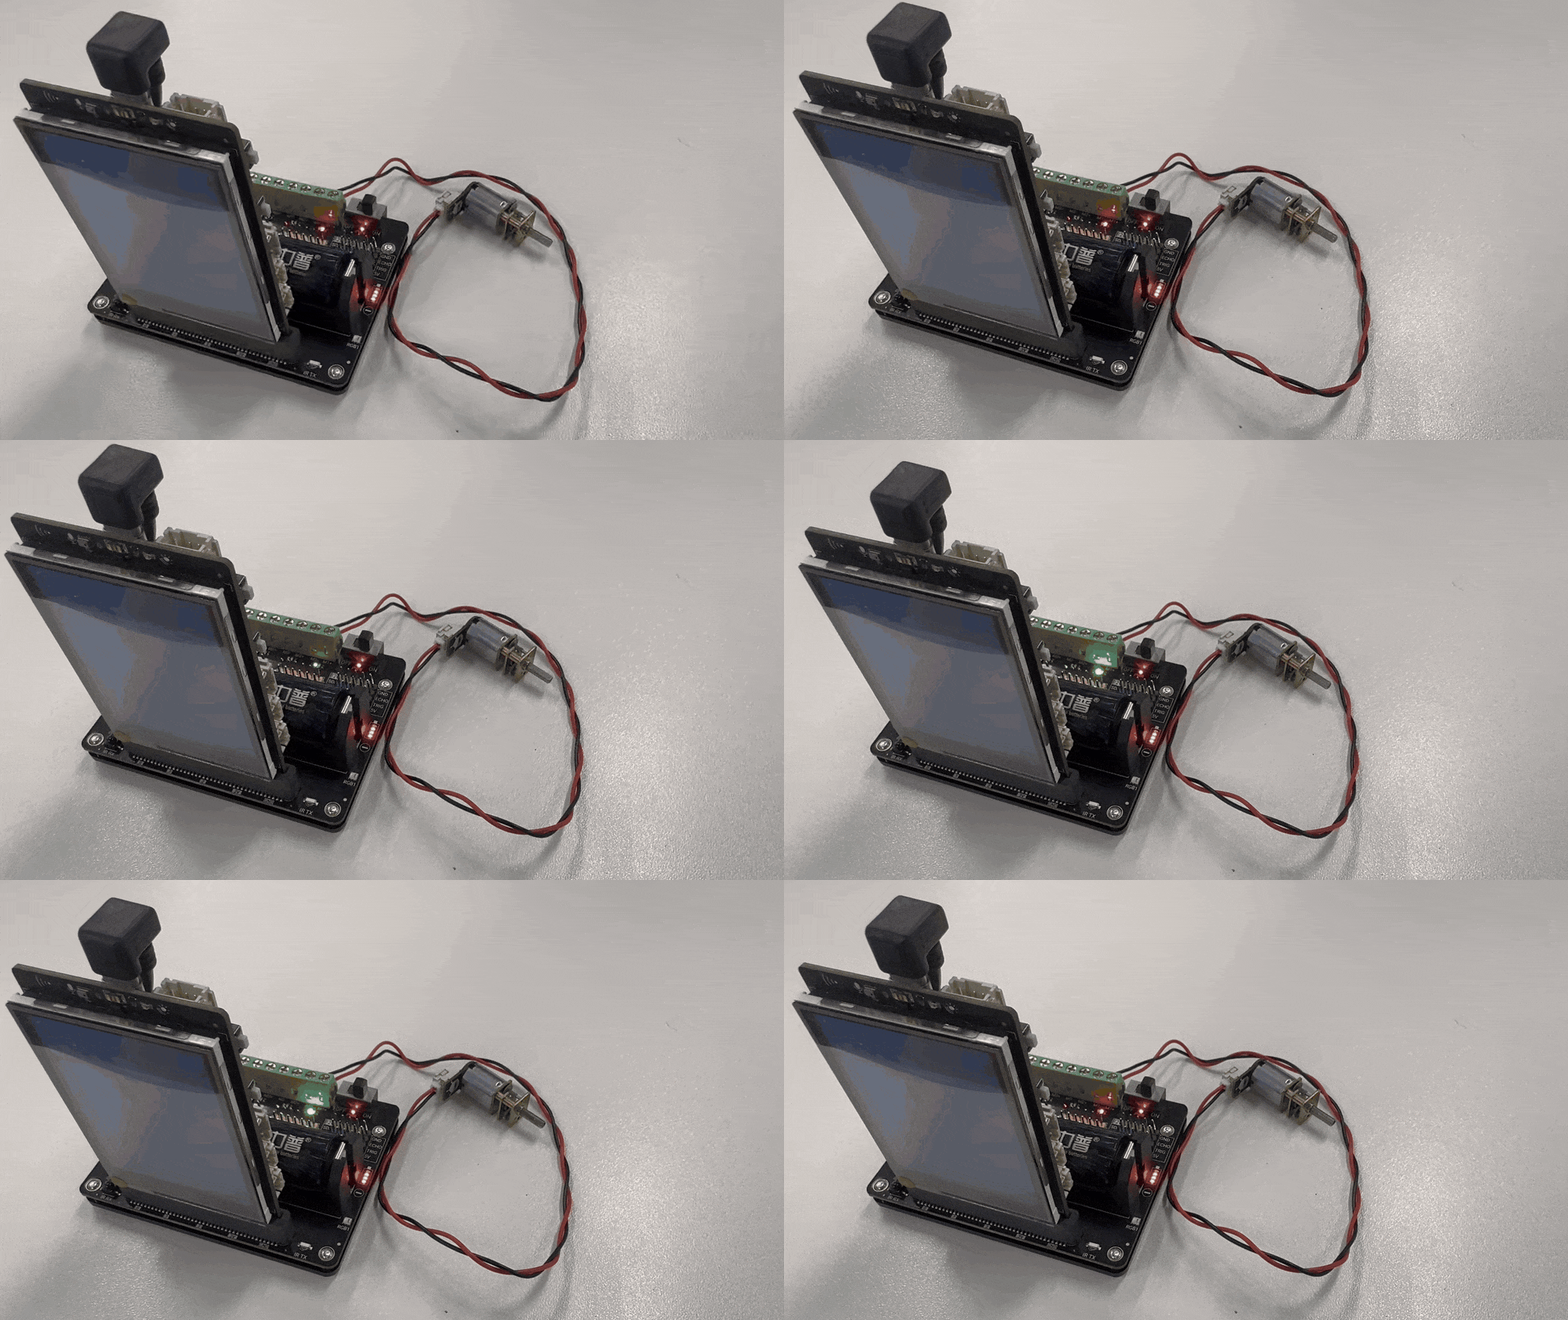
Example 6 Motor Driver
Extra Hardware Prepare
Micro Metal Gear Motor with Connector
Mind+

Arduino IDE
#include "DFRobot_UnihikerExpansion.h"

DFRobot_UnihikerExpansion_I2C eunihiker(&Wire);

void setup()
{
	Serial.begin(115200);
	while(!eunihiker.begin()){
		Serial.println("NO Deivces !");
		delay(1000);
	}
	eunihiker.setMotorPeriod(eMotor1_2, 255);
	eunihiker.setMotorPeriod(eMotor3_4, 255);
}

void loop()
{
	eunihiker.setMotorDuty(eMotor1_A, 200);
	eunihiker.setMotorDuty(eMotor1_B, 0);
	delay(3000);
	eunihiker.setMotorDuty(eMotor1_A, 0);
	eunihiker.setMotorDuty(eMotor1_B, 200);
	delay(3000);
}
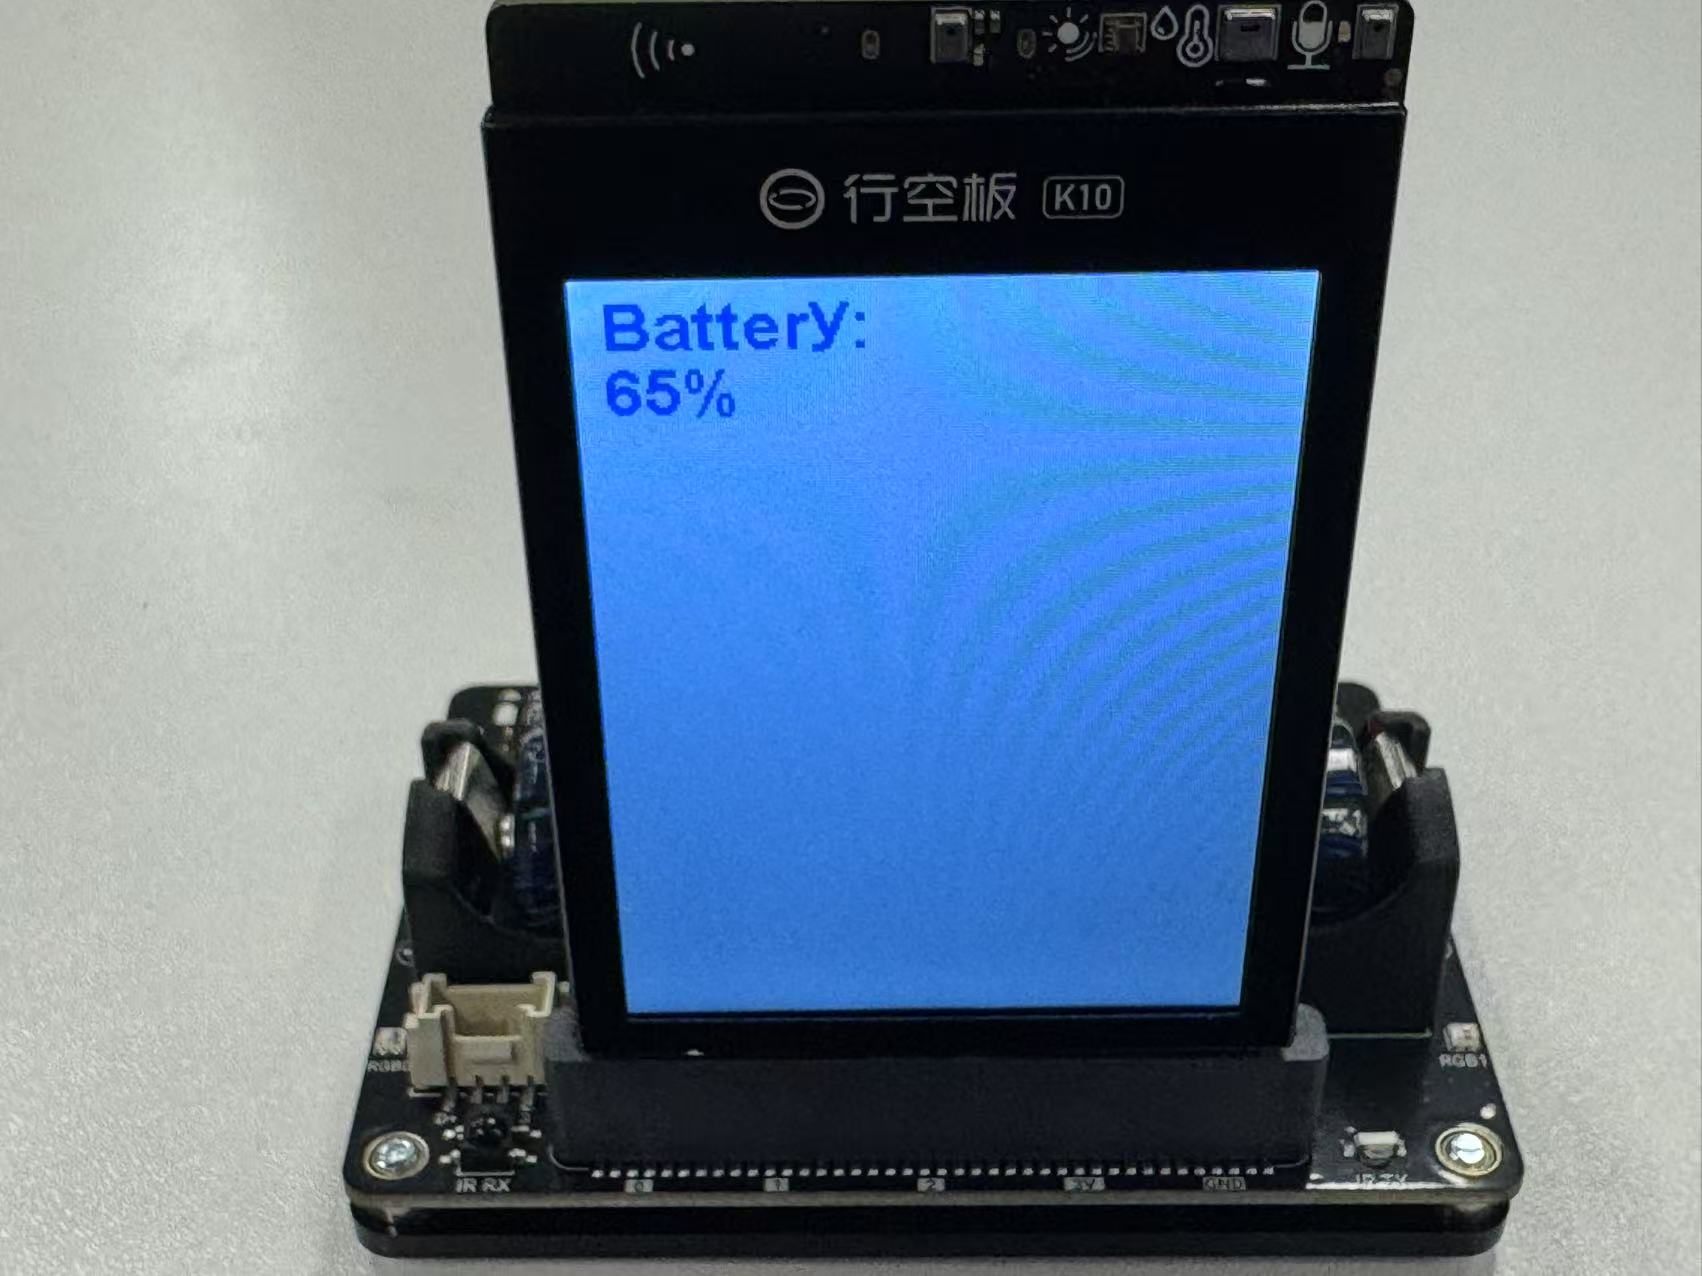
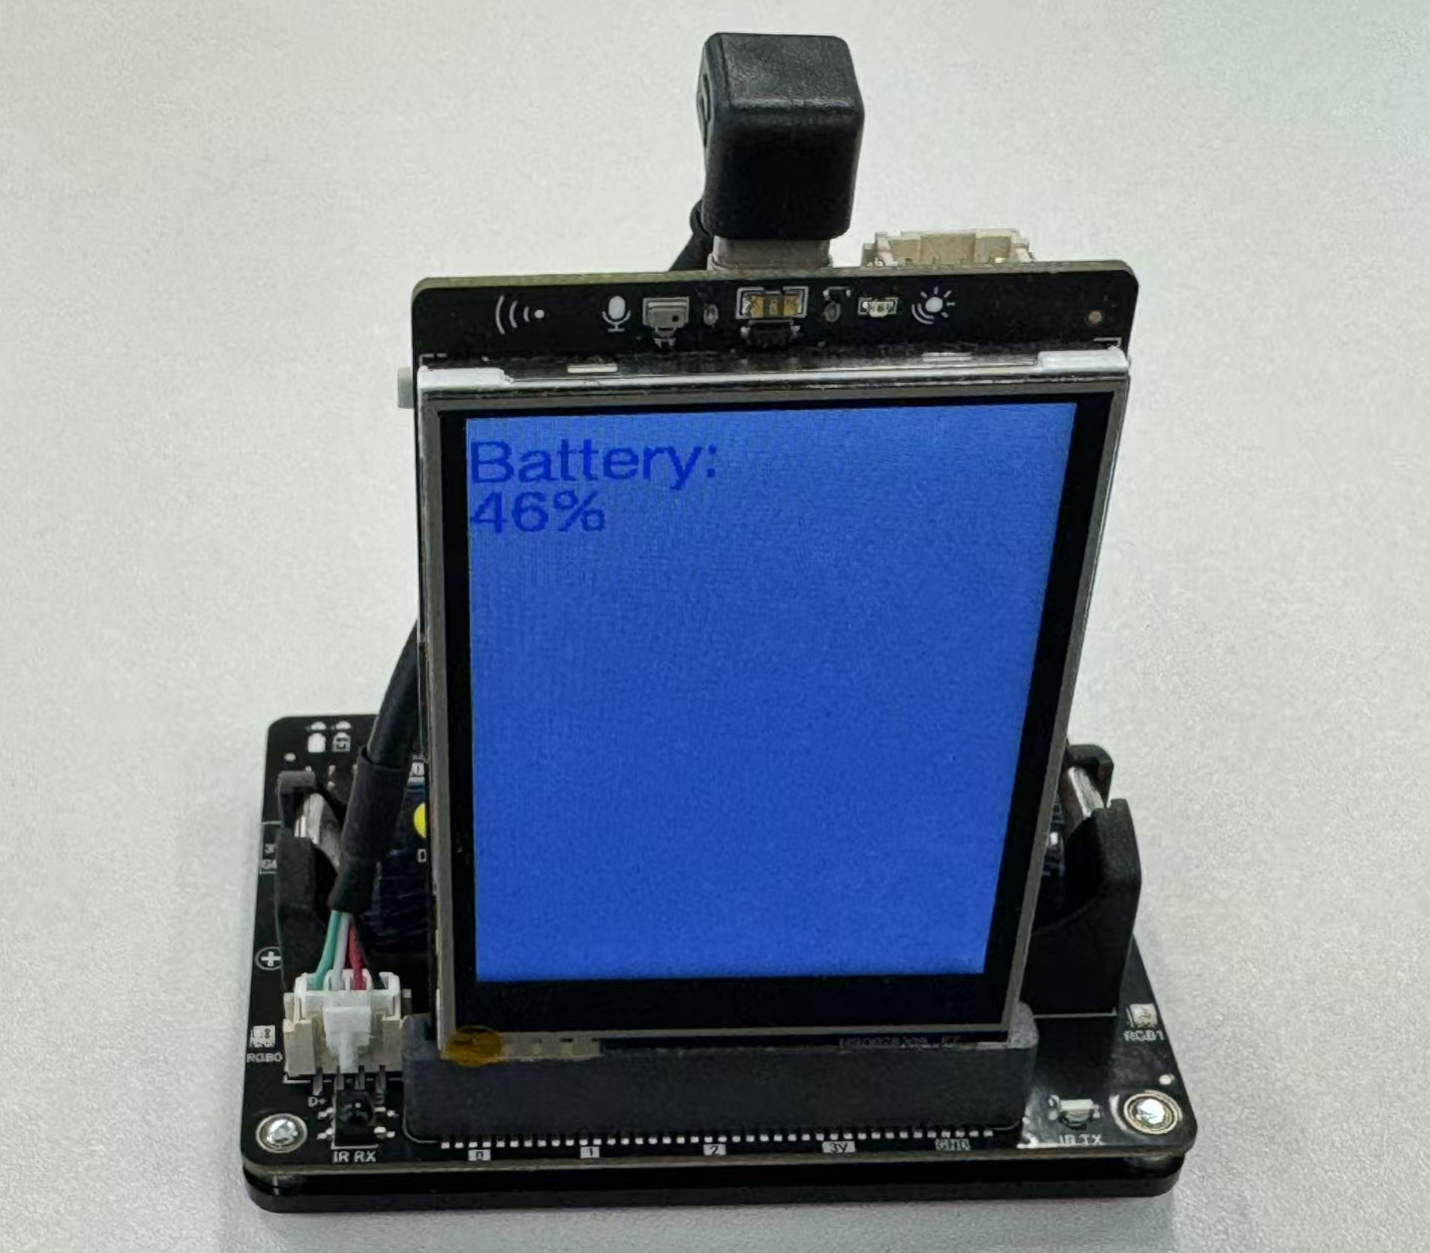
Example 7 Battery capacity
Mind+

Arduino IDE
#include "DFRobot_UnihikerExpansion.h"
#include "unihiker_k10.h"

UNIHIKER_K10 k10;
uint8_t screen_dir = 2;
DFRobot_UnihikerExpansion_I2C eunihiker(&Wire);

void setup()
{
	k10.begin();
	Serial.begin(115200);
	while(!eunihiker.begin()){
		Serial.println("NO Deivces !");
		delay(1000);
	}
	eunihiker.setMotorPeriod(eMotor1_2, 255);
	eunihiker.setMotorPeriod(eMotor3_4, 255);
	k10.initScreen(screen_dir);
	k10.creatCanvas();
}

void loop()
{
	k10.canvas->canvasText("Battery:", 1, 0x0000FF);
	k10.canvas->canvasText((String(eunihiker.getBattery()) + String("%")), 2, 0x0000FF);
	k10.canvas->updateCanvas();
	Serial.println(eunihiker.getBattery());
	delay(1000);
}
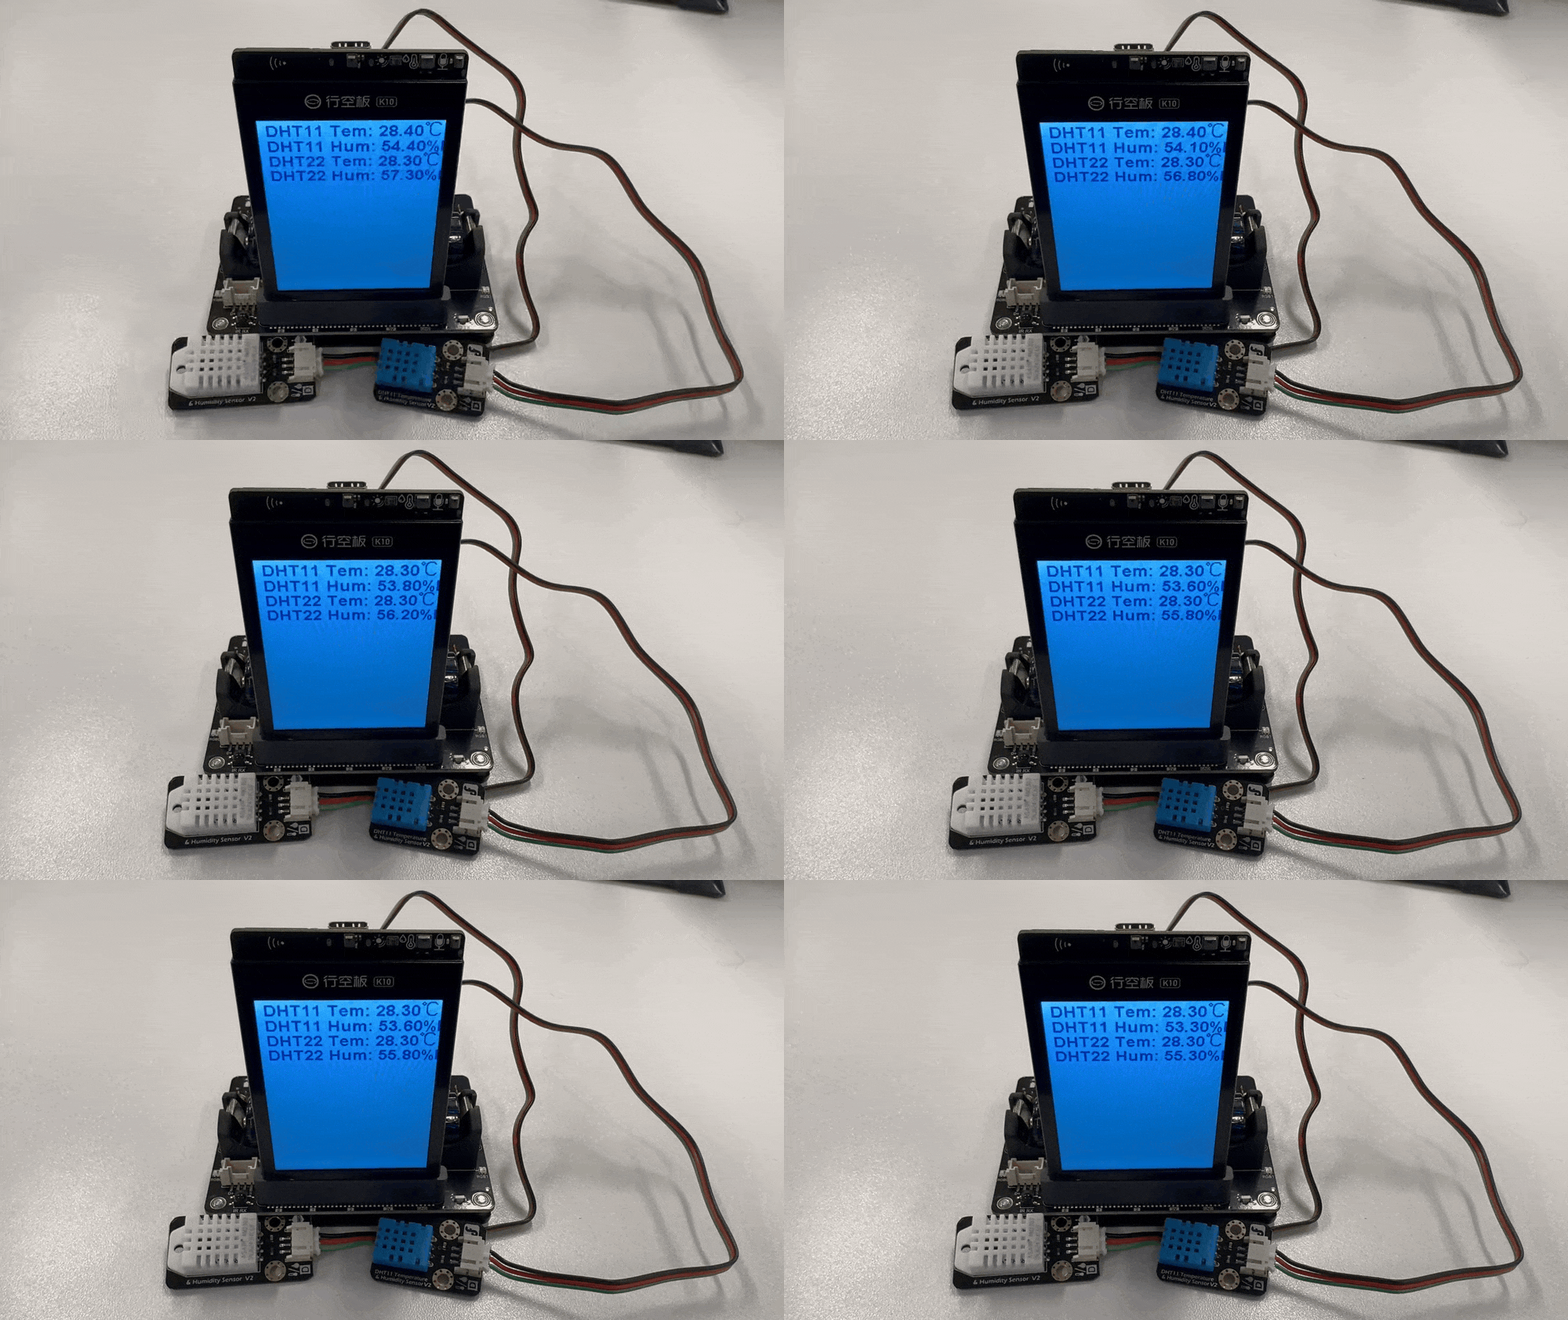
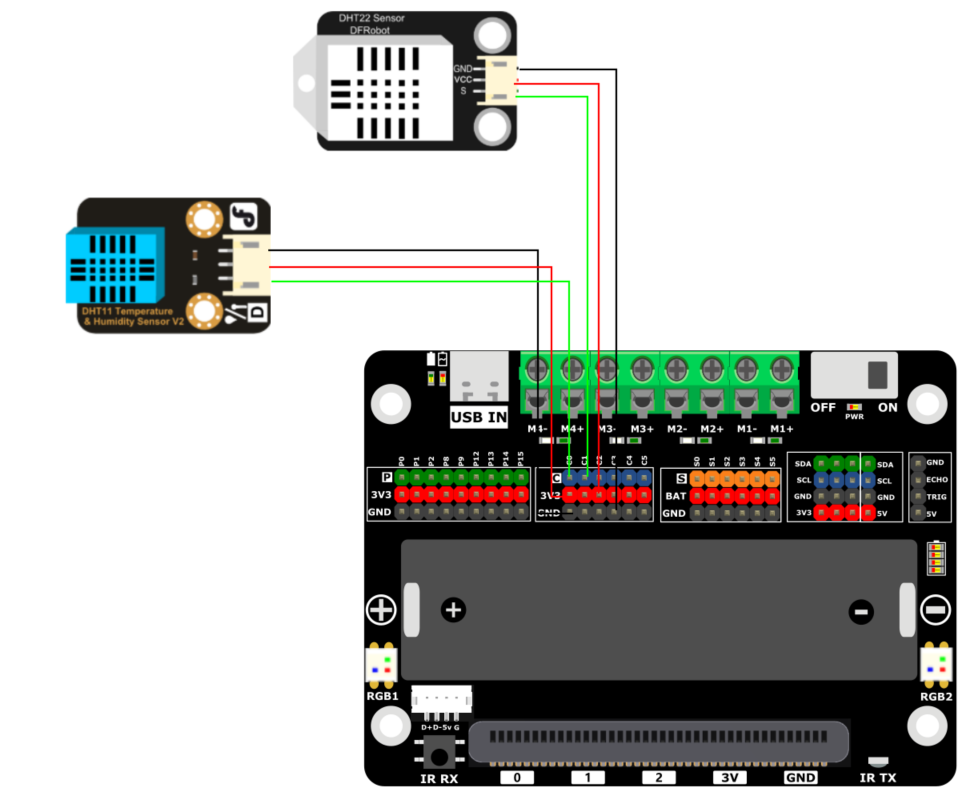
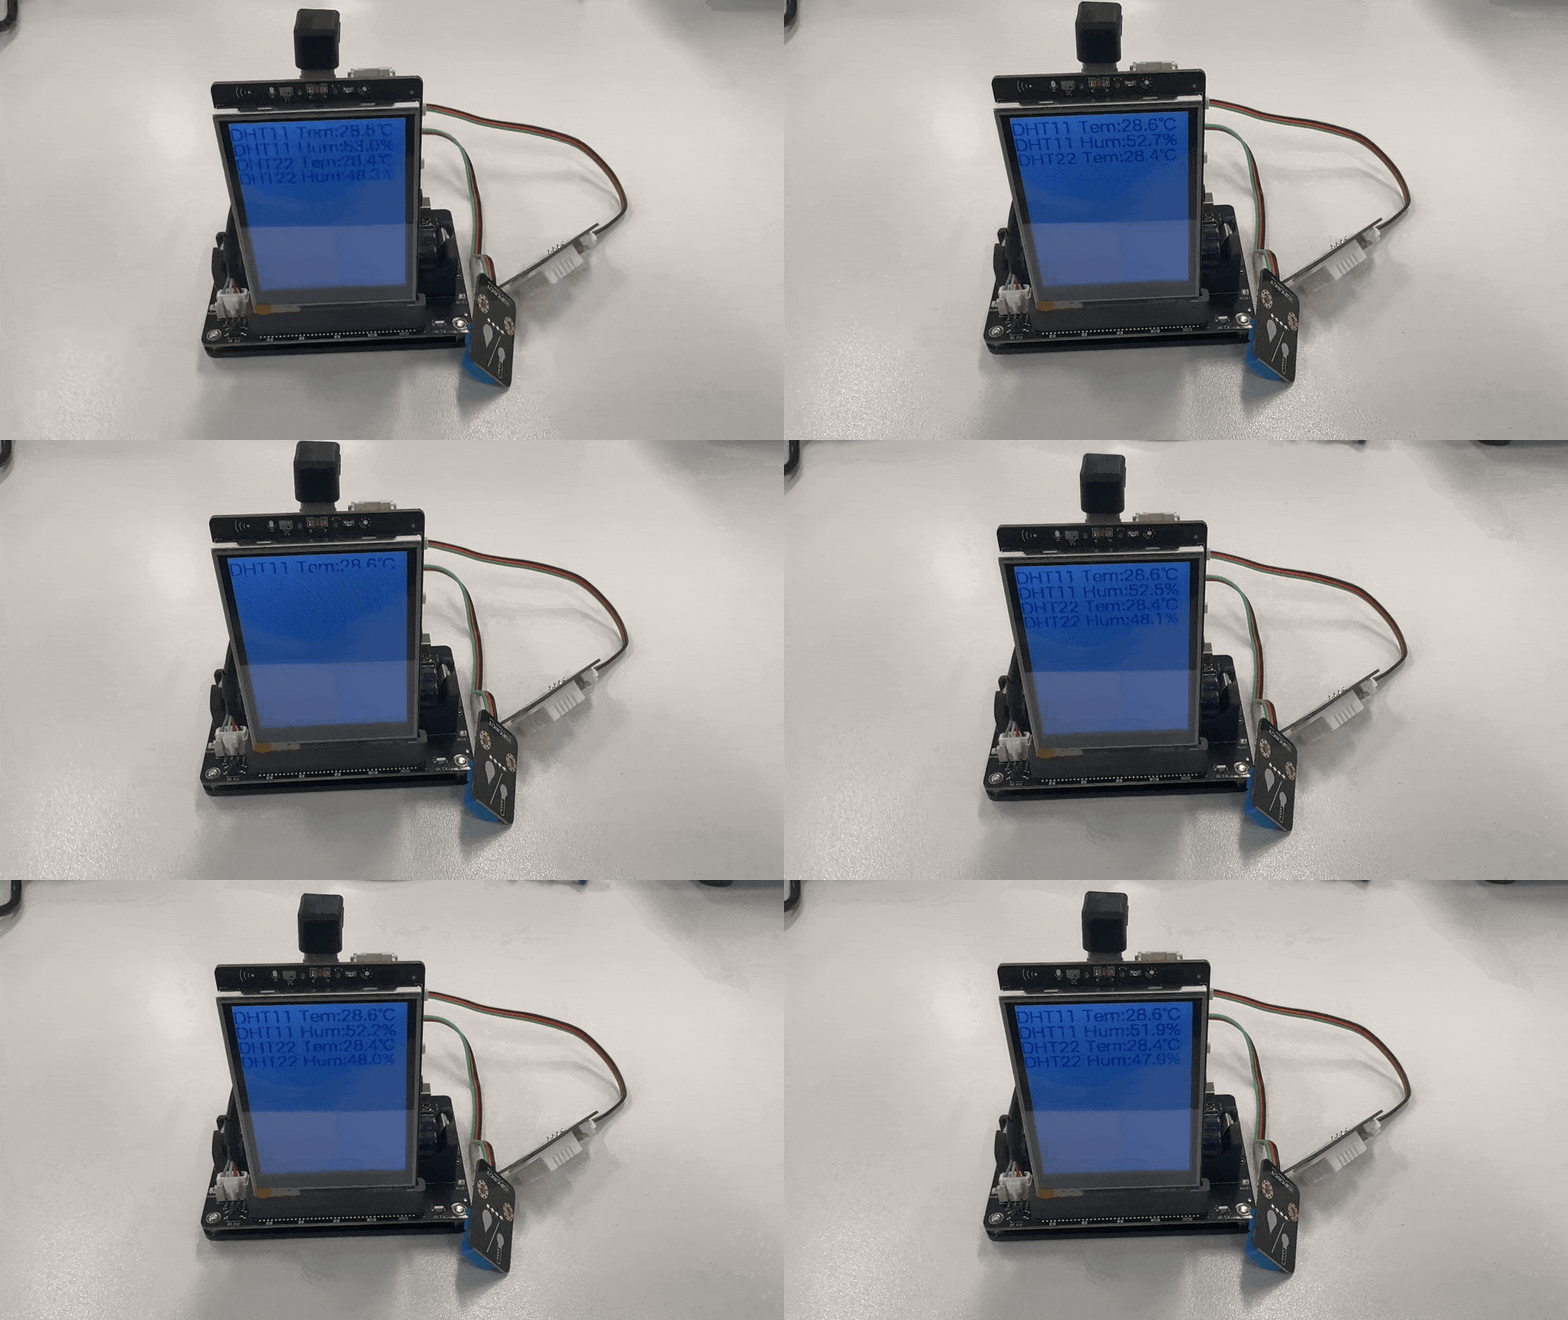
Example 8 Temperature&Humidity Sensor
Mind+

Arduino IDE
#include "DFRobot_UnihikerExpansion.h"
#include "unihiker_k10.h"

UNIHIKER_K10 k10;
uint8_t screen_dir=2;
DFRobot_UnihikerExpansion_I2C eunihiker(&Wire);

void setup()
{
	k10.begin();
	Serial.begin(115200);
	while(!eunihiker.begin()){
		Serial.println("NO Deivces !");
		delay(1000);
}
	eunihiker.setMode(eC0, eDHT11);
	eunihiker.setMode(eC1, eDHT22);
	k10.initScreen(screen_dir);
	k10.creatCanvas();
}

void loop()
{
	sDhtData_t dhtData;
	dhtData = eunihiker.getDHTValue(eC0);
	k10.canvas->canvasText((String((String("DHT11 Tem: ") + String((dhtData.temperature)))) + String("℃")), 1, 0x0000FF);
	k10.canvas->canvasText((String((String("DHT11 Hum: ") + String((dhtData.humidity)))) + String("%")), 2, 0x0000FF);
	dhtData = eunihiker.getDHTValue(eC1);
	k10.canvas->canvasText((String((String("DHT22 Tem: ") + String((dhtData.temperature)))) + String("℃")), 3, 0x0000FF);
	k10.canvas->canvasText((String((String("DHT22 Hum: ") + String((dhtData.humidity)))) + String("%")), 4, 0x0000FF);
	k10.canvas->updateCanvas();
	delay(1000);
}
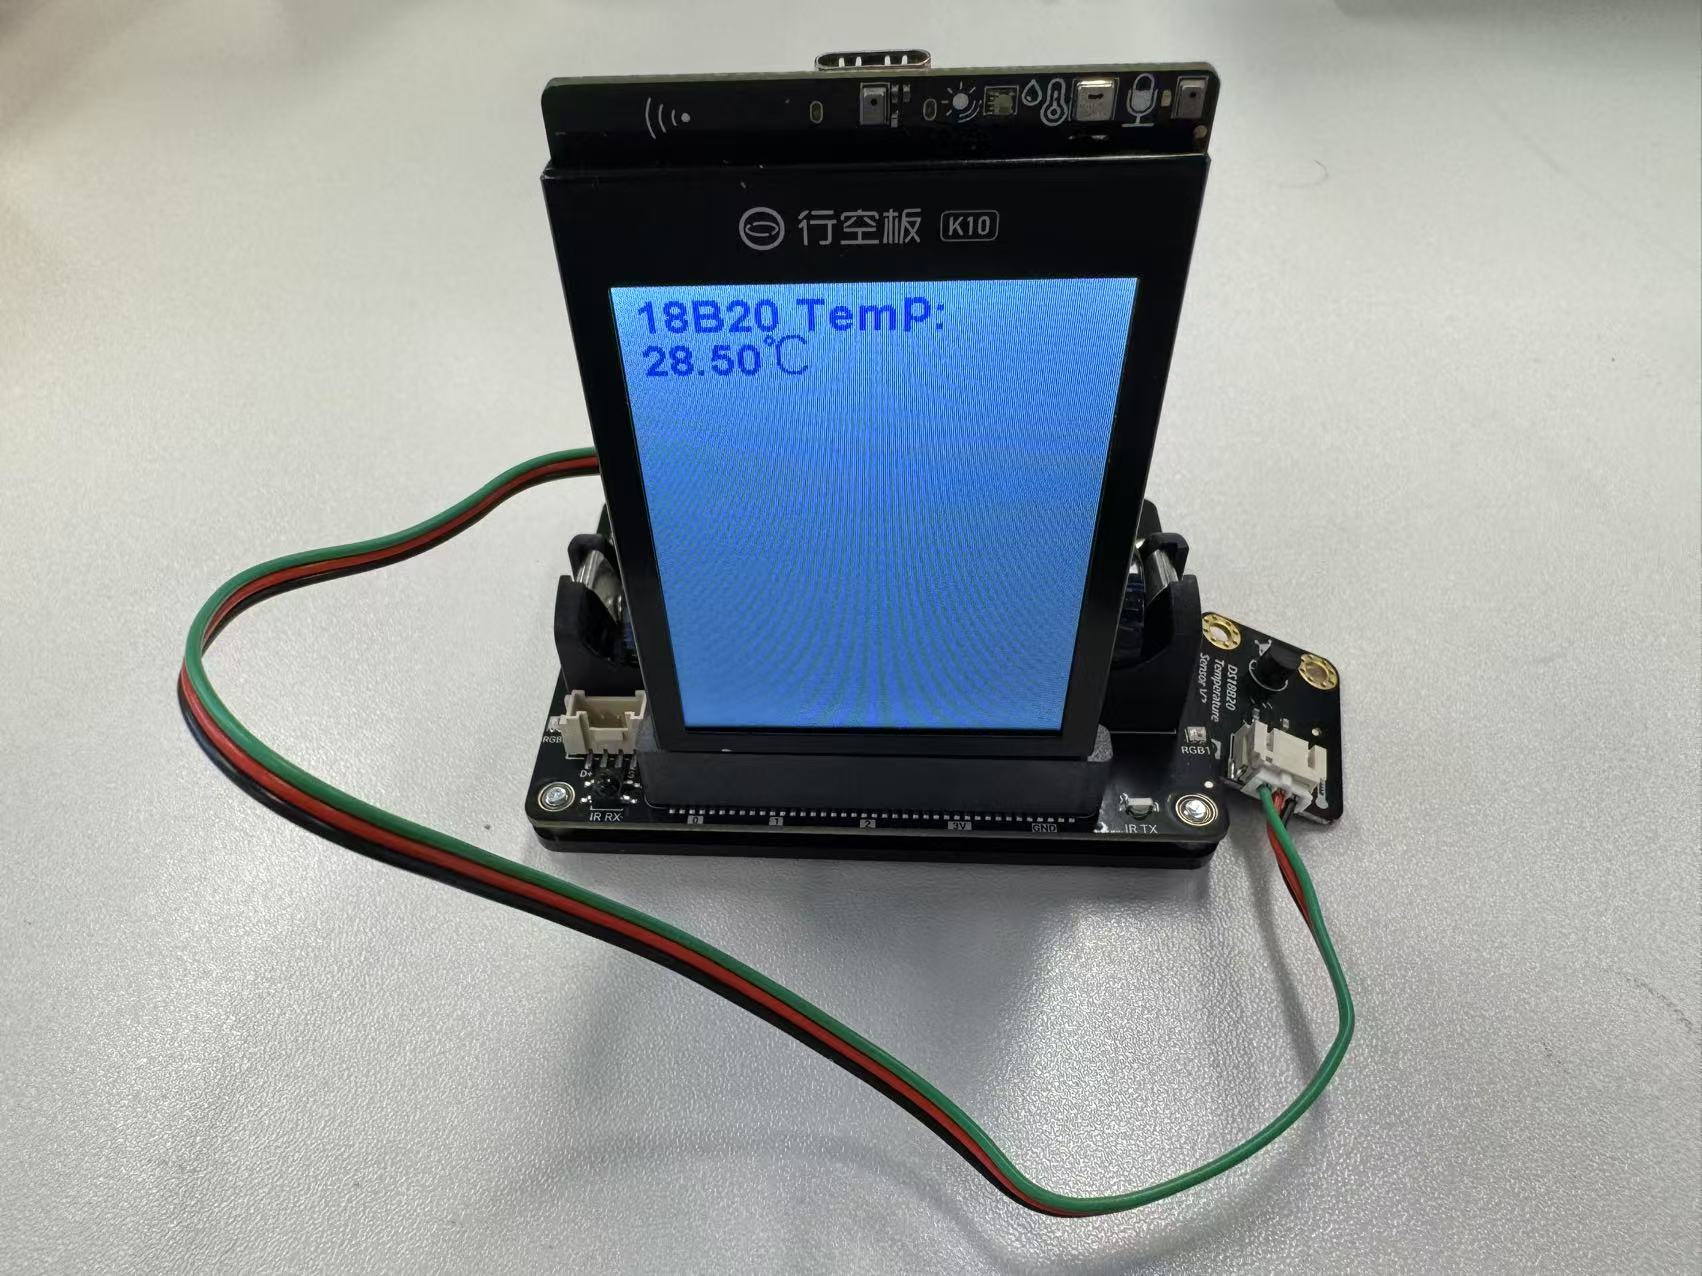
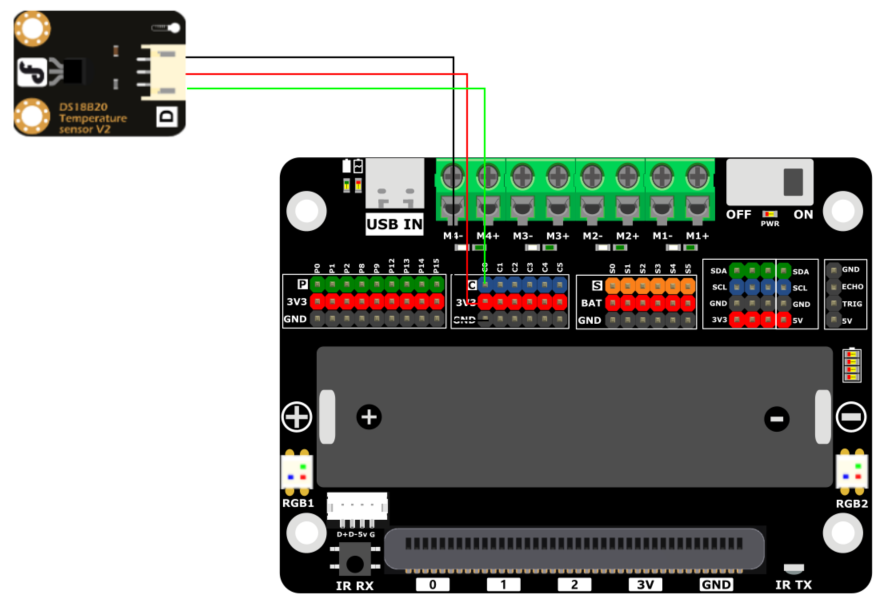
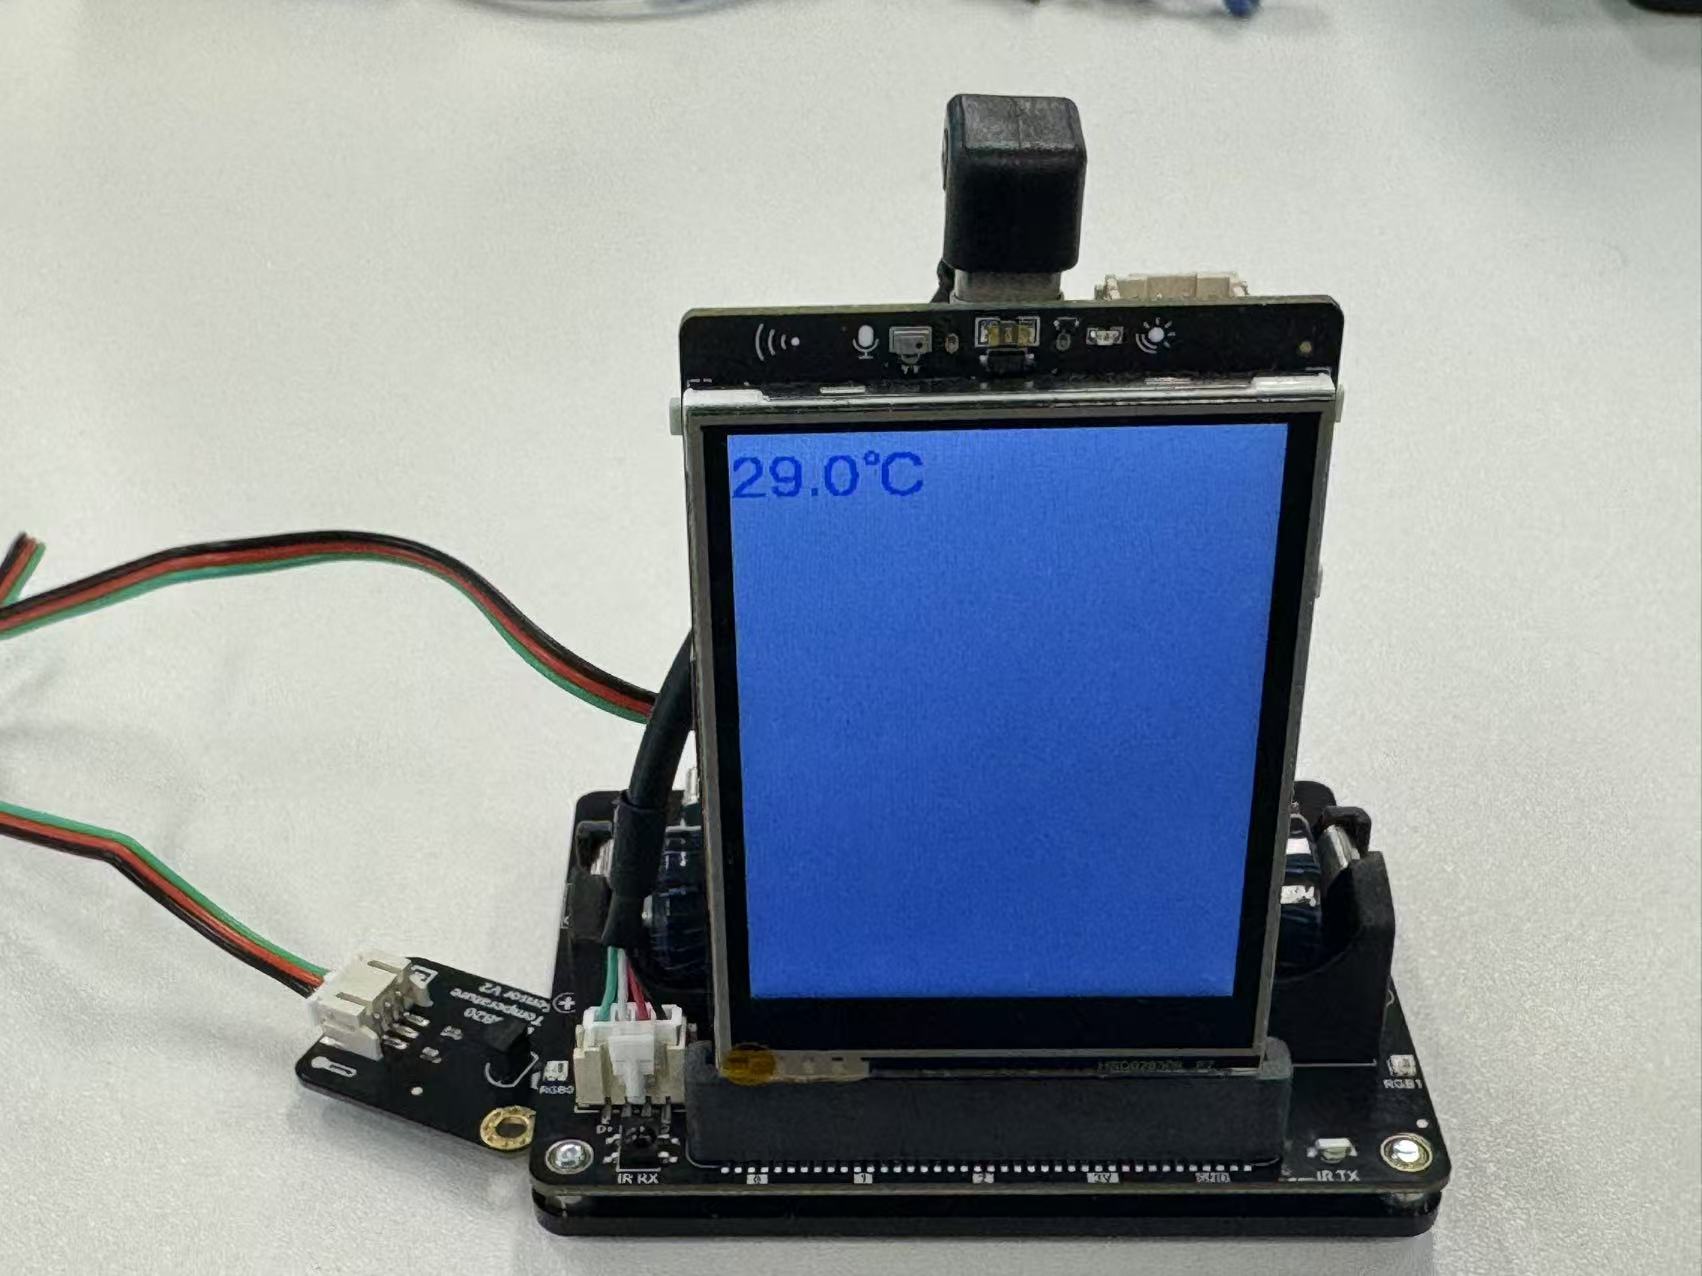
Example 9 DS18B20 Temperature Sensor
Extra hardware prepare
Gravity DS18B20 Digital Temperature Sensor * 1
Hardware connection

Mind+
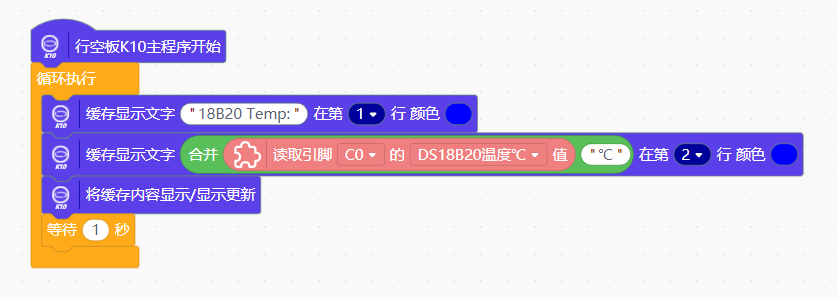
Arduino IDE
#include "unihiker_k10.h"
#include "DFRobot_UnihikerExpansion.h"
DFRobot_UnihikerExpansion_I2C eunihiker(&Wire);
UNIHIKER_K10 k10;
uint8_t screen_dir=2;

void setup() {
  k10.begin();
  while(!eunihiker.begin()){
    Serial.println("NO Deivces !");
    delay(1000);
  } Serial.println("Device connected !");
  eunihiker.setMode(eC0, eDS18B20);
  k10.initScreen(screen_dir);
  k10.creatCanvas();
}
void loop() {
  k10.canvas->canvasText("18B20 Temp:", 1, 0x0000FF);
  k10.canvas->canvasText((eunihiker.get18b20Value(eC0)), 2, 0x0000FF);
  k10.canvas->updateCanvas();
}
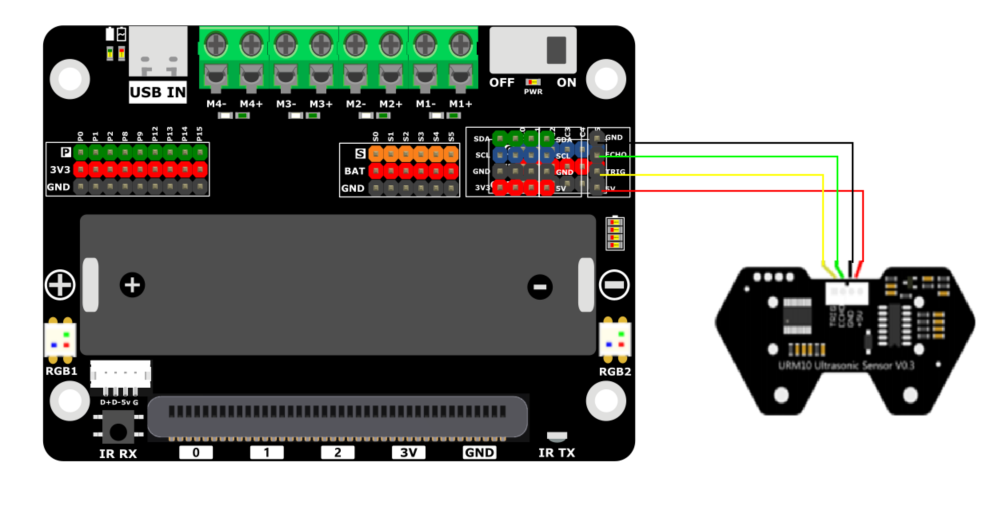
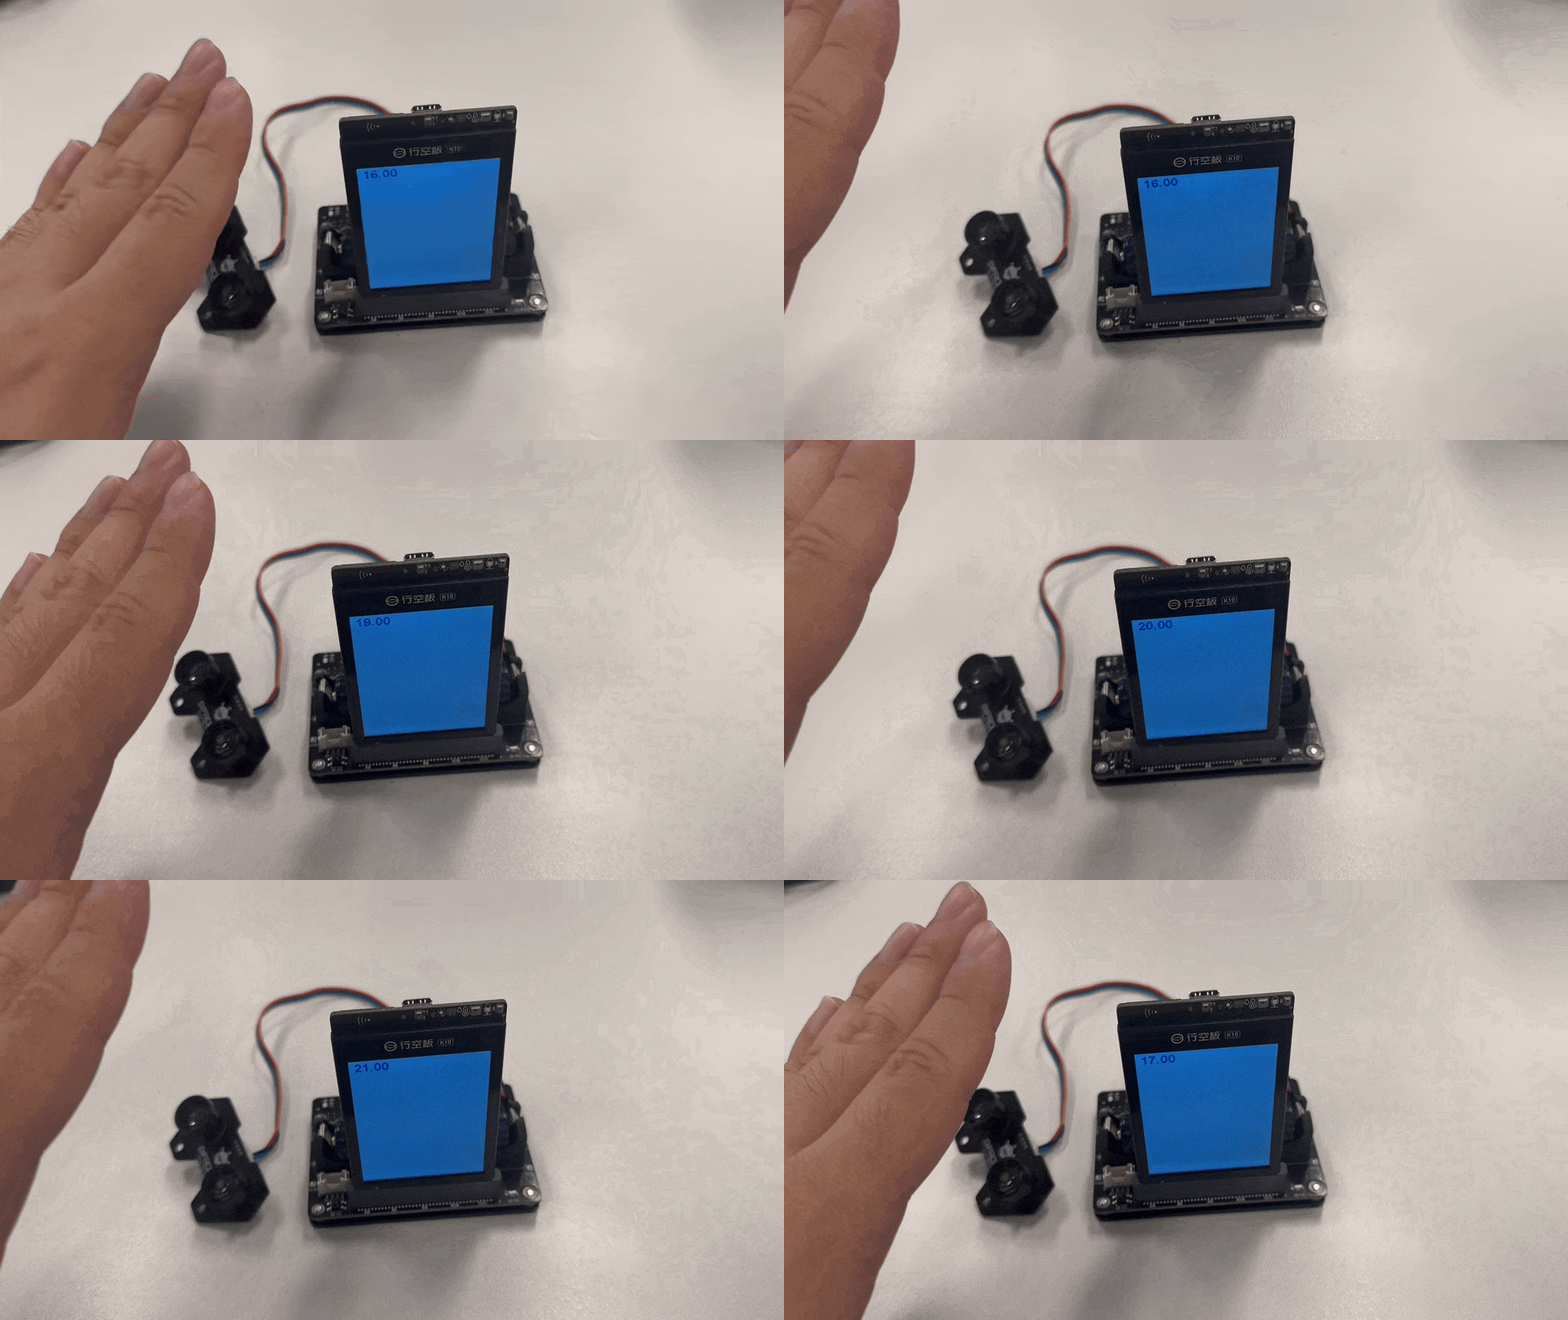
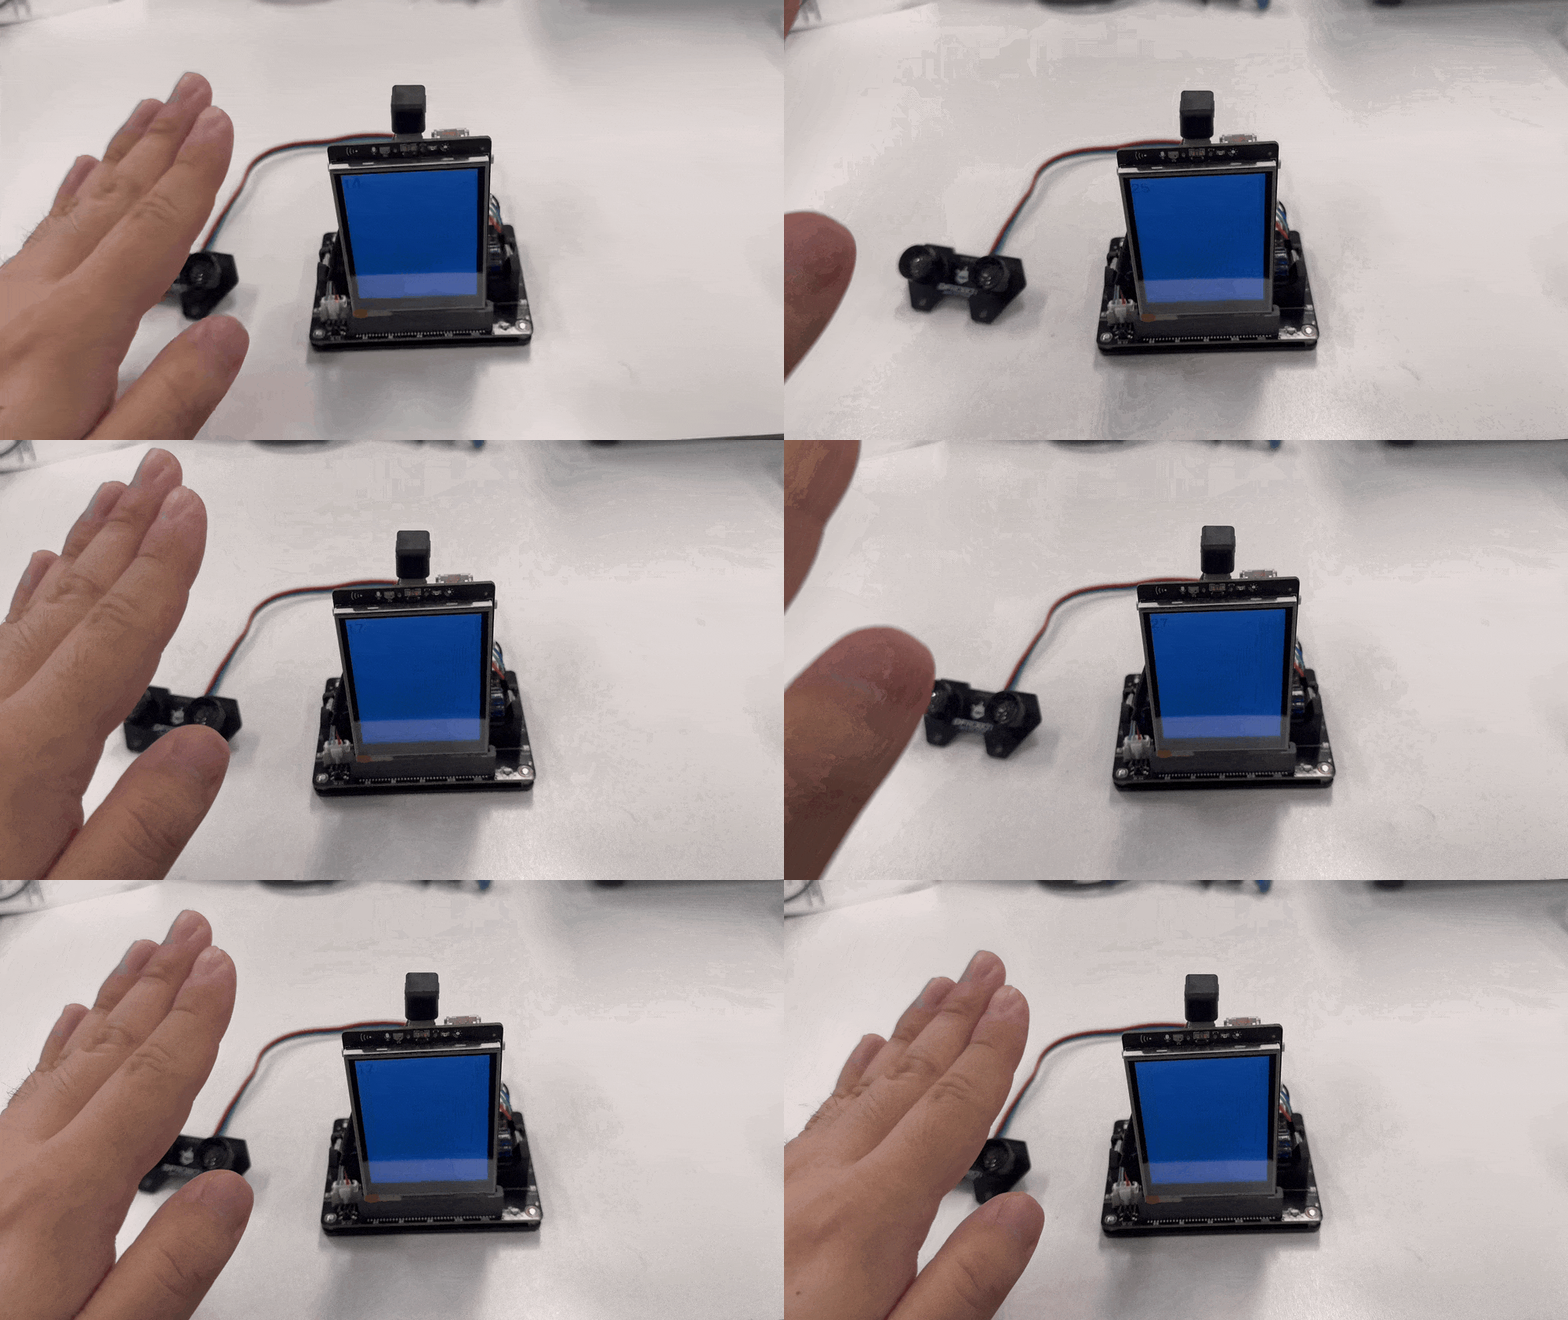
Example 10 Ultrasonic Sensor
Extra Hardware Prepare
TRIG-ECHO Ultrasonic Sensor (TRIG/ECHO Pin need to be separate) * 1
Arduino IDE
#include "unihiker_k10.h"
#include "DFRobot_UnihikerExpansion.h"

DFRobot_UnihikerExpansion_I2C eunihiker(&Wire) ;
UNIHIKER_K10 k10;
uint8_t screen_dir=2;

void setup() {
	k10.begin();
	while(!eunihiker.begin()){delay(1000);}
	k10.initScreen(screen_dir);
	k10.creatCanvas();
}
void loop() {
	k10.canvas->canvasText(eunihiker.getSr04Distance(), 1, 0x0000FF);
	k10.canvas->updateCanvas();
	delay(1000);
}
Unihiker M10
Hardware prepare
- Unihiker M10 * 1
- Unihiker Muti-function expansion board * 1
Note: The multi-functional expansion board requires separate power supply when IN use. It can be powered by installing an 18650 battery or from the USB IN of the expansion board, and the PWR power supply switch needs to be turned on.
Software prepare
- Use Mind+
Mind+ Download
Mind+ user extension:
https://github.com/YeezB/ext-UnihikerExpansion
Copy and paste above URL into the Mind+ offline mode->Extension->User-Ext

- Use other python editor
Python library:
https://gitee.com/dfrobot/DFRobot_UnihikerExpansion
Example 1 Digital Input/Output
Extra hardware prepare
Gravity: Digital LED Light Module * 1
Gravity: Digital Push Button * 1
Hardware connection

Mind+

Python
from pinpong.board import Board
from dfrobot_unihiker_expansion import UnihikerExpansion, IONum, IOType, GpioState
sys.path.append("/root/mindplus/.lib/thirdExtension/drobot_yeezb-unihikerioexpansion-thirdex")

Board("").begin()

eunihiker = UnihikerExpansion()
eunihiker.set_mode(IONum.C0, IOType.GPIO_IN)
eunihiker.set_mode(IONum.C1, IOType.GPIO_OUT)
while True:
    if (eunihiker.get_gpio_state(IONum.C0) == 1):
        eunihiker.set_gpio_state(IONum.C1, GpioState.HIGH)
    else:
        eunihiker.set_gpio_state(IONum.C1, GpioState.LOW)
Example 2 Analog Input
Mind+

Python
import sys
sys.path.append("/root/mindplus/.lib/thirdExtension/drobot_yeezb-unihikerioexpansion-thirdex")
from unihiker import GUI
from pinpong.board import Board
from dfrobot_unihiker_expansion import UnihikerExpansion, IONum, IOType


u_gui=GUI()
Board("").begin()

eunihiker = UnihikerExpansion()
eunihiker.set_mode(IONum.C0, IOType.ADC)
ana=u_gui.draw_text(text=eunihiker.get_adc_value(IONum.C0),x=0,y=0,font_size=20, color="#0000FF")
while True:
    ana.config(text=eunihiker.get_adc_value(IONum.C0))
Example 3 Servo
Extra Hardware Prepare
DFRobot DF9GMS 180° Servo * 1
DFRobot DF9GMS 360° Servo * 1
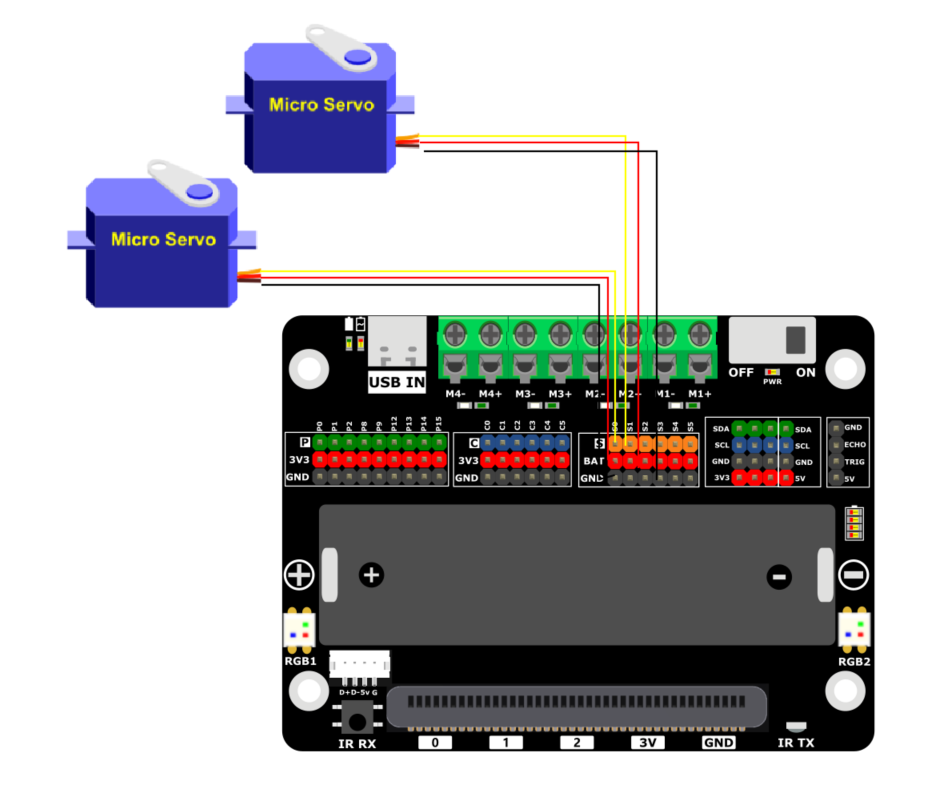
Hardware connection
180° servo connect to S0,360° servo connect to S1
Mind+

Python
import sys
sys.path.append("/root/mindplus/.lib/thirdExtension/drobot_yeezb-unihikerioexpansion-thirdex")
import time
from pinpong.board import Board
from dfrobot_unihiker_expansion import UnihikerExpansion, ServoNum
from pinpong.board import Board
from dfrobot_unihiker_expansion import UnihikerExpansion, ServoNum, Servo360Direction

Board("").begin()

eunihiker = UnihikerExpansion()
eunihiker.set_servo360(ServoNum.SERVO0, Servo360Direction.FORWARD, 50)
while True:
    eunihiker.set_servo_angle(ServoNum.SERVO1,90)
    time.sleep(1)
    eunihiker.set_servo_angle(ServoNum.SERVO1,180)
    time.sleep(1)
Example 4 Onboard RGB LED
Mind+

Python
import sys
sys.path.append("/root/mindplus/.lib/thirdExtension/drobot_yeezb-unihikerioexpansion-thirdex")
import time
from pinpong.board import Board
from dfrobot_unihiker_expansion import UnihikerExpansion, RgbNum

Board("").begin()

eunihiker = UnihikerExpansion()
while True:
    eunihiker.set_ws2812(RgbNum.RGB0, 0x0000FF)
    eunihiker.set_bright(5*25)
    eunihiker.set_ws2812(RgbNum.RGB1, 0x0000FF)
    eunihiker.set_bright(5*25)
    time.sleep(1)
    eunihiker.set_ws2812(RgbNum.RGB0, 0xFF0000)
    eunihiker.set_bright(5*25)
    eunihiker.set_ws2812(RgbNum.RGB1, 0xFF0000)
    eunihiker.set_bright(5*25)
    time.sleep(1)
    eunihiker.set_ws2812(RgbNum.RGB0, 0x00FF00)
    eunihiker.set_bright(5*25)
    eunihiker.set_ws2812(RgbNum.RGB1, 0x00FF00)
    eunihiker.set_bright(5*25)
    time.sleep(1)
Example 5 IR message send/receive
Mind+

Python
import sys
sys.path.append("/root/mindplus/.lib/thirdExtension/drobot_yeezb-unihikerioexpansion-thirdex")
import time
from unihiker import GUI
from pinpong.board import Board
from dfrobot_unihiker_expansion import UnihikerExpansion

u_gui=GUI()
Board("").begin()

eunihiker = UnihikerExpansion()
while True:
    sec = 1
    while not ((sec == 5)):
        eunihiker.send_ir(12345)
        time.sleep(0.1)
        text=u_gui.draw_text(text=eunihiker.get_ir_data(),x=0,y=(sec * 25),font_size=20, color="#0000FF")
        sec = (sec + 1)
    time.sleep(1)
    u_gui.clear()
Example 6 Motor Driver
Extra Hardware prepare
Micro Metal Gear Motor with Connector * 1
Mind+

Python
import sys
sys.path.append("/root/mindplus/.lib/thirdExtension/drobot_yeezb-unihikerioexpansion-thirdex")
import time
from pinpong.board import Board
from dfrobot_unihiker_expansion import UnihikerExpansion, MPeriod, MotorNum

Board("").begin()

eunihiker = UnihikerExpansion()
eunihiker.set_motor_period(MPeriod.MOTOR1_2, 255)
eunihiker.set_motor_period(MPeriod.MOTOR3_4, 255)
while True:
    eunihiker.set_motor_duty(MotorNum.MOTOR1_A, 200)
    eunihiker.set_motor_duty(MotorNum.MOTOR1_B, 0)
    time.sleep(3)
    eunihiker.set_motor_duty(MotorNum.MOTOR1_A, 0)
    eunihiker.set_motor_duty(MotorNum.MOTOR1_B, 200)
    time.sleep(3)
Example 7 Battery capacity
Mind+

Python
import sys
sys.path.append("/root/mindplus/.lib/thirdExtension/drobot_yeezb-unihikerioexpansion-thirdex")
import time
from unihiker import GUI
from pinpong.board import Board
from dfrobot_unihiker_expansion import UnihikerExpansion

u_gui=GUI()
Board("").begin()

eunihiker = UnihikerExpansion()
while True:
    BAT=u_gui.draw_text(text="Battery:",x=0,y=0,font_size=20, color="#0000FF")
    bat=u_gui.draw_text(text=(str(eunihiker.get_battery()) + str("%")),x=0,y=25,font_size=20, color="#0000FF")
    time.sleep(1)
    bat.remove()
Example 8 Temperature&Humidity Sensor
Extra Hardware Prepare
Gravity DHT11 Temature&Humidity Sensor * 1
Gravity DHT22 Temature&Humidity Sensor * 1
Mind+

Python
import sys
sys.path.append("/root/mindplus/.lib/thirdExtension/drobot_yeezb-unihikerioexpansion-thirdex")
import time
from unihiker import GUI
from pinpong.board import Board
from dfrobot_unihiker_expansion import UnihikerExpansion, IONum, IOType

u_gui=GUI()
Board("").begin()

eunihiker = UnihikerExpansion()
eunihiker.set_mode(IONum.C0, IOType.DHT11)
eunihiker.set_mode(IONum.C1, IOType.DHT22)
while True:
    T11=u_gui.draw_text(text=(str((str("DHT11 Tem:") + str(eunihiker.get_dht_value(IONum.C0).temperature))) + str("℃")),x=0,y=0,font_size=18, color="#0000FF")
    H11=u_gui.draw_text(text=(str((str("DHT11 Hum:") + str(eunihiker.get_dht_value(IONum.C0).humidity))) + str("%")),x=0,y=25,font_size=18, color="#0000FF")
    T22=u_gui.draw_text(text=(str((str("DHT22 Tem:") + str(eunihiker.get_dht_value(IONum.C1).temperature))) + str("℃")),x=0,y=50,font_size=18, color="#0000FF")
    H22=u_gui.draw_text(text=(str((str("DHT22 Hum:") + str(eunihiker.get_dht_value(IONum.C1).humidity))) + str("%")),x=0,y=75,font_size=18, color="#0000FF")
    time.sleep(1)
    u_gui.clear()
Example 9 DS18B20 Digital Temperature Sensor
Extra Hardware Prepare
Gravity: DS18B20 Digital Temperature Sensor * 1
Mind+

Python
import sys
sys.path.append("/root/mindplus/.lib/thirdExtension/drobot_yeezb-unihikerioexpansion-thirdex")
from unihiker import GUI
from pinpong.board import Board
from dfrobot_unihiker_expansion import UnihikerExpansion, IONum, IOType

u_gui=GUI()
Board("").begin()

eunihiker = UnihikerExpansion()
eunihiker.set_mode(IONum.C0, IOType.DS18B20)
bat=u_gui.draw_text(text=(str(eunihiker.get_18b20_value(IONum.C0)) + str("℃")),x=0,y=0,font_size=20, color="#0000FF")
while True:
    bat.config(text=(str(eunihiker.get_18b20_value(IONum.C0)) + str("℃")))
Example 10 Ultrasonic Sensor
Extra Hardware Prepare
TRIG-ECHO Ultrasonic Sensor (TRIG/ECHO Pin need to be separate) * 1
Mind+

Python
import sys
sys.path.append("/root/mindplus/.lib/thirdExtension/drobot_yeezb-unihikerioexpansion-thirdex")
import time
from unihiker import GUI
from pinpong.board import Board
from dfrobot_unihiker_expansion import UnihikerExpansion


u_gui=GUI()
Board("").begin()

eunihiker = UnihikerExpansion()
while True:
    us=u_gui.draw_text(text=eunihiker.get_sr04_distance(),x=0,y=0,font_size=20, color="#0000FF")
    time.sleep(0.5)
    u_gui.clear()
