
Example Code for Arduino-Low power Recognize Faces, Palm Prints
Arduino low power biometric demo using DFRobot FP02 offline AI vision sensor and DFRduino UNO R3, leveraging its 0–50 cm IR proximity auto‑sleep and local AI face or palm recognition for secure, privacy‑friendly access control.
Hardware Preparation
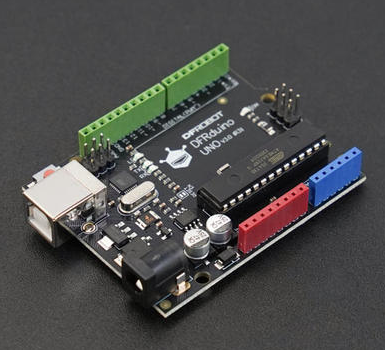
- DFRduino UNO R3 x 1
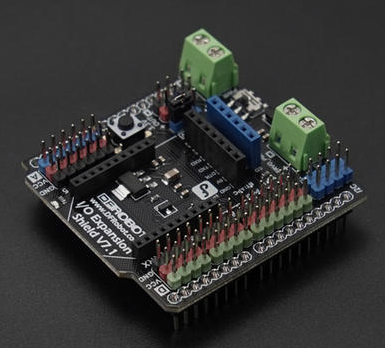
- Gravity: IO Expansion Shield for Arduino V7.1 x 1
- FP02 Offline AI Vision Recognition Sensor (Face & Palm Vein) x 1
- MX1.25mm to 2.54mm DuPont cable x1
Software Preparation
- Arduino IDE
- Download DFRobot_Biometric library
Wiring Diagram

Other Preparation Work
The sensor has a built-in infrared detection function (detection distance 0-50cm). When the infrared sensor detects no one or no obstacles in front, it enters standby mode and operates with low power consumption. When someone is detected, it triggers a recognition attempt.
White light on: Indicates recognition has started.
Green light on: Indicates successful recognition; corresponding information will be printed on the serial port.
Red light on: Indicates recognition timeout; simply re-trigger recognition.
The infrared sensing pin can be defined by the user via IR_PIN.
Sample Code
/*!
 * @file sen0737Special.ino
 * @brief the example show some function that SEN0737 Independently owned
 * @details When an object is detected, the module automatically starts recognition.
 * @n The light is off when idle, turns white during recognition, green upon success, and red upon failure
 * @copyright Copyright (c) 2026 DFRobot Co.Ltd (http://www.dfrobot.com)
 * @license The MIT License (MIT)
 * @author [Olive](feng.yang@dfrobot.com)
 * @version V1.0.0
 * @date 2026-06-02
 * @url https://github.com/DFRobot/DFRobot_Biometric
 */

#include "DFRobot_Biometric.h"
#include "string.h"
/* -----------------------------------------------------------------------------------------------------
  *    board   |             MCU                |   Leonardo/Mega2560/M0  |   ESP8266  |     ESP32     |
  *     VCC    |            3.3V/5V             |          VCC            |    VCC     |      VCC      |
  *     GND    |              GND               |          GND            |    GND     |      GND      |
  *     RX     |              TX                |      Serial1 TX1        |    5/D6    |  Serial2 TX1  |
  *     TX     |              RX                |      Serial1 RX1        |    4/D7    |  Serial2 RX1  |
  * ----------------------------------------------------------------------------------------------------*/
/* Baud rate cannot be changed , it is 115200 */

#if defined(ESP8266) || defined(ARDUINO_AVR_UNO)
#define SOFT_RX_PIN 4
#define SOFT_TX_PIN 5
#include <SoftwareSerial.h>
SoftwareSerial ModuleSerial(SOFT_RX_PIN, SOFT_TX_PIN);
#elif defined(ESP32)
#define RX_PIN       16
#define TX_PIN       17
#define ModuleSerial Serial2
#else
#define ModuleSerial Serial1
#endif

DFRobot_Biometric face(ModuleSerial);
#define IR_PIN 8    //Configure the infrared pin,it is up to your mcu

void setup()
{
#if defined(ESP32)
  ModuleSerial.begin(115200, SERIAL_8N1, RX_PIN, TX_PIN);
#else
  ModuleSerial.begin(115200);
#endif

  Serial.begin(115200);      //Start serial 1, for information printing
  pinMode(IR_PIN, INPUT);    //Configure the infrared pin as an input with a pull-down resistor
  delay(1500);               //Wait for module to start,
}
uint8_t j = 0;
void    loop()
{
  // put your main code here, to run repeatedly:
  while (face.checkState() == false) {    //Determine whether the module is ready
    Serial.println(" Module not ready !");
    delay(200);
  }
  //Print once on the first loop iteration
  if (j++ < 1) {
    Serial.println(" Module ready !");
    Serial.println("-------------------------------------------------------------------------------");
  }
  //Power-on and normal state
  face.ledColor(COLOR_WHITE, LED_OFF);
  face.ledColor(COLOR_RED, LED_OFF);
  face.ledColor(COLOR_GREEN, LED_OFF);
  while (digitalRead(IR_PIN) == LOW) {
    delay(500);
  }
  //Object detected: the white light indicates the detection state
  face.ledColor(COLOR_GREEN, LED_OFF);
  face.ledColor(COLOR_WHITE, LED_ON);
  face.ledColor(COLOR_RED, LED_OFF);
  DFRobot_Biometric::sId_t user   = { 0, DFRobot_Biometric::eFaceUser, DFRobot_Biometric::eRoleNormal, { 0 } };    ///< Store the recognized user information
  int8_t                   result = 0;
  Serial.println("Start recognition. Face the camera directly. Palm vein: 10-20cm, Face: 20-90cm");
  result = face.getRecognitionResult(&user);
  //Determine the execution result
  if (result == 1) {
    //On successful recognition, the green indicator light stays on for two seconds
    face.ledColor(COLOR_GREEN, LED_ON);
    face.ledColor(COLOR_RED, LED_OFF);
    face.ledColor(COLOR_WHITE, LED_OFF);
    Serial.println("Success! This is information of the user:");
    Serial.print("id:");
    Serial.println(user.id);
    Serial.print("userName:");
    Serial.println(user.userName);
    Serial.print("user kind:");
    if (user.kind == face.eFaceUser) {
      Serial.println("face user");
    } else if (user.kind == face.ePalmUser) {
      Serial.println("palm user");
    }
    Serial.print("userClass:");
    if (user.isAdmin == face.eRoleNormal) {
      Serial.println("Normal user");
    } else if (user.isAdmin == face.eRoleAdmin) {
      Serial.println("Administrator");
    }
    delay(2000);
  } else if (result == 2) {
    Serial.println("User recognition timeout");
  } else if (result == NO_ACK) {
    Serial.println("No response from module");
  } else if (result == 3) {
    Serial.println("Recognized user not found");
  }
  if (result != 1) {
    //On failed recognition, the green indicator light stays on for two seconds
    face.ledColor(COLOR_GREEN, LED_OFF);
    face.ledColor(COLOR_RED, LED_ON);
    face.ledColor(COLOR_WHITE, LED_OFF);
    delay(2000);
  }
  Serial.println("-------------------------------------------------------------------------------");
  Serial.println("");
}
Result
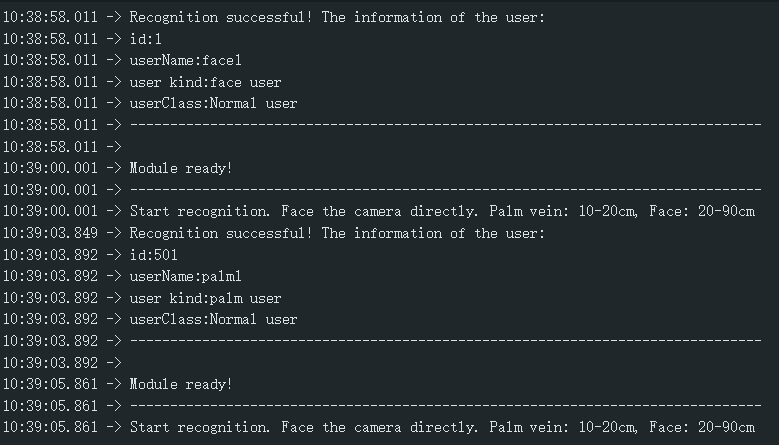
The system identifies detected faces and palm prints, and prints the corresponding information via serial port.
Was this article helpful?