Configuration and Burning Guide
This guide provides a detailed walkthrough for configuring and burning the Gravity: BLE sensor beacon using the NanoBeaconConfigTool. It includes customization of advertising data formats (iBeacon, Eddystone, Custom), ADC and GPIO configuration, hardware connections, and burning procedures. The article emphasizes careful data verification before burning, as the process is irreversible, and highlights the use of 'Run in RAM' for testing configurations before finalization.
Configure Sensor Beacon
The module can only be burned once, so don't click "Burn/Program" before confirming the configuration information.
Test the module through "Run in RAM", which can be used infinitely before burning. The system will reset when powered off.
-
Download NanoBeaconConfigTool_V3.2.11 and run NanoBeaconConfig.exe.
-
Advertising
This Gravity: BLE sensor beacon supports three advertising sets. Tick to Enable it. One of them is enabled by default; click Edit to enter the config page.
-
Advertising Set#1 - Edit - Advertising Data
Three data formats are supported: iBeacon, Eddystone and Custom. This tutorial mainly uses custom data format.
-
Advertising Set#1 - Edit - Advertising Data - Custom Settings
Check "Device Name", and enter "Gravity: Sensor Beacon" or other names. So later it will be easy to scan and find the device on the mobile phone or ESP32 by name.
Check "Manufacturer Specific Data", and click "EDIT" to configure data.
-
Advertising Set#1 - Edit - Advertising Data - Custom Settings - EDIT
Only one analog data is configured here. Select "ADC CH1" in the drop-down menu, check "Big Endian", click "Append to Data", and then "0x<ADC CH1 2byte 1 0>" appears in the window. Click OK to exit.
-
Advertising Set#1 - Edit - Advertising Parameters
The advertising interval and address are set here. Make changes as required, and click OK to exit when done. Now the advertising data format is configured, and the module will broadcast data once every 1s.
-
ADC
Next, configure ADC. The Gravity: BLE sensor beacon uses IO5 for analog acquisition, so enable "ADC Channel 1 MPGIO 5" in the ADC config page, and click Edit to set.
-
ADC - ADC Channel 1 MPGIO 5 - Edit
Change the unit to 0.001 for easy calculation, which has little effect on the accuracy. But if high accuracy is required, leave it alone. Since the analog input voltage is divided (2.06) in the circuit, it is necessary to remap the divided voltage value.
Change Value of 1.4V to 2.898
Change Value of 0.4V to 0.828
Now the ADC sampling config is completed, and the data broadcasted by the beacon will be the voltage of the "sensor signal input"; unit is mV.
-
GPIO
Since MGPIO 5 serves as ADC input, it needs to be configured as "disable".
MGPIO 6 will be used as a power supply for the sensor, so configure it as "output high" "pull up" and "latch" to keep it outputting a high 3.3V for powering sensor.
-
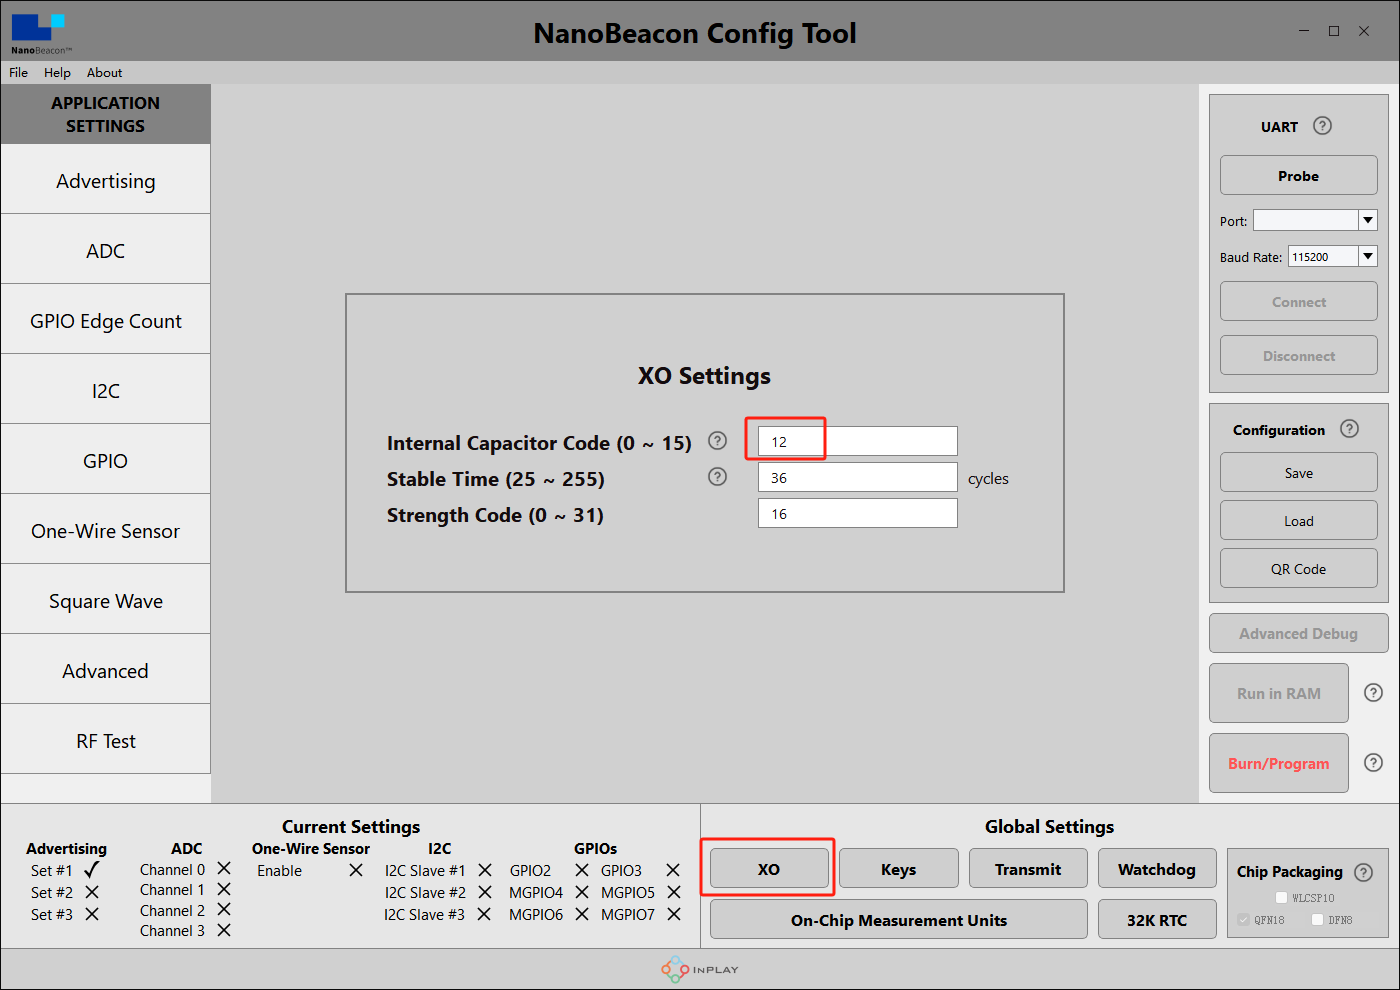
Crystal Capacitance Matching
The NanoBeaconConfig Tool can be set to match the crystal capacitance, and in conjunction with our circuit, in order to keep the frequency bias at an optimal level, we recommend that you change the following two parameters to 12.
-
Check Config
As shown at the lower left corner of the page, Set #1, ADC Channel 1, MGPIO5 and MGPIO6 are enabled.
-
Hardware connection
Connect hardware according to the connection diagram.
-
Connect module to PC
Click "Probe" at the upper right corner to refresh the port, then select the corresponding port, and click "Connect". A pop-up window will appear after a successful connection.
-
Run Test
Click "Run in RAM", and a pop-up window will appear when it's done.
Note: The module can only be burned once, so don't click "Burn/Program" before confirming the configuration information. The module can be tested through "Run in RAM", which can be used infinitely before burning. The system will reset when powered off.
Confirm Data & Burn
- Note: The module can only be burned once, skip the step if you're just for function test.
- The data above broadcast in the custom format. For configuring other data formats, please refer to software specifications for details.
- Check and confirm data, then burn it into the chip.
- Click the "Burn/Program" button at the lower right to burn codes; the corresponding pop-up window will appear when done.
- After burning, you can disconnect the module from the programming device and power the module with batteries.

Was this article helpful?