
[UNIHIKER K10][Arduino IDE][C++] Examples for HUSKYLENS 2
Install Arduino IDE, add the UNIHIKER K10 SDK URL in Preferences, then install the K10 board and HUSKYLENS2 library; it’s like wiring and configuring a smart AI lab on a single teaching-friendly board.
1.Introduction
1.1 Introduction to Arduino IDE
Arduino IDE is a programming software specifically designed for the Arduino open-source hardware platform, used to write, compile, and upload programs to Arduino main control boards (such as UNO, MEGA, Nano, ESP32, etc.). It is the core tool for the development of all Arduino projects.
Arduino IDE official website: https://www.arduino.cc/en/software/
1.2 Introduction to UNIHIKER K10
UNIHIKER K10 is a development learning board specifically designed for quick experience and learning of artificial intelligence. It adopts 100% domestic chips with independent intellectual property rights, meeting the teaching needs of programming, Internet of Things, and artificial intelligence in information technology courses. The board integrates an LCD color screen, Wi-Fi and Bluetooth, a camera, microphone, speaker, RGB indicator light, various sensors, and rich expansion interfaces. With highly integrated onboard resources, it enables easy implementation of sensor control, IoT applications, and AI projects such as face recognition, voice recognition, and voice synthesis without requiring additional equipment during teaching.
UNIHIKER K10 purchase link: click here.
2. Hardware Preparation
Materials Needed
2.1 Wiring Diagram
Prepare one USB data cable and one 4-pin white silicone wire. Connect the computer and UNIHIKER K10 with the USB data cable. Use the 4-pin white silicone wire to connect UNIHIKER K10 and HUSKYLENS 2 first, then use an additional USB data cable to connect the USB-C interface of HUSKYLENS 2 to the power supply to power HUSKYLENS 2. Refer to the wiring diagram below for reference.
If using UART mode, we recommend using the K10-compatible Edge Connector Expansion Board as well.

3. Software Preparation
3.1 Install UNIHIKER K10 SDK
Step 1: Download Arduino IDE from the official website: https://www.arduino.cc/en/software.
Install Arduino IDE SDK
After downloading, UNIHIKER K10 will be integrated into Arduino IDE as an SDK (Software Development Kit).
SDK URL: https://downloadcd.dfrobot.com.cn/UNIHIKER/package_unihiker_index.json
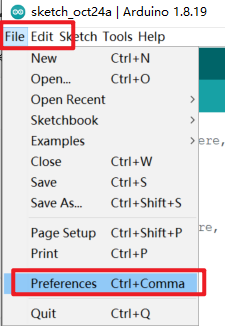
In the Arduino IDE, open "File->Preference".
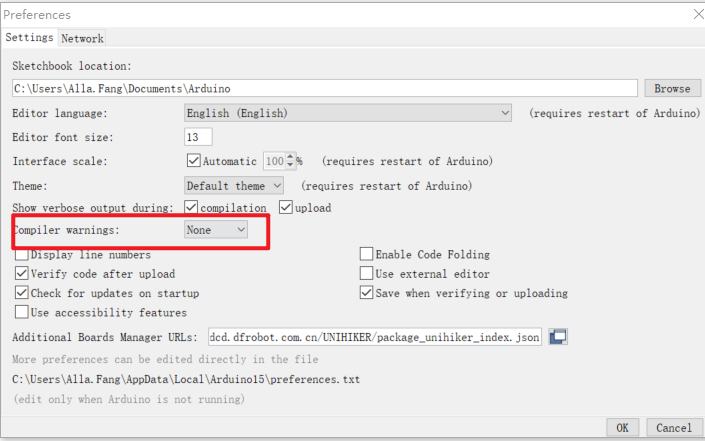
Set "Compiler warnings" to none.
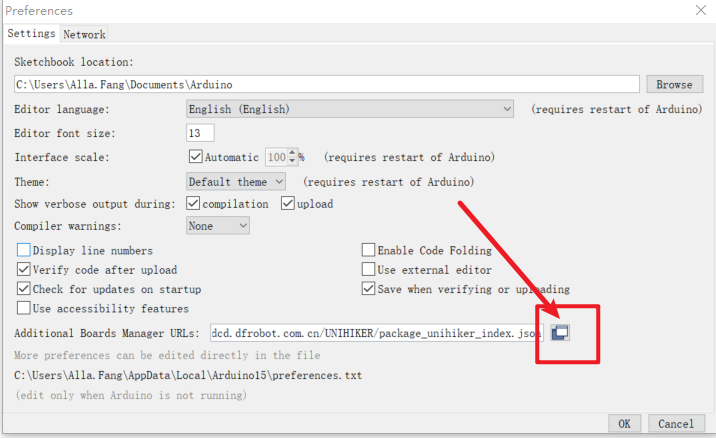
Click the button indicated by the arrow in the image below to add the SDK URL.
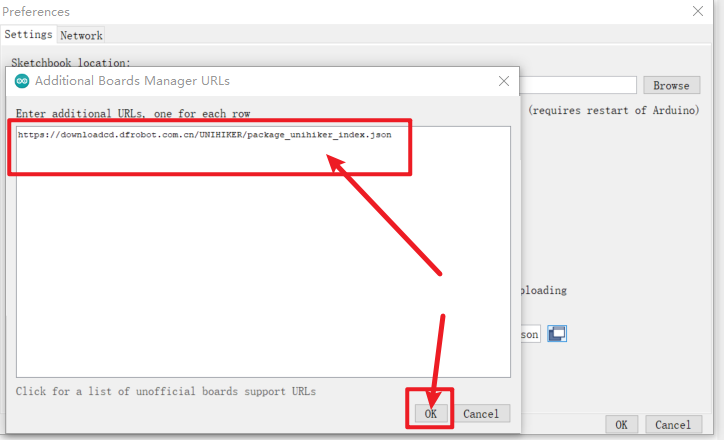
Please add the SDK URL above this document on a new line in the dialog box.
The provided download link is: https://downloadcd.dfrobot.com.cn/UNIHIKER/package_unihiker_index.json.
Finally, click OK.
Open "Tools->Board->Boards Manager".
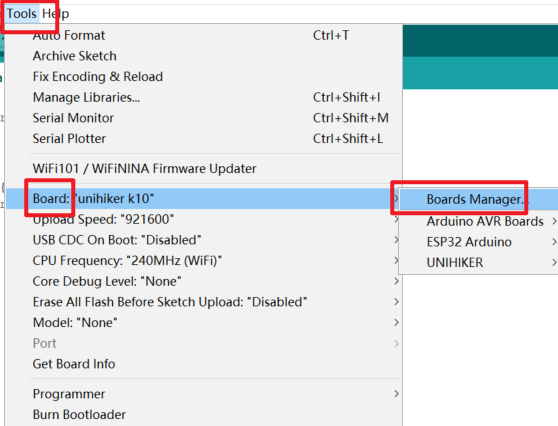
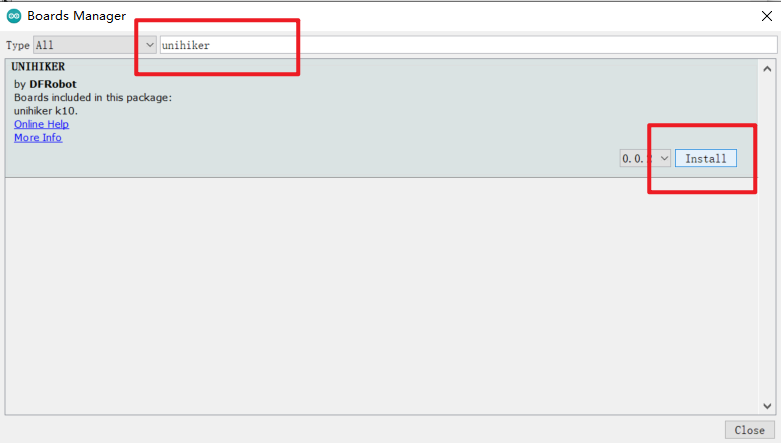
Search for "unihiker" in the dialog box and click Install to install.
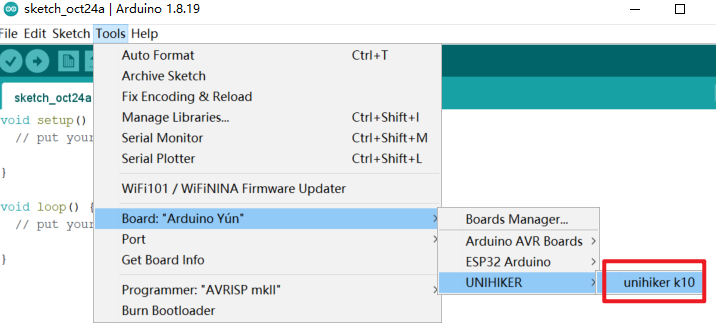
Once installation is complete, select UNIHIKER K10 in the Arduino IDE to begin development.
3.2 Loading HUSKYLENS 2 Library
Step 1: First, download the HUSKYLENS 2 Arduino Library.Click here to download.
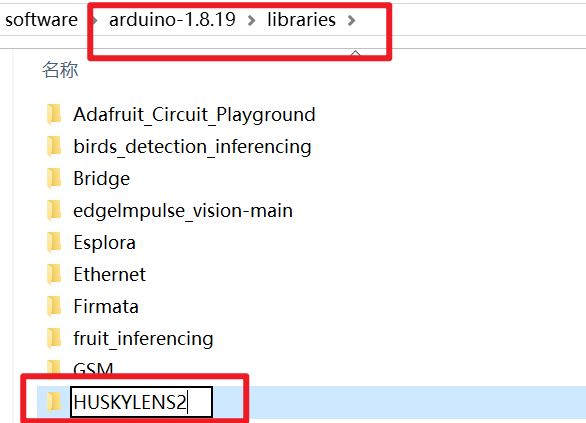
Step 2: Unzip the downloaded file and place it in the "libraries" folder directory of your Arduino IDE installation, then rename the extracted folder to "HUSKYLENS2".
Was this article helpful?