
Instruction
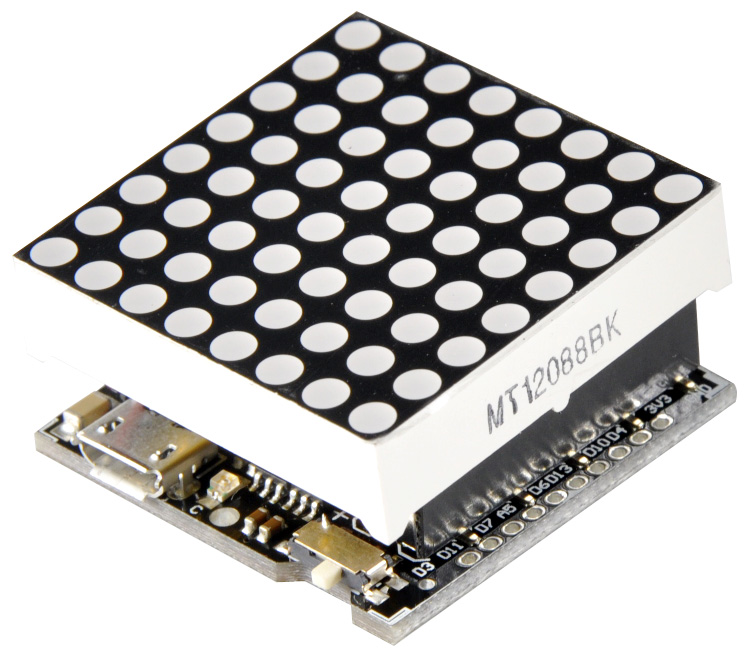
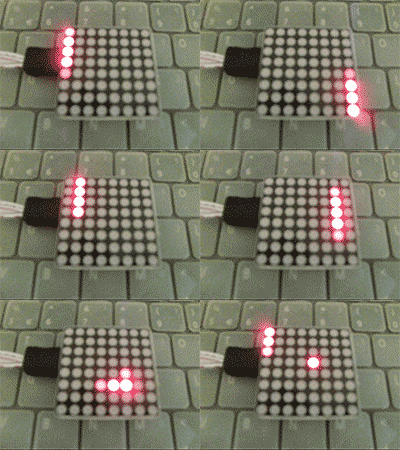
A brand new way to play with 8*8 matrix! Put your board aside after uploading. This small matrix has a quicker & easier way of displaying what you want. Tiny, portable, with microcontroller, display & power supply included, making it more convenienient to play with. You can programme whatever you want to display according to the sample codes in Wiki page.For example, a beating heart, a smile face, or even a slot machine. It can be a gift to your girlfriend, children, the choice is up to you. No need to connect other jumper cables & microcontroller. Find this cool little blittering dice in the bar, in a party... Now it's your turn to give it a new life.
Specification
- MCU: Atmega8
- Led color: red
- Programmable hang decorations
- Charging circuit build in
- Lipo battery x1
- Xbee socket x1
- 8*8 matrix module x1
- Size: 32x32mm
Sample Code
Library for sample code
- Put the <led_8x8.h>in the same file of the sample codes
/**************** start of led_8x8.h ********************/
/*
 *  created: 2013-06-14
 *  by: adrian
 *
 */
#include <Arduino.h>

const uint8_t row[8] = {9, 8,  4, 17, 3, 10, 11,  6};
const uint8_t col[8] = {2, 7, 19, 5, 13, 18, 12, 16};

//init 8x8 led
void led_init (void) {
    for (int pin = 0; pin<8; pin++)  {
        pinMode (row[pin], OUTPUT);
        pinMode (col[pin], OUTPUT);
        digitalWrite (row[pin], LOW);
        digitalWrite (col[pin], HIGH);
    }
}

//display one led
void led_xy_on (int x, int y) {
    digitalWrite (row[x], HIGH);
    digitalWrite (col[y], LOW);
    digitalWrite (col[y], HIGH);
    digitalWrite (row[x], LOW);
}

//display one led with a time
void led_xy_time (int x, int y, int time) {
    for (int t=0; t<=time; t++) {
        digitalWrite (row[x], HIGH);
        digitalWrite (col[y], LOW);
        digitalWrite (col[y], HIGH);
        digitalWrite (row[x], LOW);
    }
}

//display one led with a state
void led_xy_state (int x, int y, int state) {
    digitalWrite (row[x], HIGH);
    digitalWrite (col[y], !state);
    digitalWrite (col[y], HIGH);
    digitalWrite (row[x], LOW);
}

//display one picture
void led_pic (int pix[8][8]) {
    for (int x=0; x<8; x++)
        for (int y=0; y<8; y++)
            led_xy_state (x, y, pix[x][y]);
}

//loop displays a set of pictures in pix[][8][8];
void led_pix (int pix[][8][8], int pmax, int time) {
    for (int p=0; p<pmax; p++)  //picture from 0 to pmax
        for (int t=0; t<time; t++)  //delay
            for (int x=0; x<8; x++)
                for (int y=0; y<8; y++)
                    led_xy_state (x, y, pix[p][x][y]);
}


//open all led
void led_all_on () {
    for (int i=0; i<8; i++) {
        digitalWrite (row[i], HIGH);
        digitalWrite (col[i], LOW);
    }
}

/***************** end of led_8x8.h ***********************/
Sample code
/*************** start of sample3.c ******************/
/*
 *  created: 2013-06-14
 *  by:  adrian
 *      loop displays a volution
 */

#include <Arduino.h>
#include "led_8x8.h"

void setup () {
    led_init ();
}

void loop () {
    int left = 0;
    int right = 7;
    int time = 500;

    for (int x=0,y=0 ;left<right; left++, right--) {
        for (x=left; x<=right; x++)
            led_xy_time (x, y, time);
        x--;
        for (y=left; y<=right; y++)
            led_xy_time (x, y, time);
        y--;
        for (x=right; x>=left; x--)
            led_xy_time (x, y, time);
        x++;
        for (y=right; y>left; y--)
            led_xy_time (x, y, time);
        y++;
    }
}
/*************** end of sample3.c ******************/