Introduction
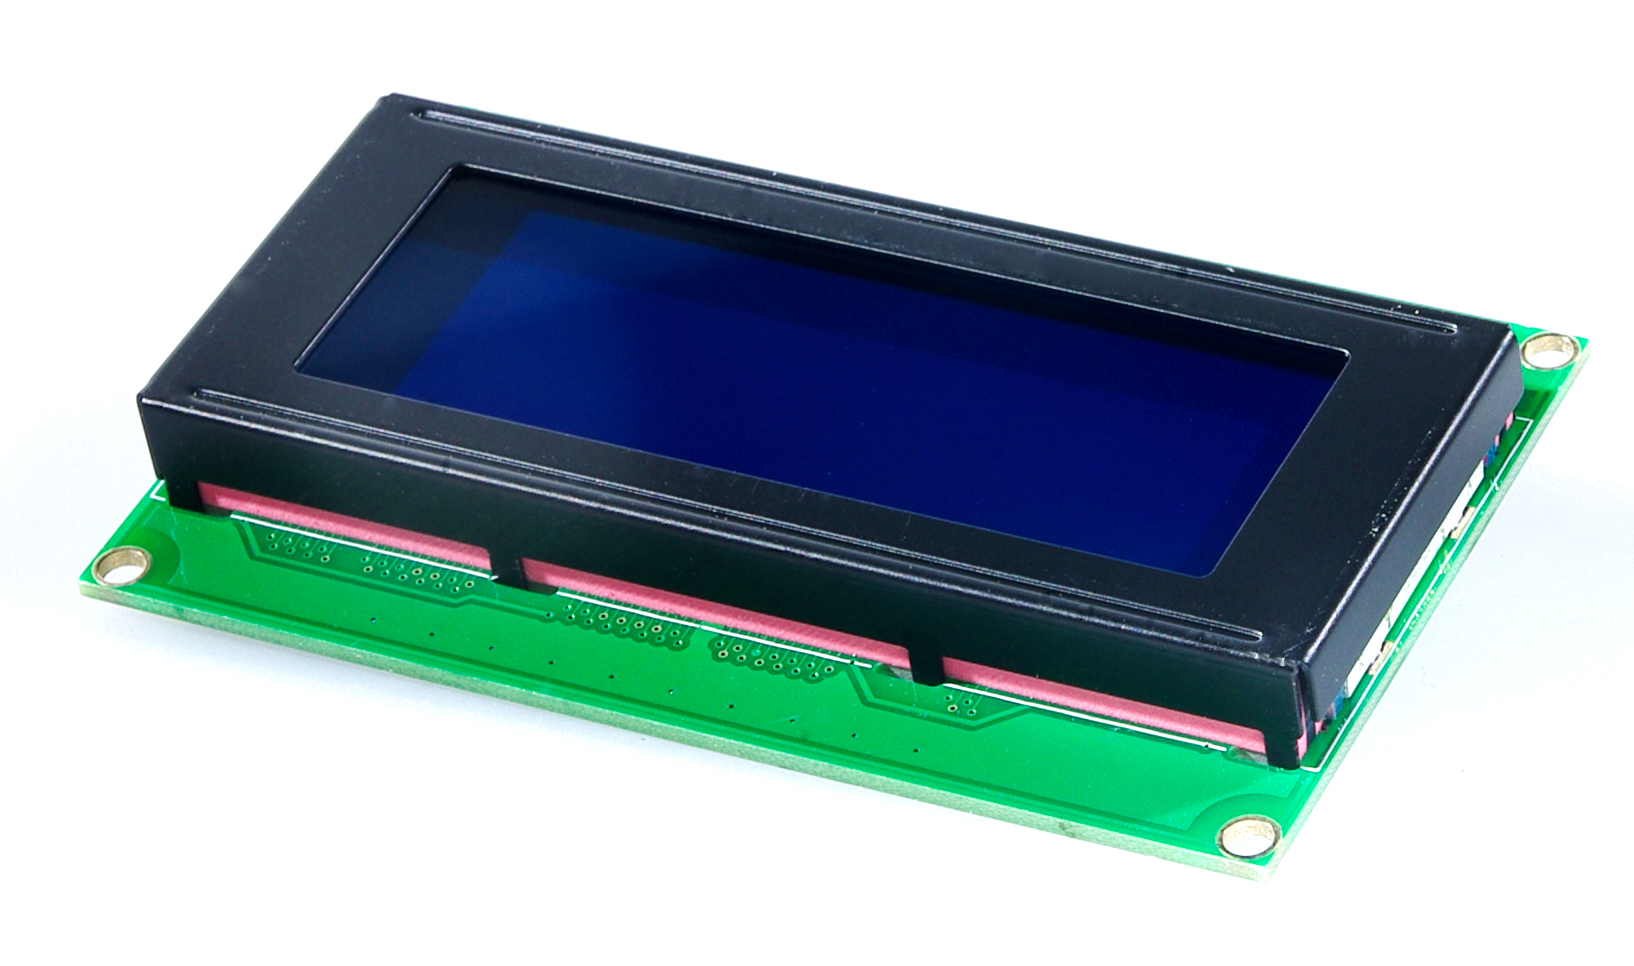
I2C/TWI LCD2004 module compatible with Gadgeteer is a cool lcd display with a high speed I2C serial bus from DFRobot. With the limited pin resources, your project may be out of resources using normal LCD shield. The LCD display is a 4x20 character STN white display with a blue LED backlight.
With this I2C interface LCD module, you only need 2 lines (I2C) to display the information.If you already have I2C devices in your project, this LCD module actually cost no more resources at all. Fantastic for Arduino based project.
This board is able to be powered by 5V or 3.3V which make it compatile with both Gadgeteer, Arduino DUE 3.3V system and standard Arduino UNO/ Arduino Mega 5V system.
Specification
- I2C Address: 0x20-0x27(0x20 default)
- Number of Characters: 20 characters x 4 Lines
- Blue LED backlight with white char color
- Adjustable contrast
- Supply voltage: 5V(via Pin) 3.3V(via IDC10)
- Interface: IIC/TWI x1,IDC10 x2
- View direction: Wide viewing angle
- Dot size: 0.55 x 0.55 mm
- Dot pitch: 0.60 x 0.60 mm
- Character size: 2.96 x 4.75 mm
- Character pitch: 3.55 x 5.35 mm
- Size: 98x60x24mm
Contrast Adjust
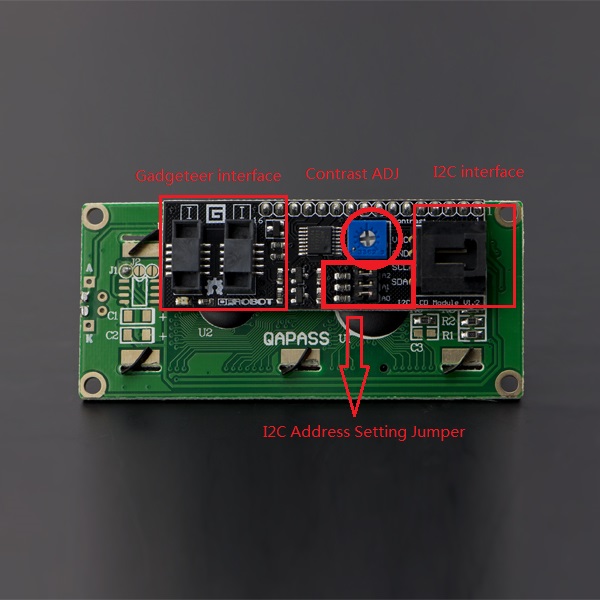
The contrast can be adjusted by the potential-meter displayed in the following picture.

I2C Address Setting
| A2 | A1 | A0 | 地址 |
|---|---|---|---|
| 0 | 0 | 0 | 0x20 |
| 0 | 0 | 1 | 0x21 |
| 0 | 1 | 0 | 0x22 |
| 0 | 1 | 1 | 0x23 |
| 1 | 0 | 0 | 0x24 |
| 1 | 0 | 1 | 0x25 |
| 1 | 1 | 1 | 0x26 |
| 1 | 1 | 1 | 0x27 |
- 0: The Jumper Cap is connected
- 1: The Jumper Cap is disconnected
NOTE: The default address is 0x20. All the jumper caps will be connected from the factory.
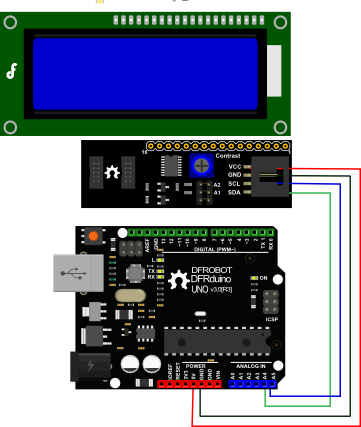
Connection Diagram

NOTE: V1.2 has a different power pinout from V1.1, please check the history version for the old connection diagram.
- Arduino UNO: connect SDA to pin A4 and SCL to pin A5 on your Arduino.
Arduino Leonardo: connect SDA to digital pin 2 and SCL to digital pin 3 on your Arduino.
Library Support Functions
- LiquidCrystal_I2C() //set the LCD address for a 16 chars and 2 line display
- init() //Initialization for the LCD
- clear() //clear display, set cursor position to zero
- home() //set cursor position to zero
- createChar() //Fill the first 8 CGRAM locations with custom characters
- setCursor() //set the position of the cursor
- cursor() //Turns the underline cursor on
- noCursor() //Turns the underline cursor off
- blink() //Turn on the blinking cursor
- noBlink() //Turn off the blinking cursor
- display() //Turn the display on(quickly)
- noDisplay() //Turn the display 0ff(quickly)
- backlight() //Turn the backlight on
- noBacklight() //Turn the backlight off
- scrollDisplayLeft() //Make the display scroll left without changing the RAM
- scrollDisplayRight() //Make the display scroll right without changing the RAM
- autoscroll() //This will 'right justify' text from the cursor
- noAutoscroll() //This will 'left justify' text from the cursor
- leftToRight() //This is for text that flows Left to Right
- rightToLeft() //This is for text that flows Right to Left
Sample code
//Please download the Arduino library!
//The link:https://www.dfrobot.com/image/data/DFR0154/LiquidCrystal_I2Cv1-1.rar
//DFRobot.com
//Compatible with the Arduino IDE 1.0
//Library version:1.1
#include <Wire.h>
#include <LiquidCrystal_I2C.h>

#if defined(ARDUINO) && ARDUINO >= 100
#define printByte(args)  write(args);
#else
#define printByte(args)  print(args,BYTE);
#endif

uint8_t bell[8]  = {0x4,0xe,0xe,0xe,0x1f,0x0,0x4};
uint8_t note[8]  = {0x2,0x3,0x2,0xe,0x1e,0xc,0x0};
uint8_t clock[8] = {0x0,0xe,0x15,0x17,0x11,0xe,0x0};
uint8_t heart[8] = {0x0,0xa,0x1f,0x1f,0xe,0x4,0x0};
uint8_t duck[8]  = {0x0,0xc,0x1d,0xf,0xf,0x6,0x0};
uint8_t check[8] = {0x0,0x1,0x3,0x16,0x1c,0x8,0x0};
uint8_t cross[8] = {0x0,0x1b,0xe,0x4,0xe,0x1b,0x0};
uint8_t retarrow[8] = { 0x1,0x1,0x5,0x9,0x1f,0x8,0x4};

LiquidCrystal_I2C lcd(0x20,20,4);  // set the LCD address to 0x20 for a 20 chars and 4 line display (All jumpers should be connected!)

void setup()
{
//  Serial.begin(57600);
  lcd.init();                      // initialize the lcd
  lcd.backlight();

  lcd.createChar(0, bell);
  lcd.createChar(1, note);
  lcd.createChar(2, clock);
  lcd.createChar(3, heart);
  lcd.createChar(4, duck);
  lcd.createChar(5, check);
  lcd.createChar(6, cross);
  lcd.createChar(7, retarrow);
  lcd.home();

  lcd.setCursor(0, 0);
  for(int i = 0;i < 20; i++)  lcd.printByte(6);
  lcd.setCursor(0, 1);
  lcd.printByte(6);
  lcd.print("   Hello world    ");
  lcd.printByte(6);
  lcd.setCursor(0, 2);
  lcd.printByte(6);
  lcd.print("  i ");
  lcd.printByte(3);
  lcd.print(" arduinos!   ");
  lcd.printByte(6);
  lcd.setCursor(0, 3);
  for(int i = 0;i < 20; i++)  lcd.printByte(6);
//  lcd.clear();

}

void loop()
{

}
If you want to use the library's own sample code, pay attention to modify the initialization statement, need to change:
LiquidCrystal_I2C lcd(0x27,16,2); // set the LCD address to 0x27 for a 16 chars and 2 line display
to:
LiquidCrystal_I2C lcd(0x20,20,4); // set the LCD address to 0x20 for a 20 chars and 4 line display(All jumpers should be connected\!)
Because the default initialization statement is for LCD1602!
More Documentation
Arduino Sample code
Arduino Library(compatible with IDE V1.0 and above)
LCD datasheet
PCA8574 Datasheet
