Introduction
PT100 is suitable for most of the temperature measurement below 400°C, but usually the temperature of the household natural gas stove can reach over 800°C, and the temperature of the pottery kiln or high-power electric furnace can be more than 1000°C. The K-type thermocouple are commonly used in such ultra-high temperature scenes.
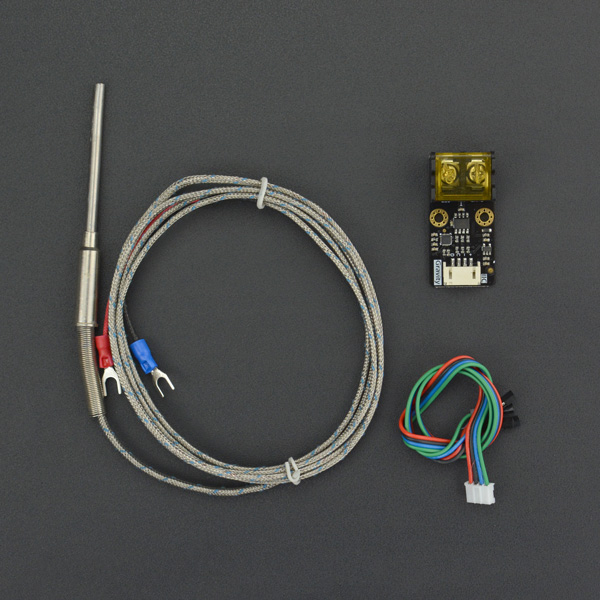
The digital K-type high temperature sensor consists of a signal amplification conversion module and a sheathed K-type thermocouple probe. When the K-type thermocouple probe is placed near a high-temperature heat source, the probe generates a small voltage proportional to the temperature due to the thermoelectric effect. The module uses a MAX31855K dedicated chip to amplify this small voltage, convert it to digital signals, and compensate accordingly. The temperature readings can be read through Gravity I2C interface. The module can measure extremely wide temperature ranging from -270°C to 1372°C, the error from -200°C to 700°C is within ±2°C, and the error from 700°C to 1350°C is within ±4°C. The attached K-type thermocouple can measure up to 800 °C with error within ± 2.5 °C.
Features
- 14 bit, 0.25°C digital high resolution temperature measurement
- Extremely wide temperature range
- Wide input voltage, compatible with 3.3V and 5V controllers
- Gravity I2C interface, convenient connection
- Fits any K-type thermocouple probe
Specifications
Signal Amplification Conversion Module
- Input Voltage (VCC): 3.3V~5.5V
- Probe: K Type Thermocouple
- Temperature Range: -270°C~1372°C
- Resolution: 0.25 °C
- Error: within ≤ ±2°C(-200°C~700°C) ~ ±4°C(700°C~1350°C)
- Interfaces: Gravity I2C (Logic Level 0-3.3V)
- Dimension: 44.0mm*22.0mm
Armored K-Type Thermocouple Probe
- Temperature Range: 0 °C ~ 800 °C
- Error: ≤ ±2.5°C
- Wire Length: 1.5m
- Probe Length: 50mm
- Probe Diameter: Φ4mm
- Features: Waterproof, Corrosion Resistant (Weak Acid or Alkali Resistant, Rustproof), High Temperature Resistance
Applications
- Electric Oven, Electric Furnace
- High Temperature Flame, Gas
- Pottery Kiln
Board Overview
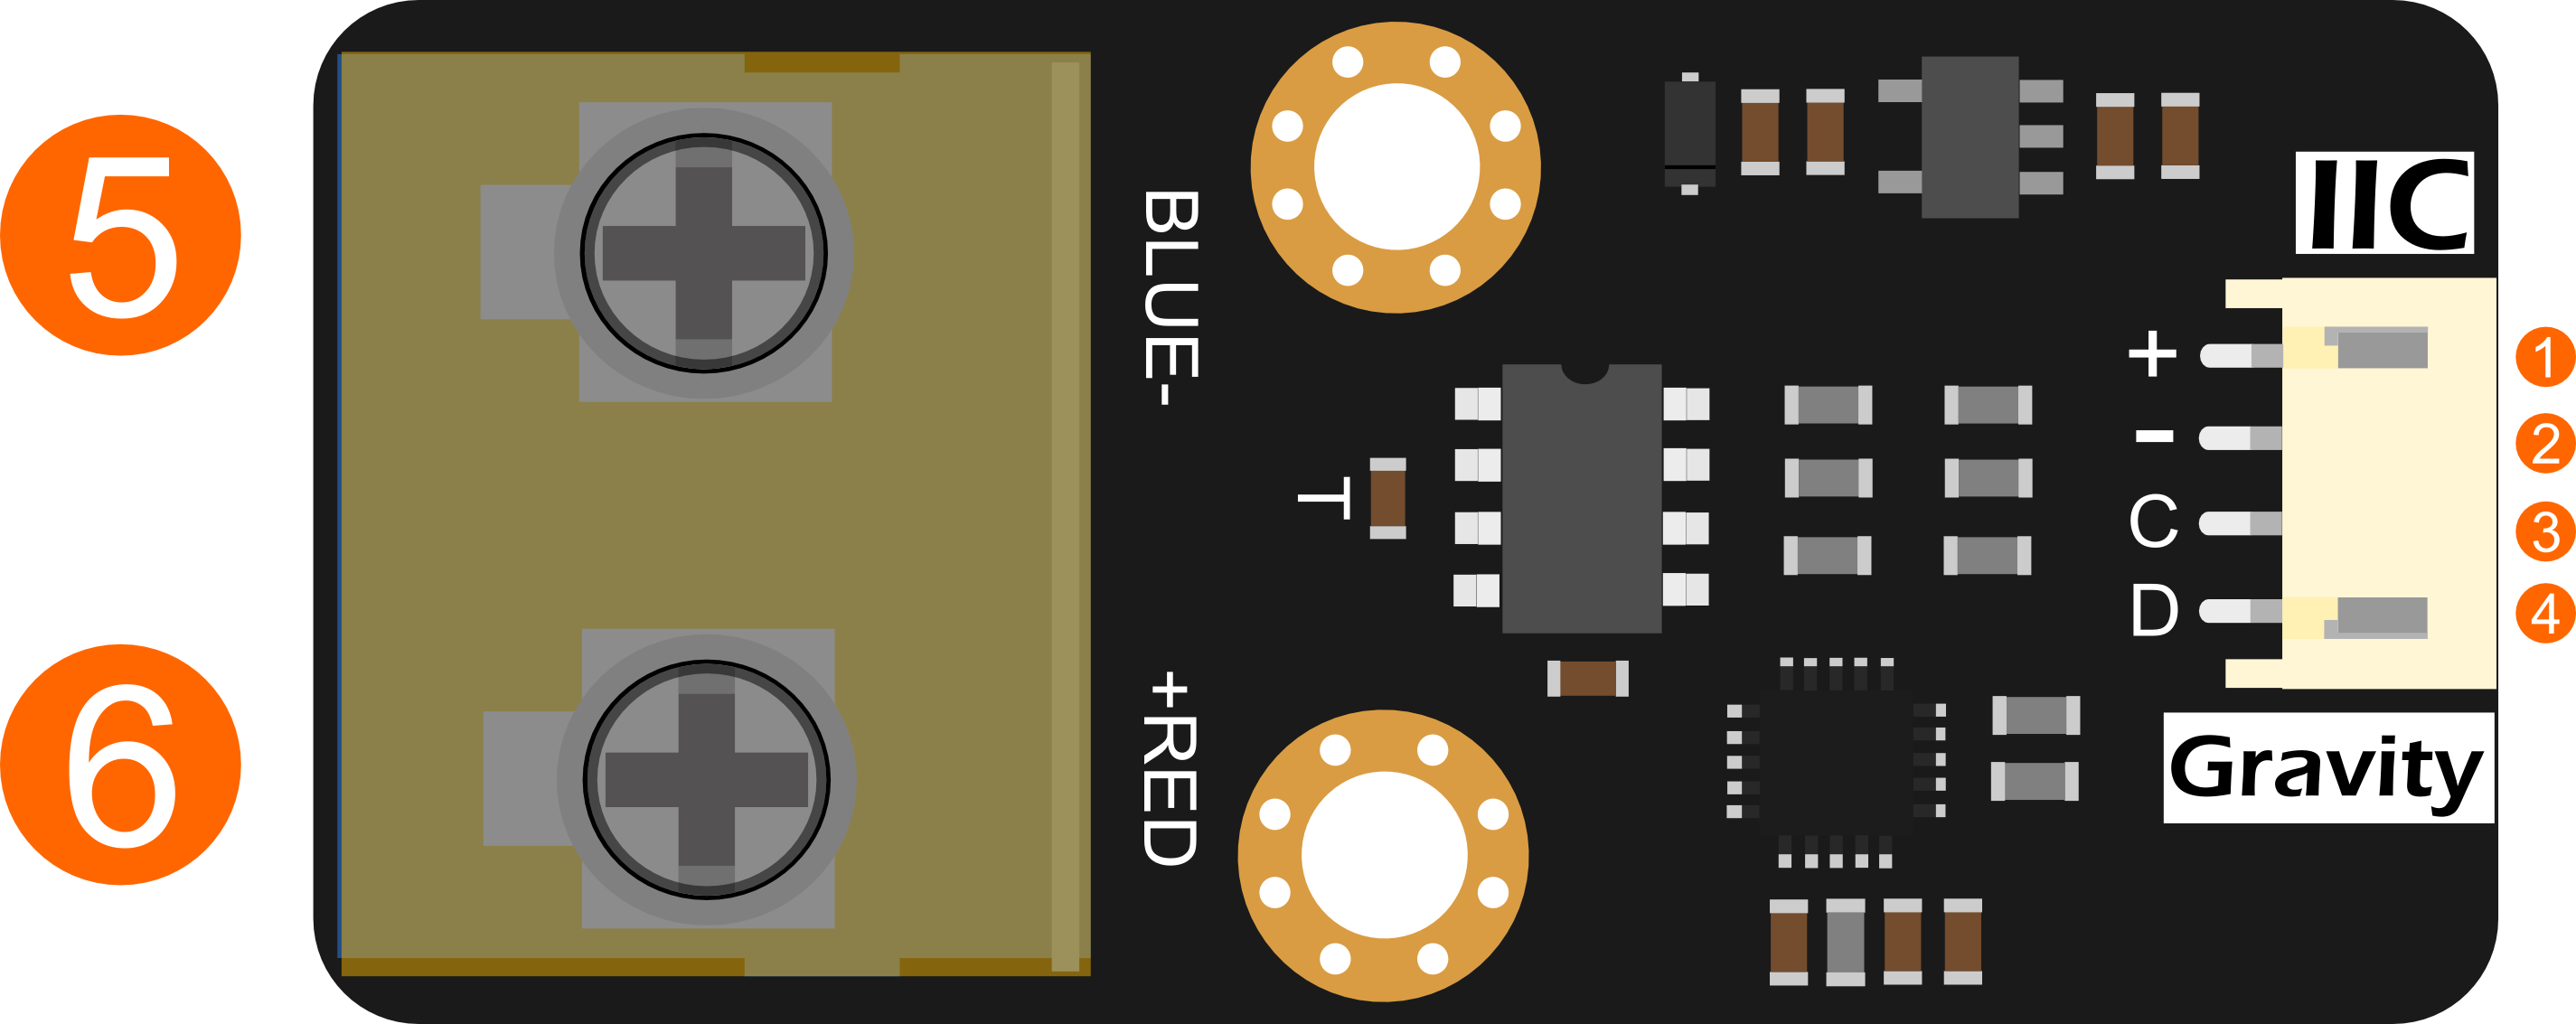
| Label | Name | Description |
|---|---|---|
| 1 | VCC | Power VCC(3.3~5.5V) |
| 2 | GND | Power GND |
| 3 | SCL | I2C Clock Signal |
| 4 | SDA | I2C Data Signal |
| 5 | BLUE- | K type thermocouple negative electrode |
| 6 | RED+ | K type thermocouple positive electrode |
Arduino Tutorial
Requirements
-
Hardware
- DFRduino UNO R3 (or similar) x 1
- DFRobot Digital High Temperature Sensor (K-type) x 1
- K-Type Thermocouple Probe x 1
- Gravity 4P sensor wire (or Dupont wires) x 1
-
Software
- Arduino IDE (V1.0.x or V1.8.x), Click to Download Arduino IDE from Arduino®
- Download and install the DFRobot_MAX31855 Library. How to install the library?
Connection Diagram
Read Temperature
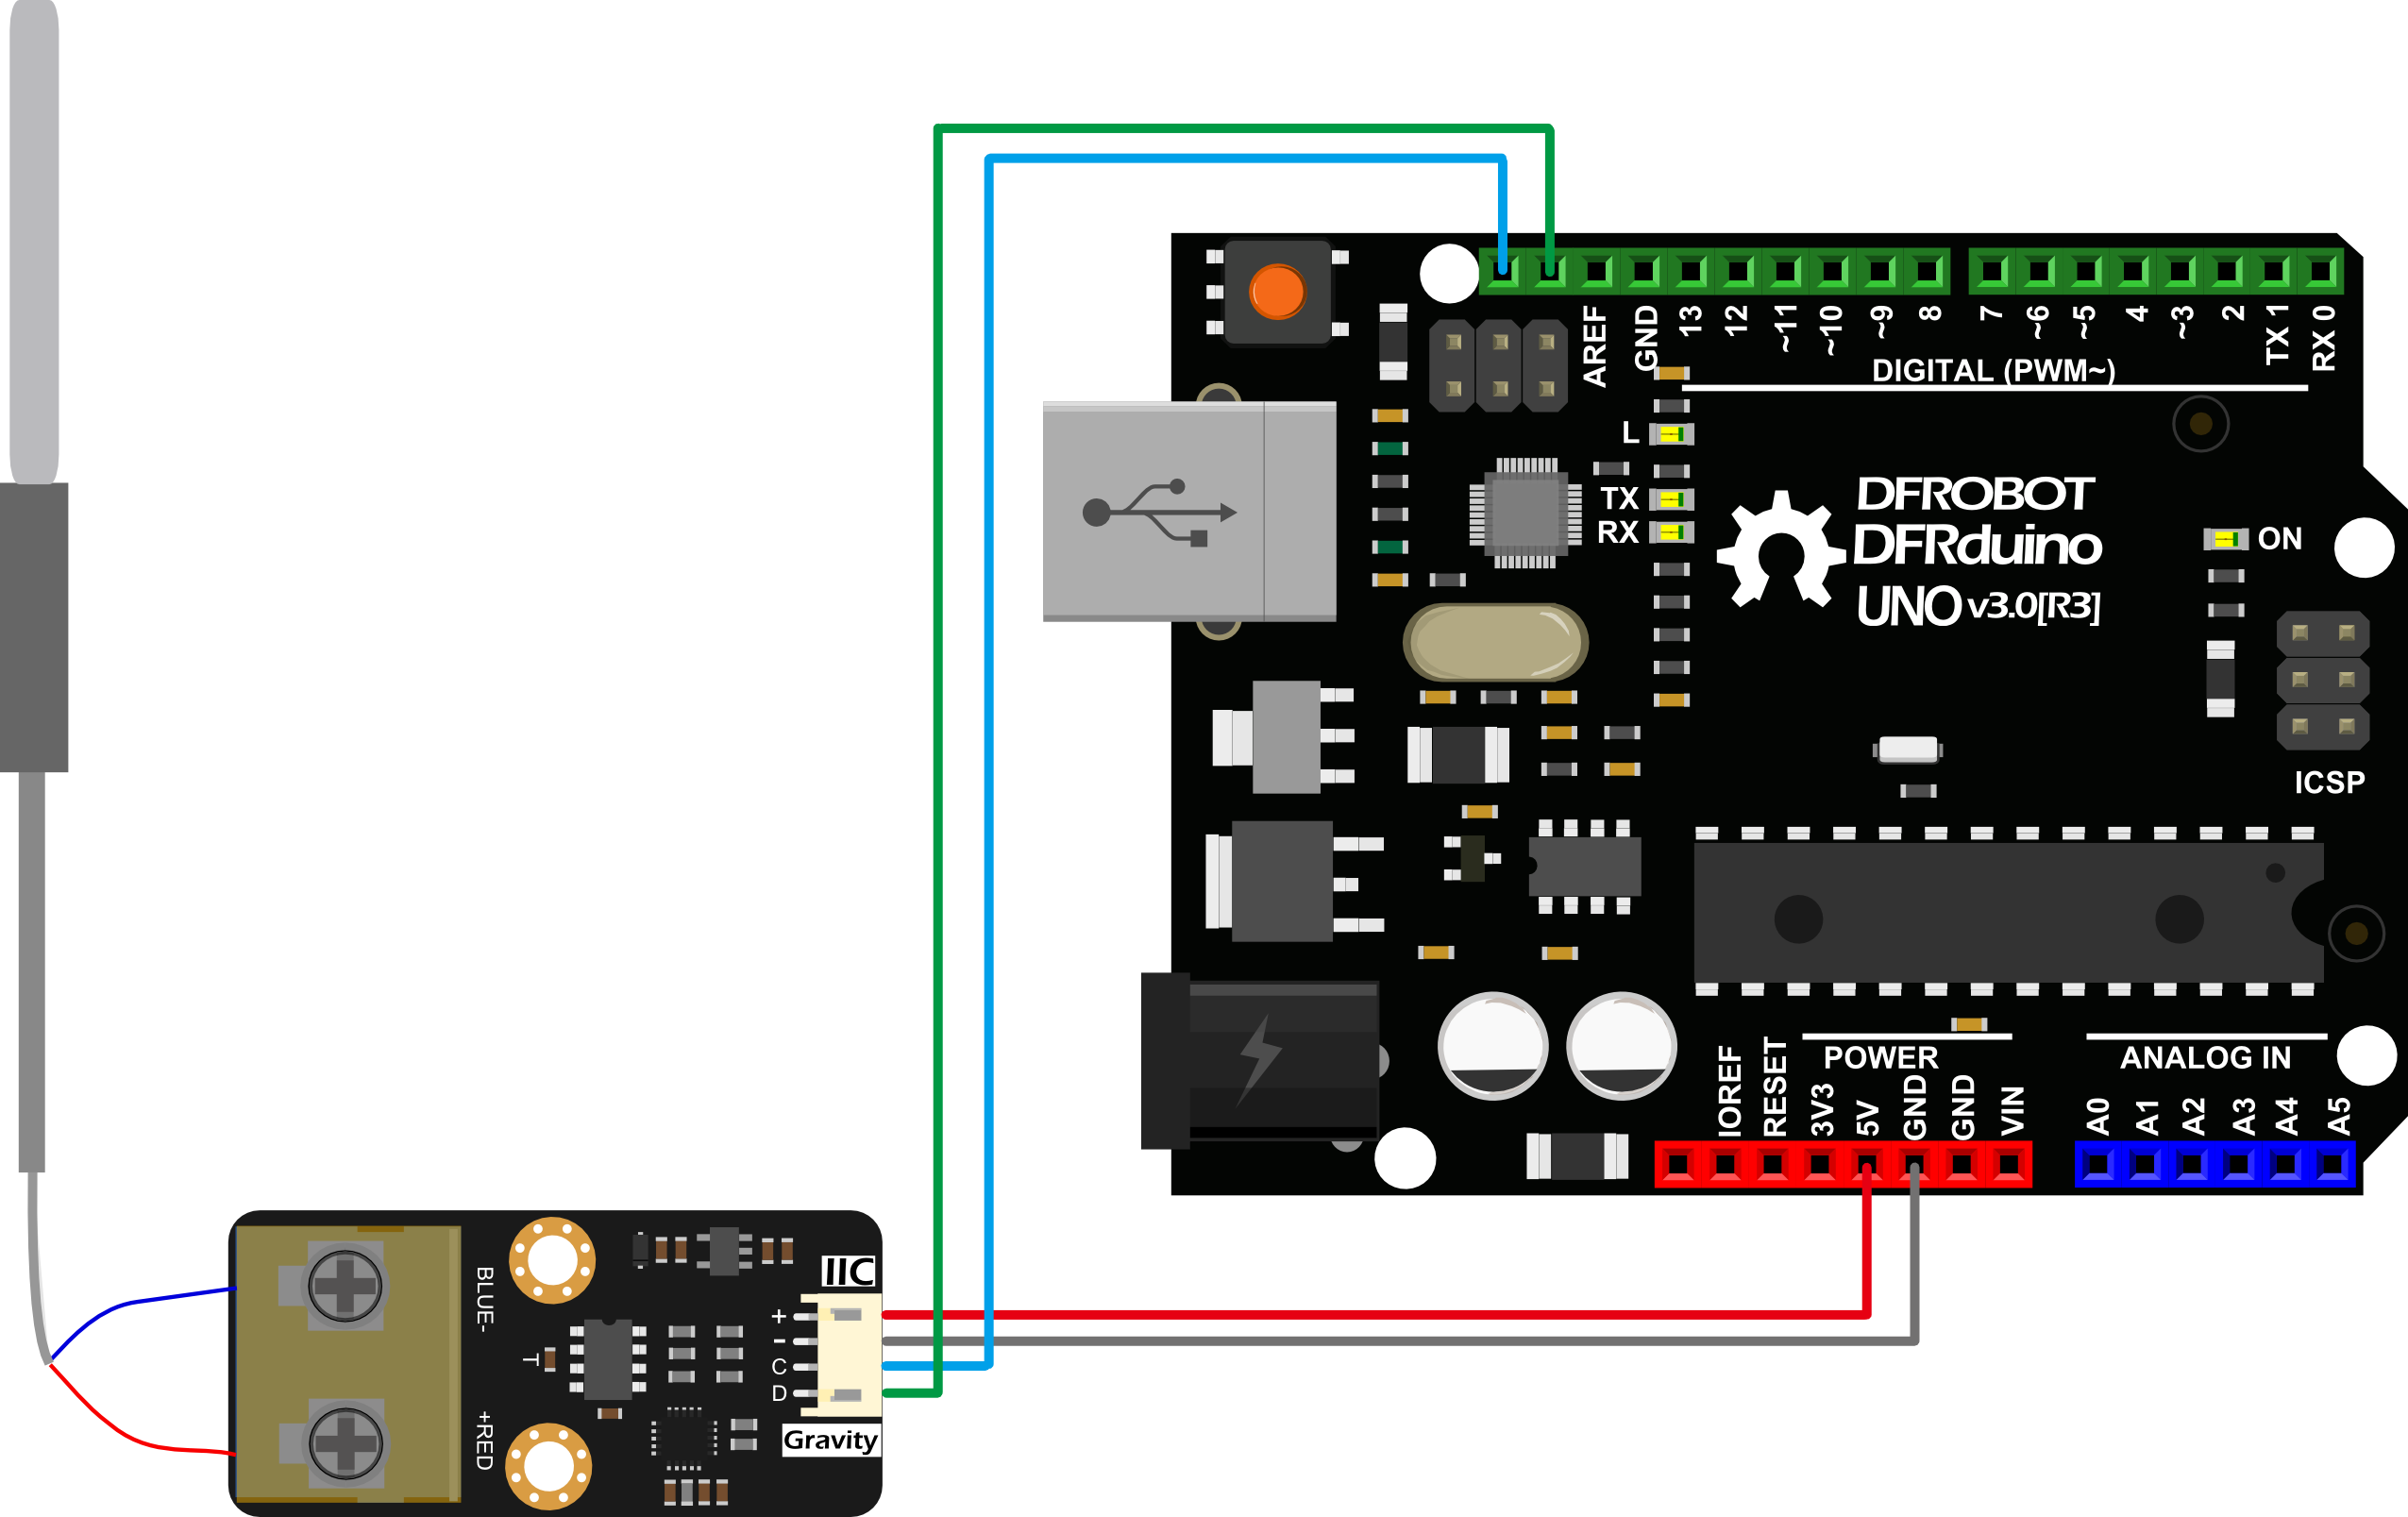
- Connect the probe and Arduino to the module according to the connection diagram. The I2C address is fixed to 0x10.
- Install DFRobot_MAX31855 library.
- Open Arduino IDE, upload the following sample code to the Arduino UNO.
- Open the serial monitor of Arduino IDE.
/*!
  * file ReadTemp.ino
  *
  * Connect MAX31855 to arduino via I2C interface,then download this example
  * @n open serial monitor to check the temperature.
  *
  * Copyright   [DFRobot](https://www.dfrobot.com), 2016
  * Copyright   GNU Lesser General Public License
  *
  * version  V0.1
  * date  2018-3-6
  */

#include <DFRobot_MAX31855.h>

DFRobot_MAX31855 max31855;

void setup(){
  /*Set baudrate*/
  Serial.begin(9600);
}

void loop(){
  int stat;
  /*Detect I2C device*/
  stat = max31855.scan();
  if(!stat){
    Serial.println("No I2C devices!");
  }
  else{
    /*Read Celsius*/
    float temp = max31855.readCelsius();
    Serial.print("Temperature:");
    Serial.print(temp);
    Serial.println(" ℃");
  }
  delay(1000);
}
Results
- Arduino prints current temperature every one second.

Raspberry Pi Tutorial
Requirements
-
Hardware
- Raspberry Pi 3 Model B (or similar) x 1
- DFRobot Digital High Temperature Sensor (K-type) x 1
- K-Type Thermocouple Probe x 1
- Gravity 4P sensor wire (or Dupont wires) x 1
-
Software
- Download and install the DFRobot_MAX31855 RaspberryPi library
- RASPBIAN
Connection Diagram
Installation
1.Start the I2C interface of the Raspberry Pi. If it is already open, skip this step. Open Terminal, type the following command, and press Enter:
pi@raspberrypi:~ $ sudo raspi-config
Then use the up and down keys to select “5 Interfacing Options” -> “P5 I2C” and press Enter to confirm “YES”. Reboot the Raspberry Pi.
2.Installing Python libraries and git (networking required). If it is already installed, skip this step. In the Terminal, type the following commands, and press Enter:
pi@raspberrypi:~ $ sudo apt-get update
pi@raspberrypi:~ $ sudo pip install wiringpi
3.Download the driver library and run it. In Terminal, type the following commands, and press Enter:
pi@raspberrypi:~ $ git clone https://github.com/DFRobot/DFRobot_MAX31855.git
pi@raspberrypi:~ $ cd ~/DFRobot_MAX31855/RaspberryPi
pi@raspberrypi:~/DFRobot_MAX31855/RaspberryPi $ python DFRobot_MAX31855.py
Read Temperature
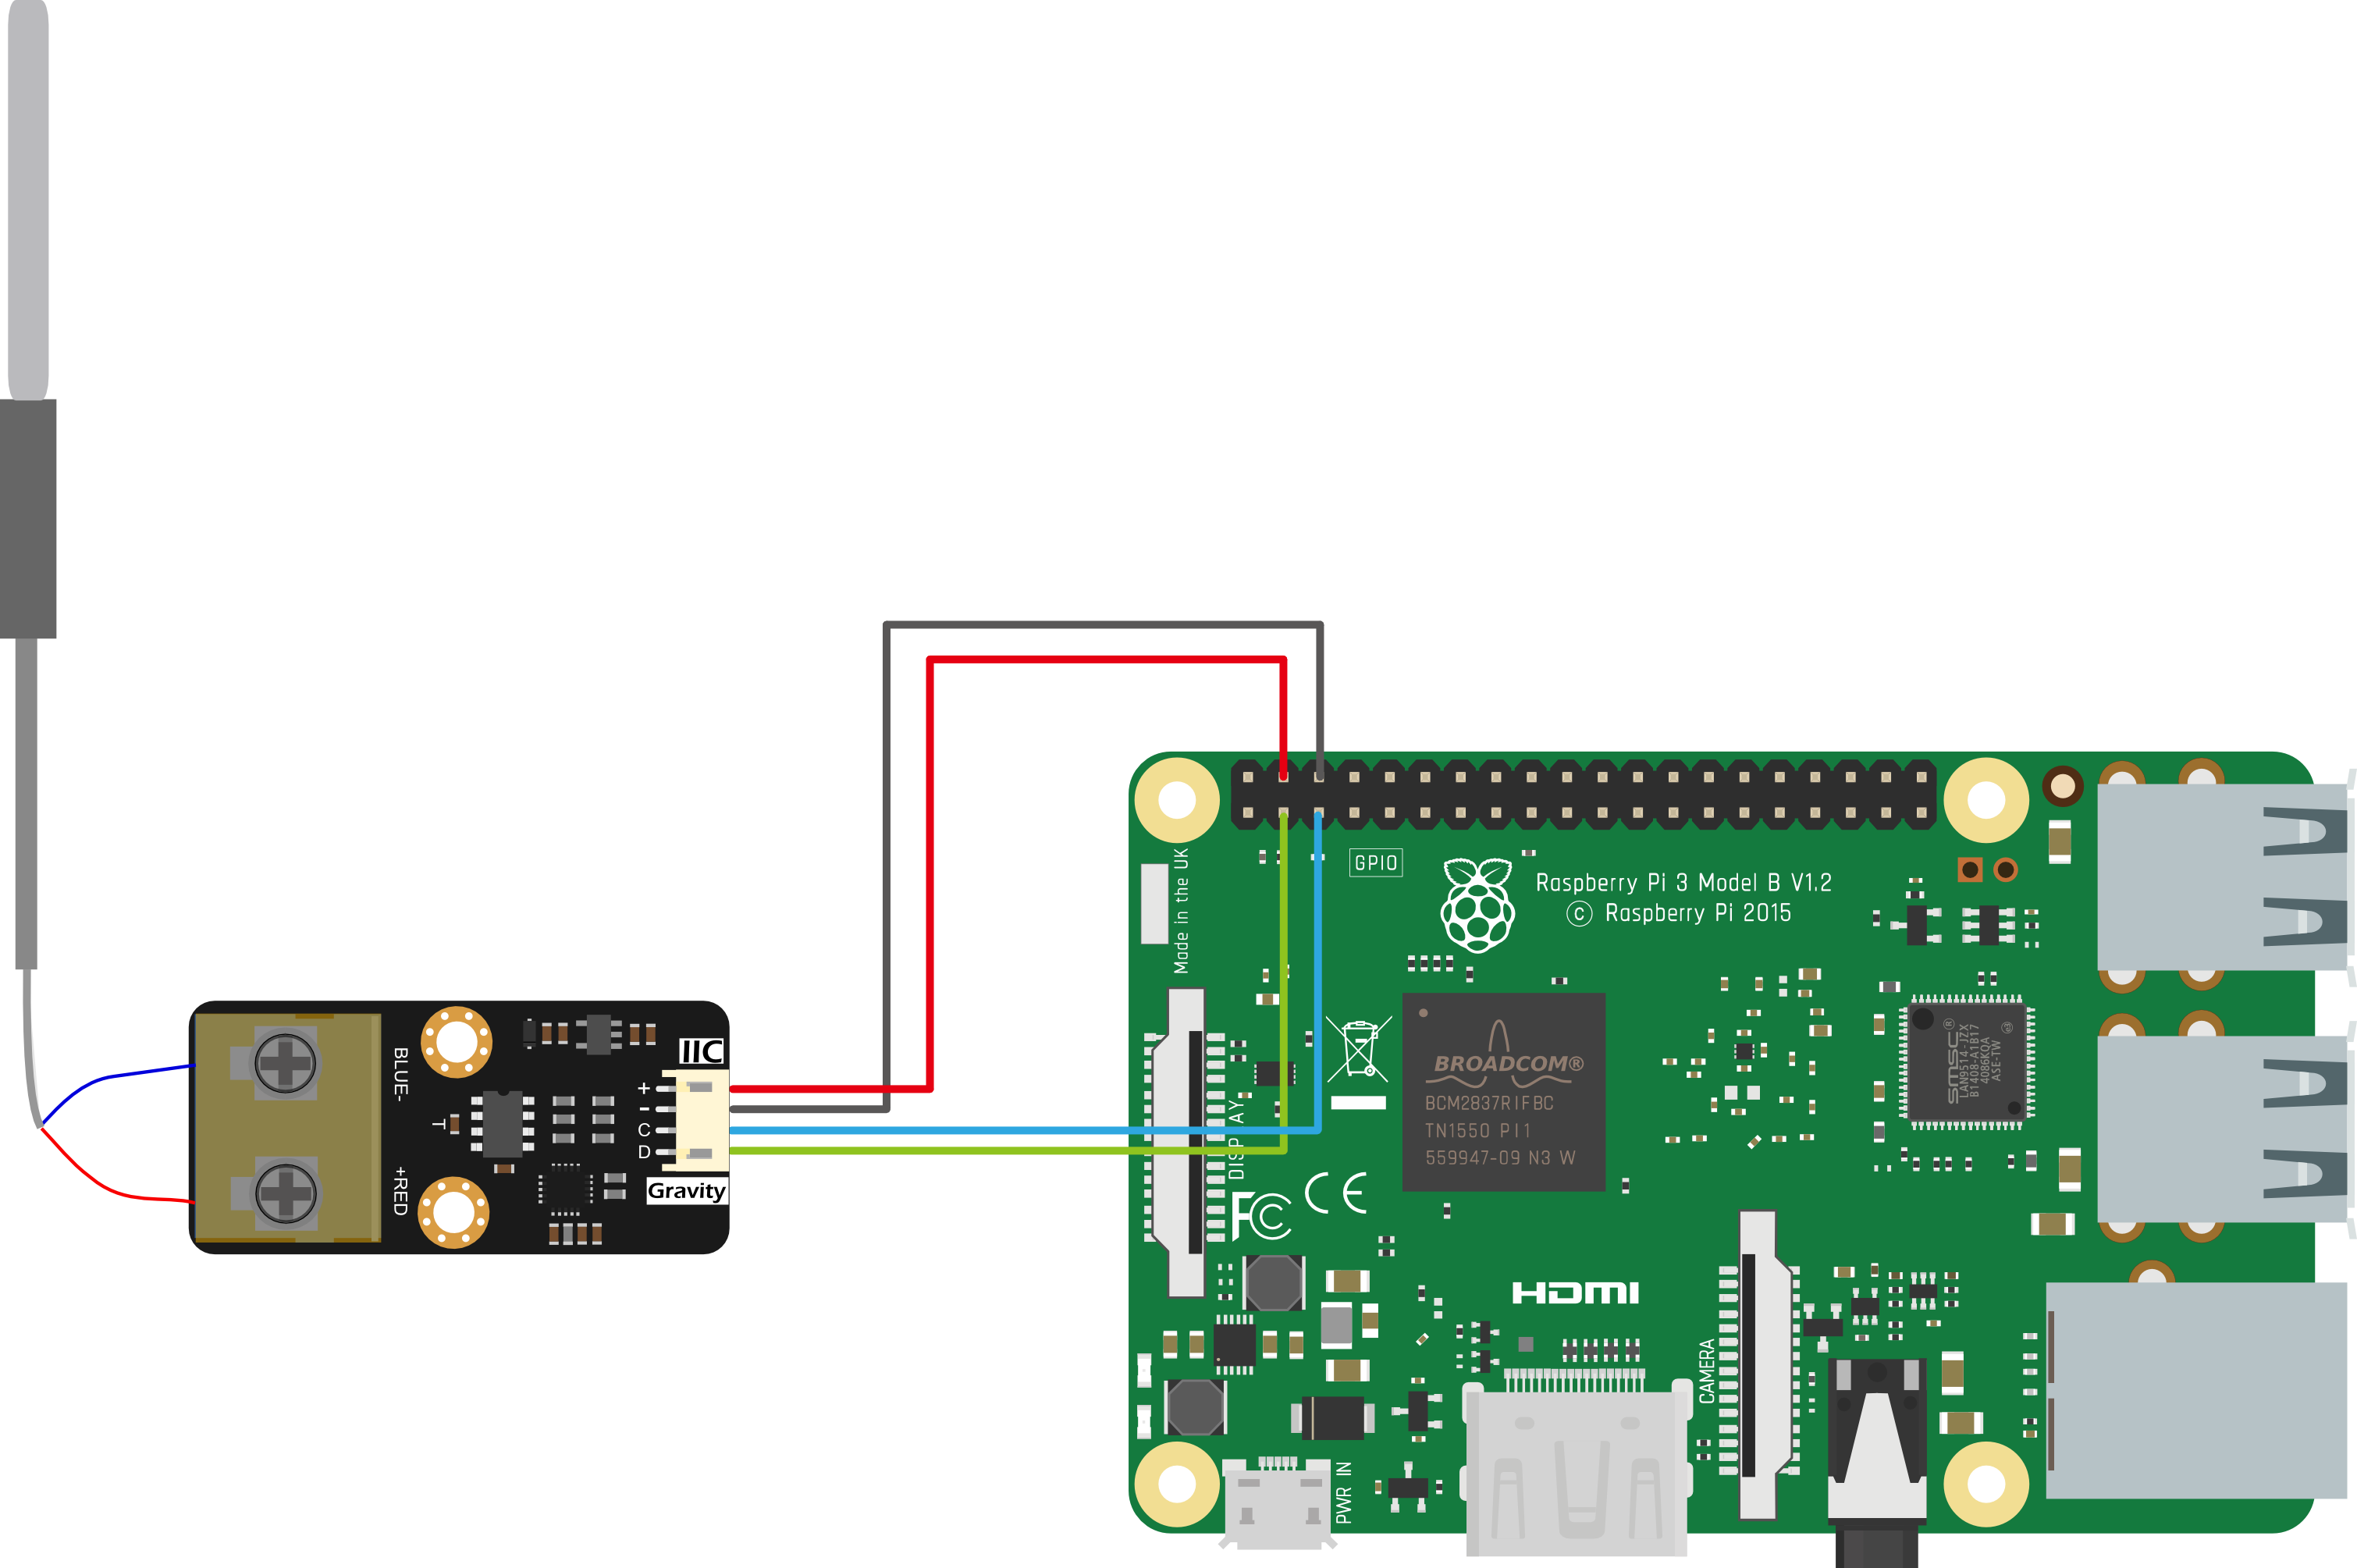
- Connect the probe and RaspberryPi to the module according to the connection diagram. The I2C address is fixed to 0x10.
pi@raspberrypi:~/DFRobot_MAX31855/RaspberryPi/python $ cd readTemp
pi@raspberrypi:~/DFRobot_MAX31855/RaspbeeryPi/python/readTemp $ python readTemp.py
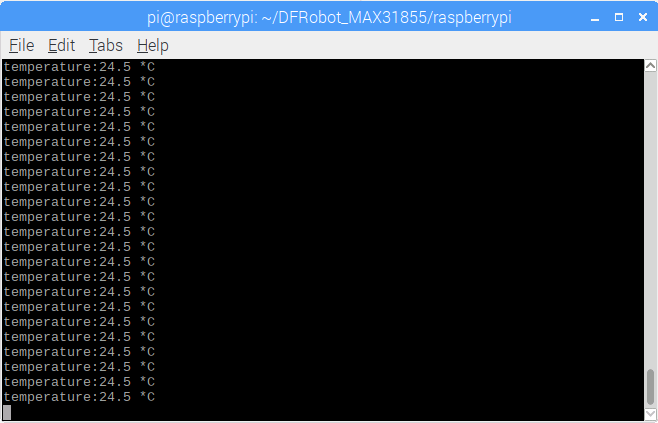
Results
- If the reading falls as the temperature becoming higher. Positive and negative connections of the probe may be reversed. Try to exchange them.
FAQ
-
Q1. Why my reading falls (even below zero degree) as the temperature becoming higher?
A. The positive and negative connections of the probe may be reversed. Try to exchange them.
For any questions, advice or cool ideas to share, please visit the DFRobot Forum.
