Gravity: Formaldehyde Detection Sensor
SKU: SEN0231
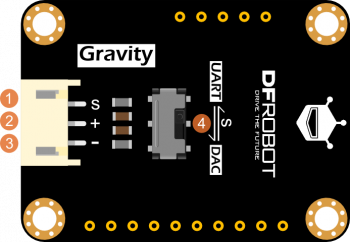
This formaldehyde (HCHO) sensor module uses an electrochemical sensing principle to accurately detect indoor HCHO concentrations from 0 to 5 ppm. Compared with single-use reagent or colorimetric cards, it offers higher sensitivity (0.01 ppm), strong anti-interference performance, long-term stability, and built-in automatic temperature compensation (ATC) for reliable continuous monitoring. The module integrates a wide input voltage range and a Gravity 3-pin interface, providing both DAC (0.4–2 V) and UART (9600 bps) outputs for rapid integration with Arduino, Raspberry Pi, and other controllers. Compact and durable with a 2-year service life, it is ideal for indoor air-quality monitoring, smart-home systems, portable detectors, and distributed IoT sensing applications.