Introduction
An ordinary DC motor requires an H Bridge to work with a arduino microcontroller such as an arduino UNO. For newcomers to electronics, the process of finding the right motor driver, connecting it to the MCU and learning the relevant electronic theory can be confusing and frustrating when you just need something to work quickly. We hope that using the DC Micro Metal gear motor changes this.
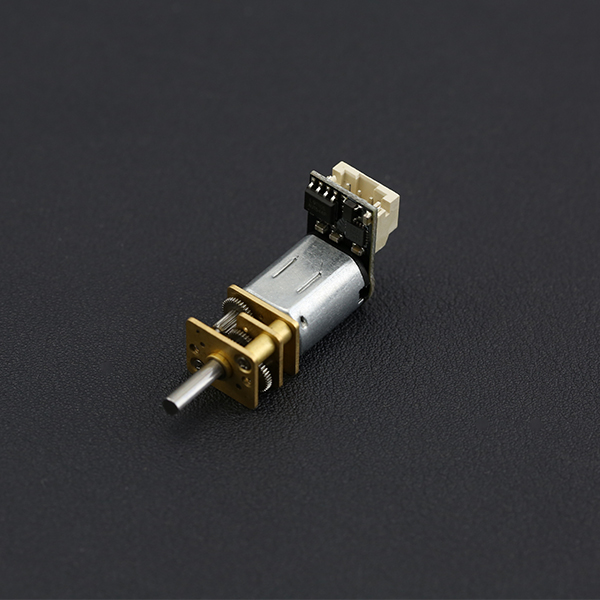
The new micro DC geared motor is easy to operate - using the DFRobot "Gravity" interface, you are able to control the motor using only one control signal. Easily implement forward/reverse control and speed control via PWM. This motor also combines the features of a DC motor and 360 degree servo. We have also increased the stop range and reduced standby power consumption, so the current draw is less than 1mA without signal control. Ideal for DIY projects!
NOTE: The embedded control chip will consume a small amount of the input voltage, therefore the motor voltage will be slightly reduced. The motor speed will also be slightly slower than the rated motor speed.
Specification
-
Operating voltage: 3.5V - 8V
-
Reduction ratio: 75:1
-
No load current: 40mA@6V (approx)
-
Static current: <1mA (no PWM control signal input)
-
Interface: Gravity 3-Pin
-
PPM signal resolution: 1us
-
PPM signal pulse width range: 500us-2500us
-
Clockwise pulse width range: 500us-1400us (500us speed maximum)
-
Stop pulse width range: 1400us-1600us
-
Anticlockwise pulse width range: 1600us-2500us (2500us speed maximum)
-
PWM frequency: 500 Hz.
Motor Overview

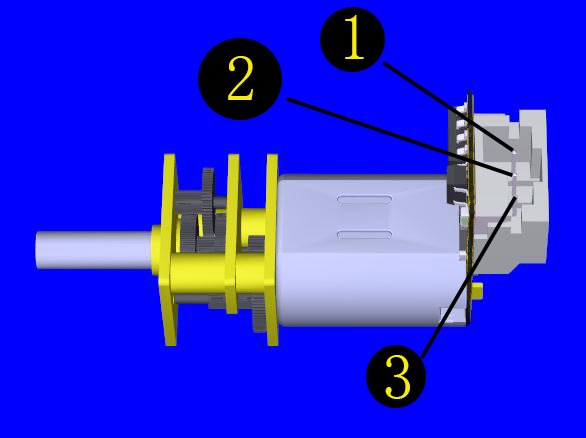
| No. | Label | Description |
|---|---|---|
| 1 | Signal | PWM signal input |
| 2 | Power | VCC (3.5~8V) |
Tutorial
The motor works similar to a 360 degree rotation servo, using the servo library (Arduino IDE included).
Requirements
- Hardware
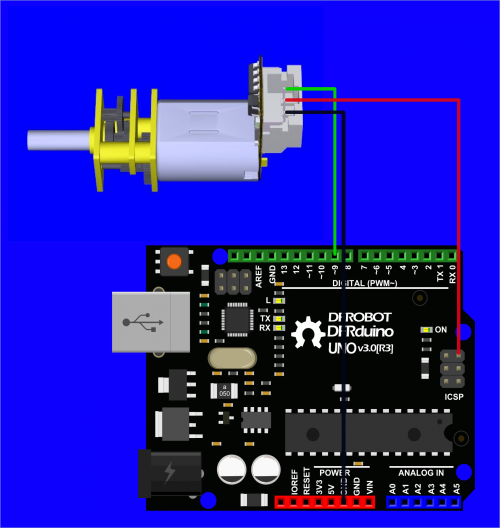
- DFRduino UNO x1
- DFR0399 Gear Motor x1
- Software
- Arduino IDE Click to Download Arduino IDE from Arduino®
Connection Diagram

Sample Code
#include <Servo.h>

#define speed_maxP 0   //Clockwise rotation (Max speed)
#define speed_maxN 180 //Anticlockwise rotation (Max speed)
#define speed_stop  90 //Stop

Servo  mymotor;  // create servo object to control a servo (my motor)
                 // twelve servo objects can be created on most boards

int pos=0;
void setup()
{
  mymotor.attach(9);  //attaches the motor on pin 9 to the servo object
}
void loop()
{
  /**********Using 180 degree servo library to control N20 motor******************************/
  mymotor.write(speed_stop);     //Stop
  delay(1000);                   //delay 1s
  mymotor.write(speed_maxP);     //Clockwise rotation
  delay(2000);                   //delay 2s
  mymotor.write(speed_maxN);     //Anticlockwise rotation
  delay(2000);                   //delay 2s
  for(pos=speed_maxP;pos<speed_maxN;pos++)  //slow down, change the direction and speed up
  {
    mymotor.write(pos);
    delay(50);
  }
}
Note
"0~180" degree corresponds to the pulse width signal "500us~2500us".
When we give a value between 81~99° (1400~1600us), the motor will stop;
When we give a value less than 81° (1400us), the motor rotates clockwise, the smaller the value, the faster the speed, 0° (500us) is the maximum speed;
When we give a value greater than 99° (1600us), the motor rotates anticlockwise, the larger the value, the faster the speed, 180 ° (2500us) is the maximum speed;
Since every motor has a little difference, we enlarge the stop range to ensure that the motor can be stopped correctly.
FAQ
For any questions, advice or cool ideas to share, please visit the DFRobot Forum!
