Sensor connection to Raspberry Pi
This tutorial will demonstrate how to connect the I2C sensor to the Raspberry Pi and get data.
Requirements
-
Hardware
- 1 x Raspberry Pi (system has been installed)
- 1 x I2C sensor
- 4 x Dupont Line
-
Software
- Sensor library file
Connection Diagram
| colour | interface |
|---|---|
| 红 | VCC |
| 黑 | GND |
| 蓝 | SCL |
| 绿 | SDA |
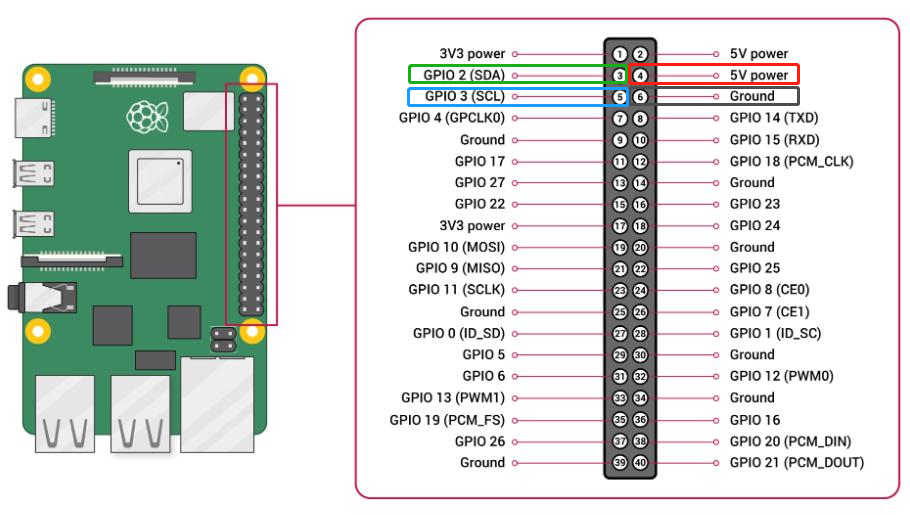
System Configuration
-
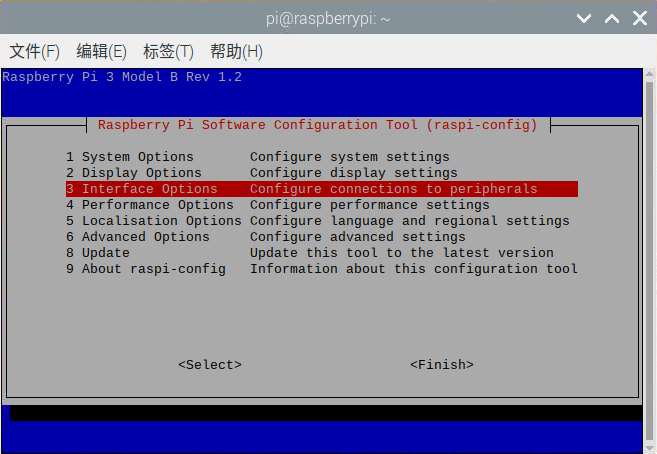
- Start the I2C interface of the Raspberry Pi. If it is already turned on, you can skip this step.
Open the terminal (Terminal), type the following command, and press Enter:
sudo raspi-config
Select "3. Interfacing Options ", press enter
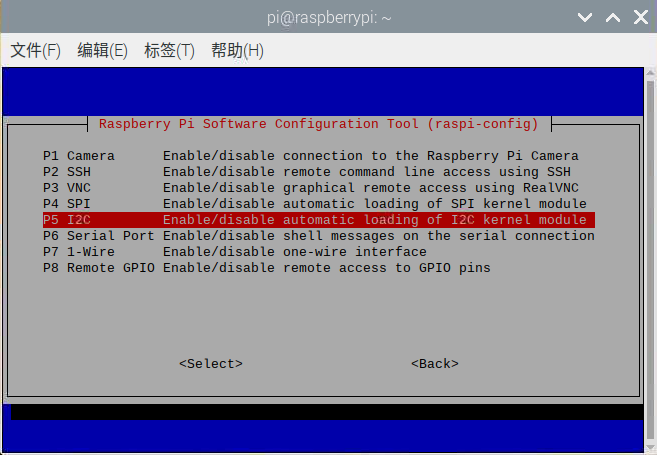
Select "P5 I2C", press Enter to confirm "YES".
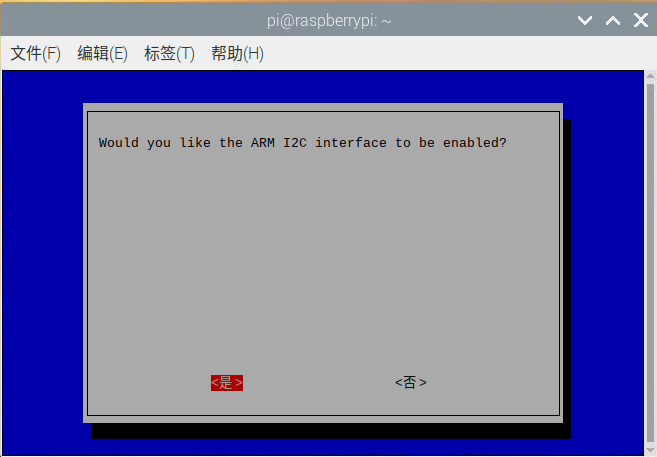
I2C mode has been turned on, just select "Finish" to exit the setting.
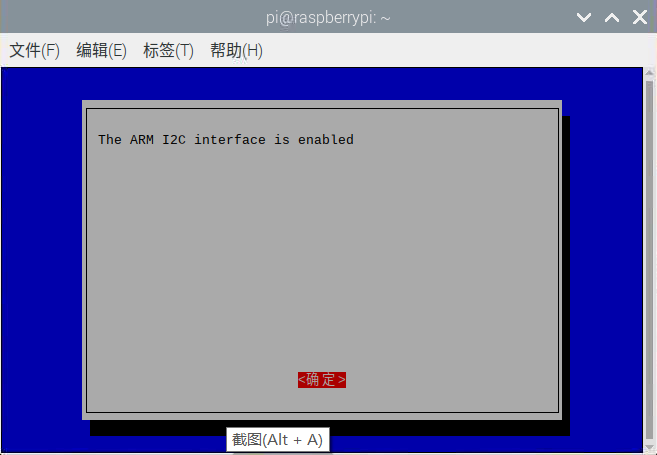
- 2.To install Python dependent libraries and git, the Raspberry Pi needs to be connected to the Internet. If it is already installed, you can skip this step.
In the terminal, type the following commands in sequence and press Enter:
sudo apt-get update
sudo apt-get install build-essential python-dev python-smbus git
"Success" will be prompted after completion
- 3.Download the library file according to the corresponding sensor wiki and run it.