Introduction
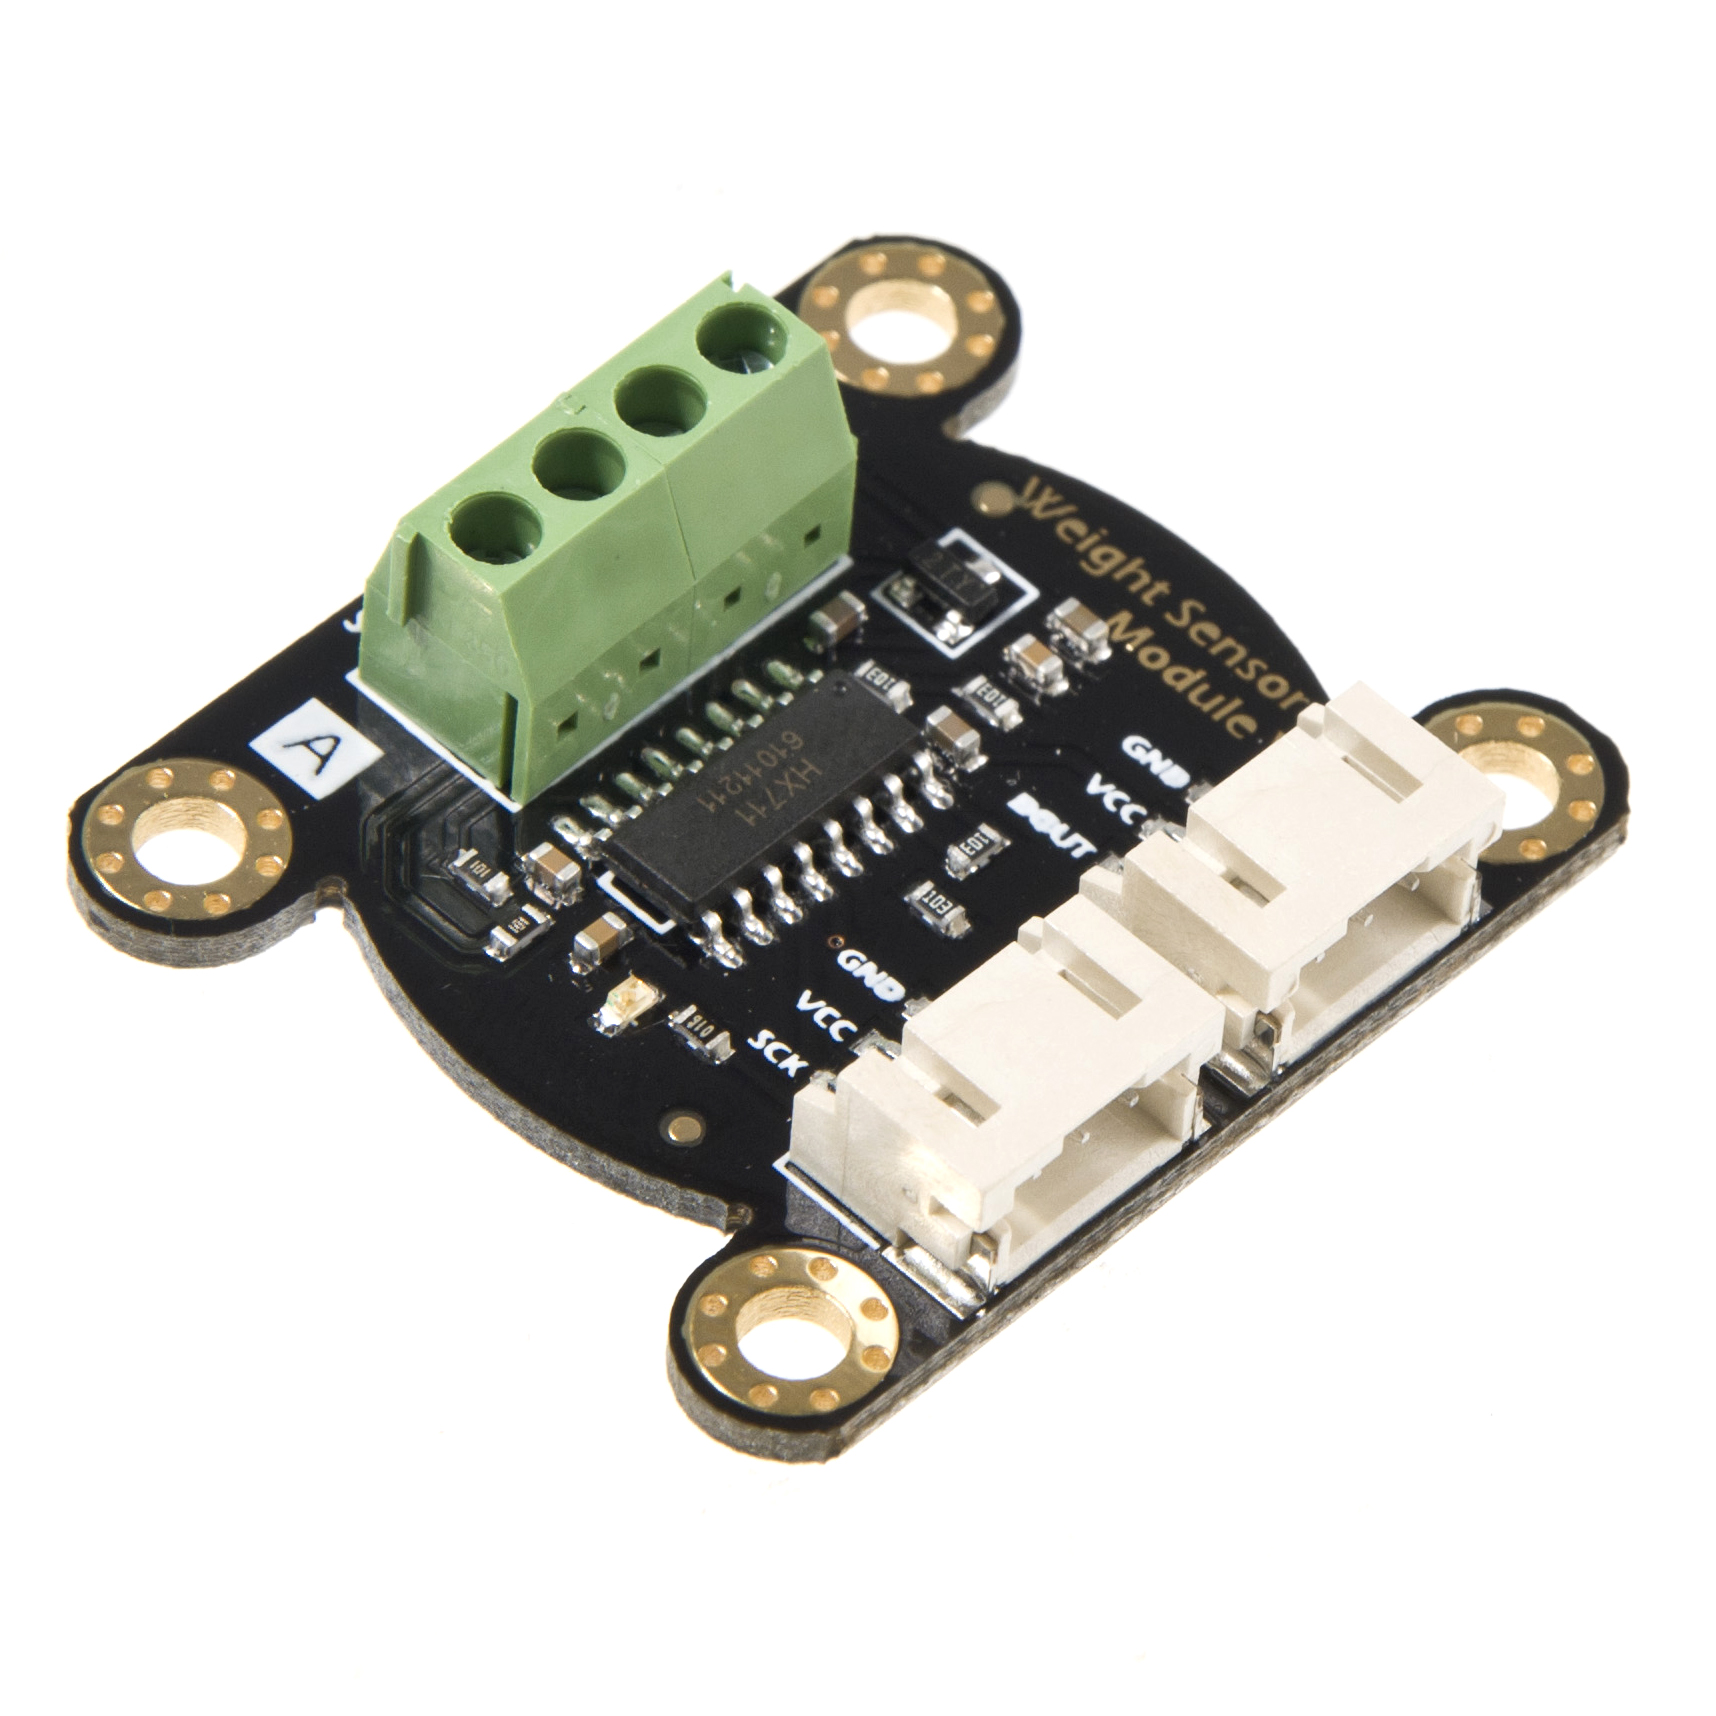
Digital Weight Sensor Module is based on HX711 module, which is a precision 24-bit analog-to-digital convertor designed for a weight scale. It also designed for industrial control applications to interface directly with a bridge sensor. Compared with other chips, HX711 not only has a few basic function, but also contains high integration, fast response, immunity, and other features. The chip is also a lower cost compared to other electrionic scales, and still improves on performance and reliability.
The input interface of this weight sensor module is compatible with Arduino I/O port. The output adopts a compact terminal that makes weight sensor module easier to connect the weight sensor. It's the best choice for electronic enthusiast for a tiny home scale.
The weight sensor module can be combined with weight sensor on the market. We can also help you to pick a small range weight sensor.
Specification
24-Bit Analog-to-Digital Converter for Weight Scales (HX711)
- Two selectable differential input channels
- On-chip active low noise PGA with selectable gain of 32, 64 and 128
- On-chip power supply regulator for load-cell and ADC analog power supply
- On-chip oscillator requiring no external component with optional external crystal
- On-chip power-on-rest
- Simple digital control and serial interface: pin-driven controls, no programming needed
- Selectable 10SPS or 80SPS output data rate
- Simultaneous 50 and 60Hz supply rejection
- Supply Voltage: 2.6V~5.5V
- Current: <1.6mA
- Working temperature: -40~85°C
- 16 pin SOP-16 package
Weight Sensor Module
- Range:1kg
- Excitation voltage: 5-15 V
- Output sensitivity: 1.0±0.15mV/V
- Synthetical error: 1 per thousand cent of full scale
- Zero shift: 0.05/0.03 (30min)%F.S
- Zero temperature shift: 0.05/0.03 %F.S/10°C
- Zero output: ±0.1mV/V
- Input impedance: 1055±15 Ω
- Output impedance: 1000±5 Ω
- Overload capability: 200 %F.S
- Output: Analog output
- Size: 33mm*38mm
Tutorial
The range of the weight scale is only 1kg. So, it's very appropriate for you to make a kitchen scale. we will bring you a step by step tutorial to make one and print the data by Arduino Serial Monitor.
Hardware Requirement
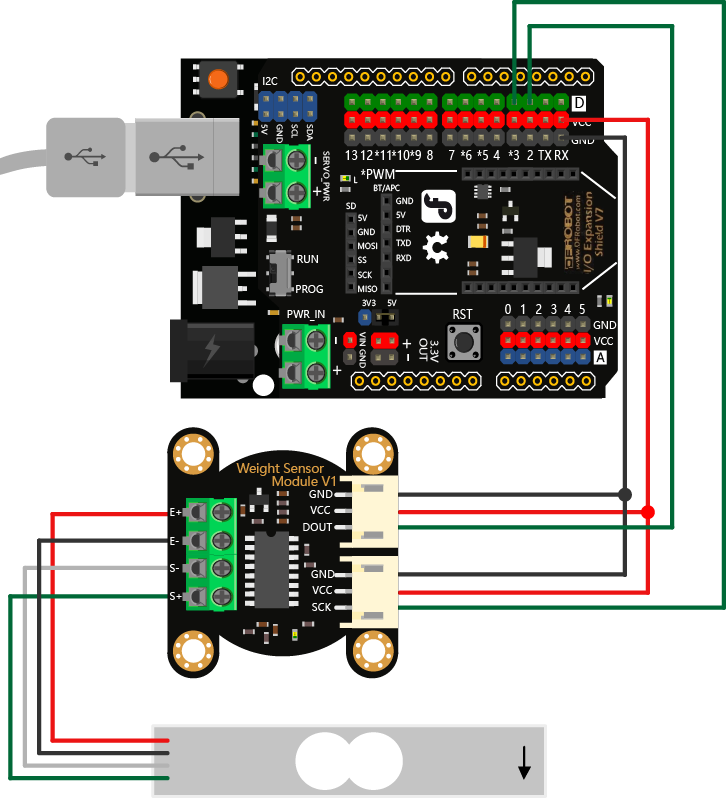
- 1x DFRduino UNO R3
- 1x Weight Sensor Module
- 1x IO Expansion Shield for Arduino V7.1
- 1x Weighing platform Reference 3D model
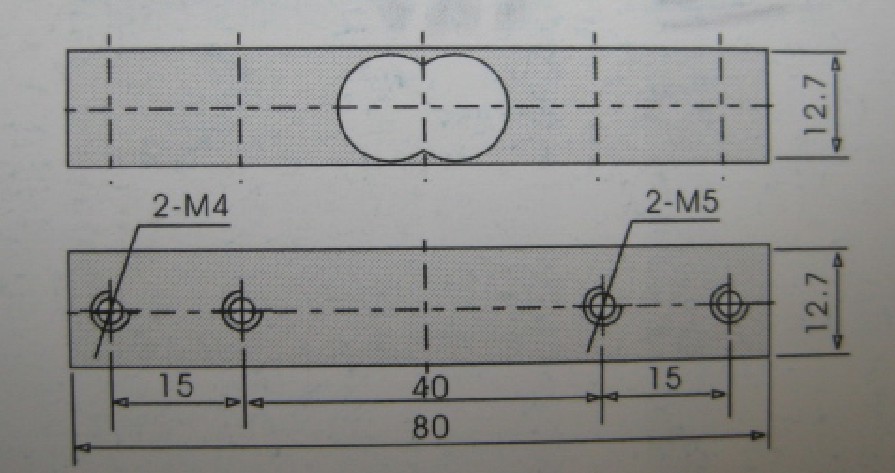
Note: The weighing platform will be made by yourself according to the weight sensor machine drawing. The following figure show the weight sensor machine drawing.
Connection Diagram
Software Requirement
Detail Steps
1. Install the Arduino library to your Arduino IDE. Upload the following codes.
#include <DFRobot_HX711.h>

DFRobot_HX711 MyScale(A2, A3);

void setup() {
  Serial.begin(9600);
}

void loop() {
  Serial.print(MyScale.readWeight(), 1);
  Serial.println(" g");
  delay(200);
}
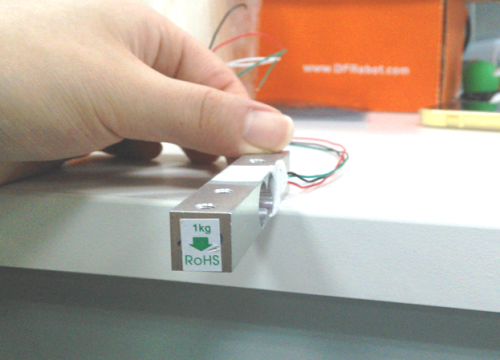
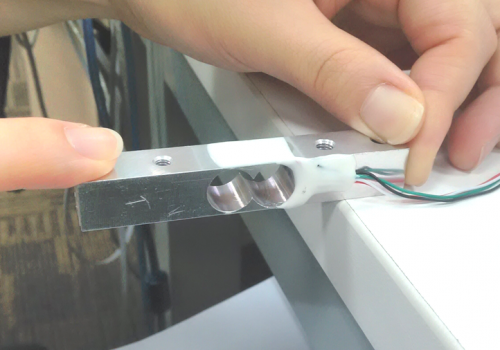
2. Upload the sample code to UNO. When finished, you put the weight sensor horizontally, one end with four wires is fixed on the table, the other one suspended.
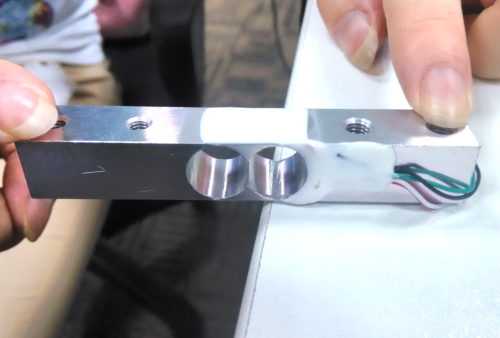
3. Open the Serial montior,and press the sensor according to the label direction.
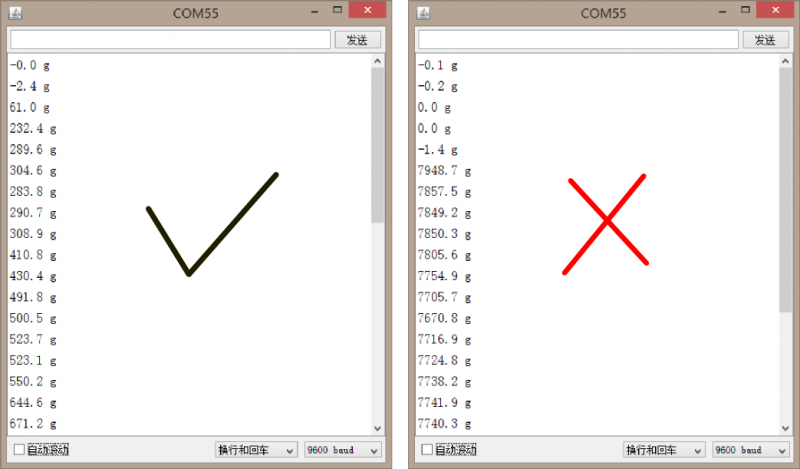
Check the Serial monitor, when you press the sensor
Left image: Normal data. The date will have a growth process with different intensity of hand.
Right image:Abnormal data.
Possible Reasons:
a. Forced direction is wrong.
b. Maybe the connection isn't firm.
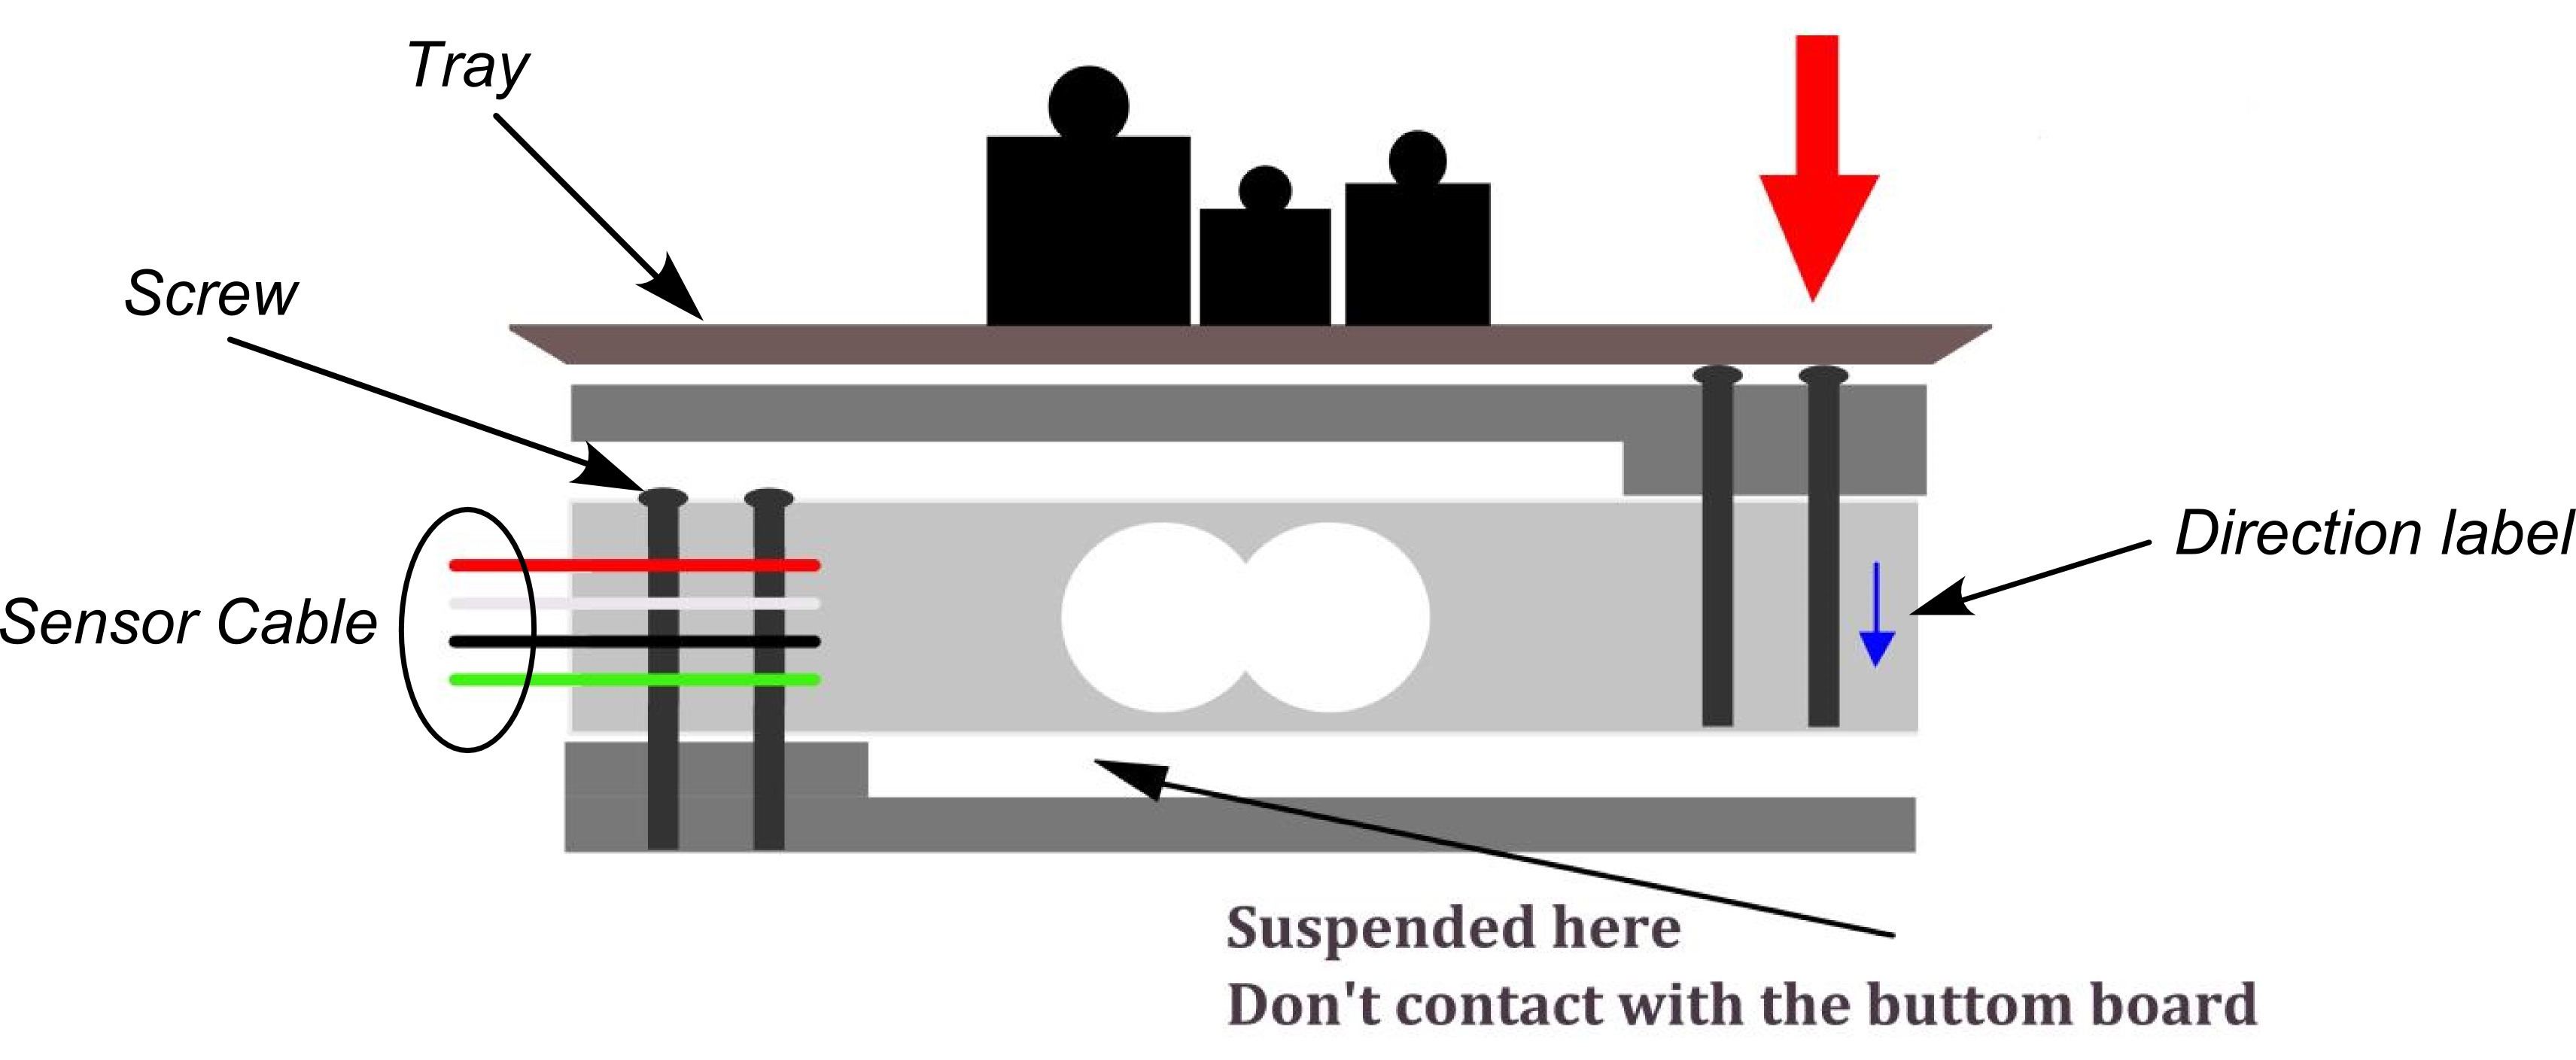
4. Install the weighing platform
5. The weight scale will be finished within one more step-- zero adjustment.
Open the DFRobot_HX711 library folder, and find the file DFRobot_HX711.h, open it. Locate the statement
void setCalibration(float base = 1992.f)
You only need to adjust the number 1992 to find the appropriate value for weight scale. Save the h file, and upload the above code again.
The structure of the weight sensor

Documents
FAQ
For any questions, advice or cool ideas to share, please visit the DFRobot Forum.