Introduction
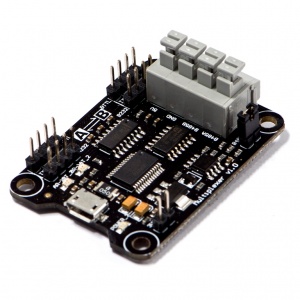
Multiplexer is a multi protocol converter which is composed by multiple interfaces for using controller communication. Multiplexer supports conversion interfaces among USB, TTL, RS232, RS485, and allows to have one input and multiple outputs. It's more convenient for many kinds of controllers to communication.
Specification
Power Supply
Supply Voltage is 5V ,and is divided into two way.
- 1.via Micro USB data wire.
- 2.Any pin 5V .
Note:please do not plug two or more 5V to aviod to burn the chip. And, do not connect 5V if already connected from Micro USB.
PIN Function Description
Points to note:
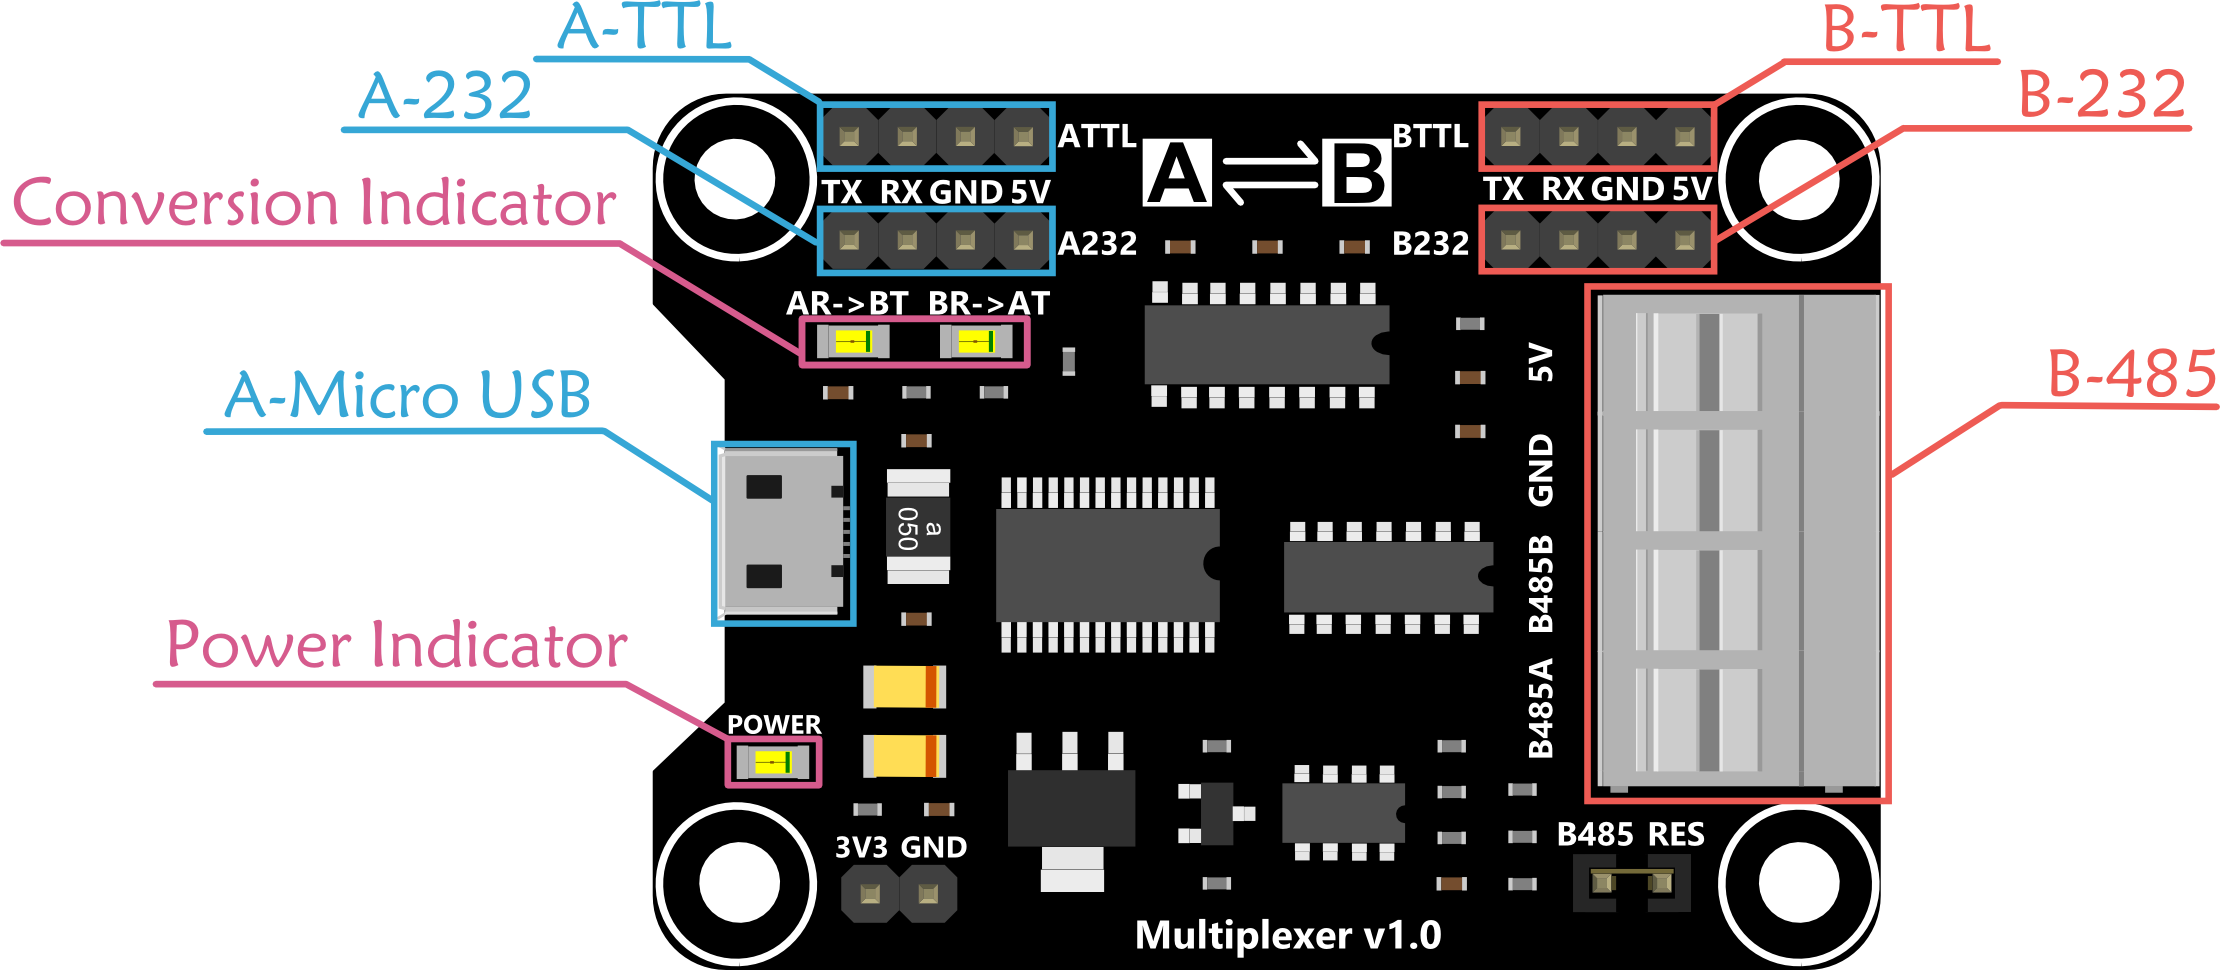
- Multiplexer board is divided into Area A and Area B. Area A includes Micro USB、ATTL and A232 interfaces. Area B includes BTTL、B232、B485 interfaces. The signal can be convertered between A and B.
- The signal in the same area can't be convertered. For example, ATTL can't be converted to A232, but it can be convertered to B232.
- Only one input in the same area, but it allows to have multiple outputs.For example,if micro USB interface in A is input,multiplexer can be allowed to have 232、485 and TTL as outputs.
Indicator: **POWER:**power indicator AR->BT: The interface in A as input,the interface in B as output BR->AT: The interface in B as input, the interface in A as output
Tutorial
Requirements
Sample descripition: The multiplexer board achieve USB to TTL, micro USB interface in A as input and the TTL interface in B as output. The operation is same for USB to 232 and 485.Similarly, the reverse converter B to A is also feasible,such as 232 to USB,485 to USB, TTL to USB.
- Hardware
- DFRduino UNO R3 x 1
- USB Cable A-B for Arduino x 1
- Micro USB Cable x 1
- Arduino Jumper Cables x 1
- Software
- Arduino IDE
- Download and install the Library installation
Connection Diagram
- Plugin Micro USB cable to multiplexer board. The "POWER" LED turns on at the same time.
- Driver Installation: V1.0 uses FT232R USB to TTL chip, please click here to download Driver. V2.0 uses CH340 USB to TTL chip, please [click here to download Driver](https://github.com/Arduinolibrary/DFRobot_FireBeetle_ESP8266_DFR0489/raw/master/CH340 Driver.zip)
Note: CH340 driver is free to install for most of Windows OS, if you find there is no COM Port in Device Manager, please download the driver and install it.
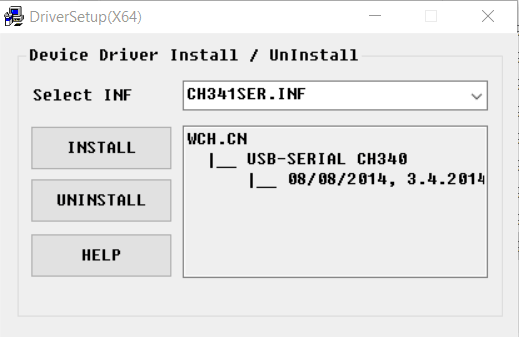
After the driver installed completed, please open Control Panel -- Device Manager in your PC. You will see a new port.
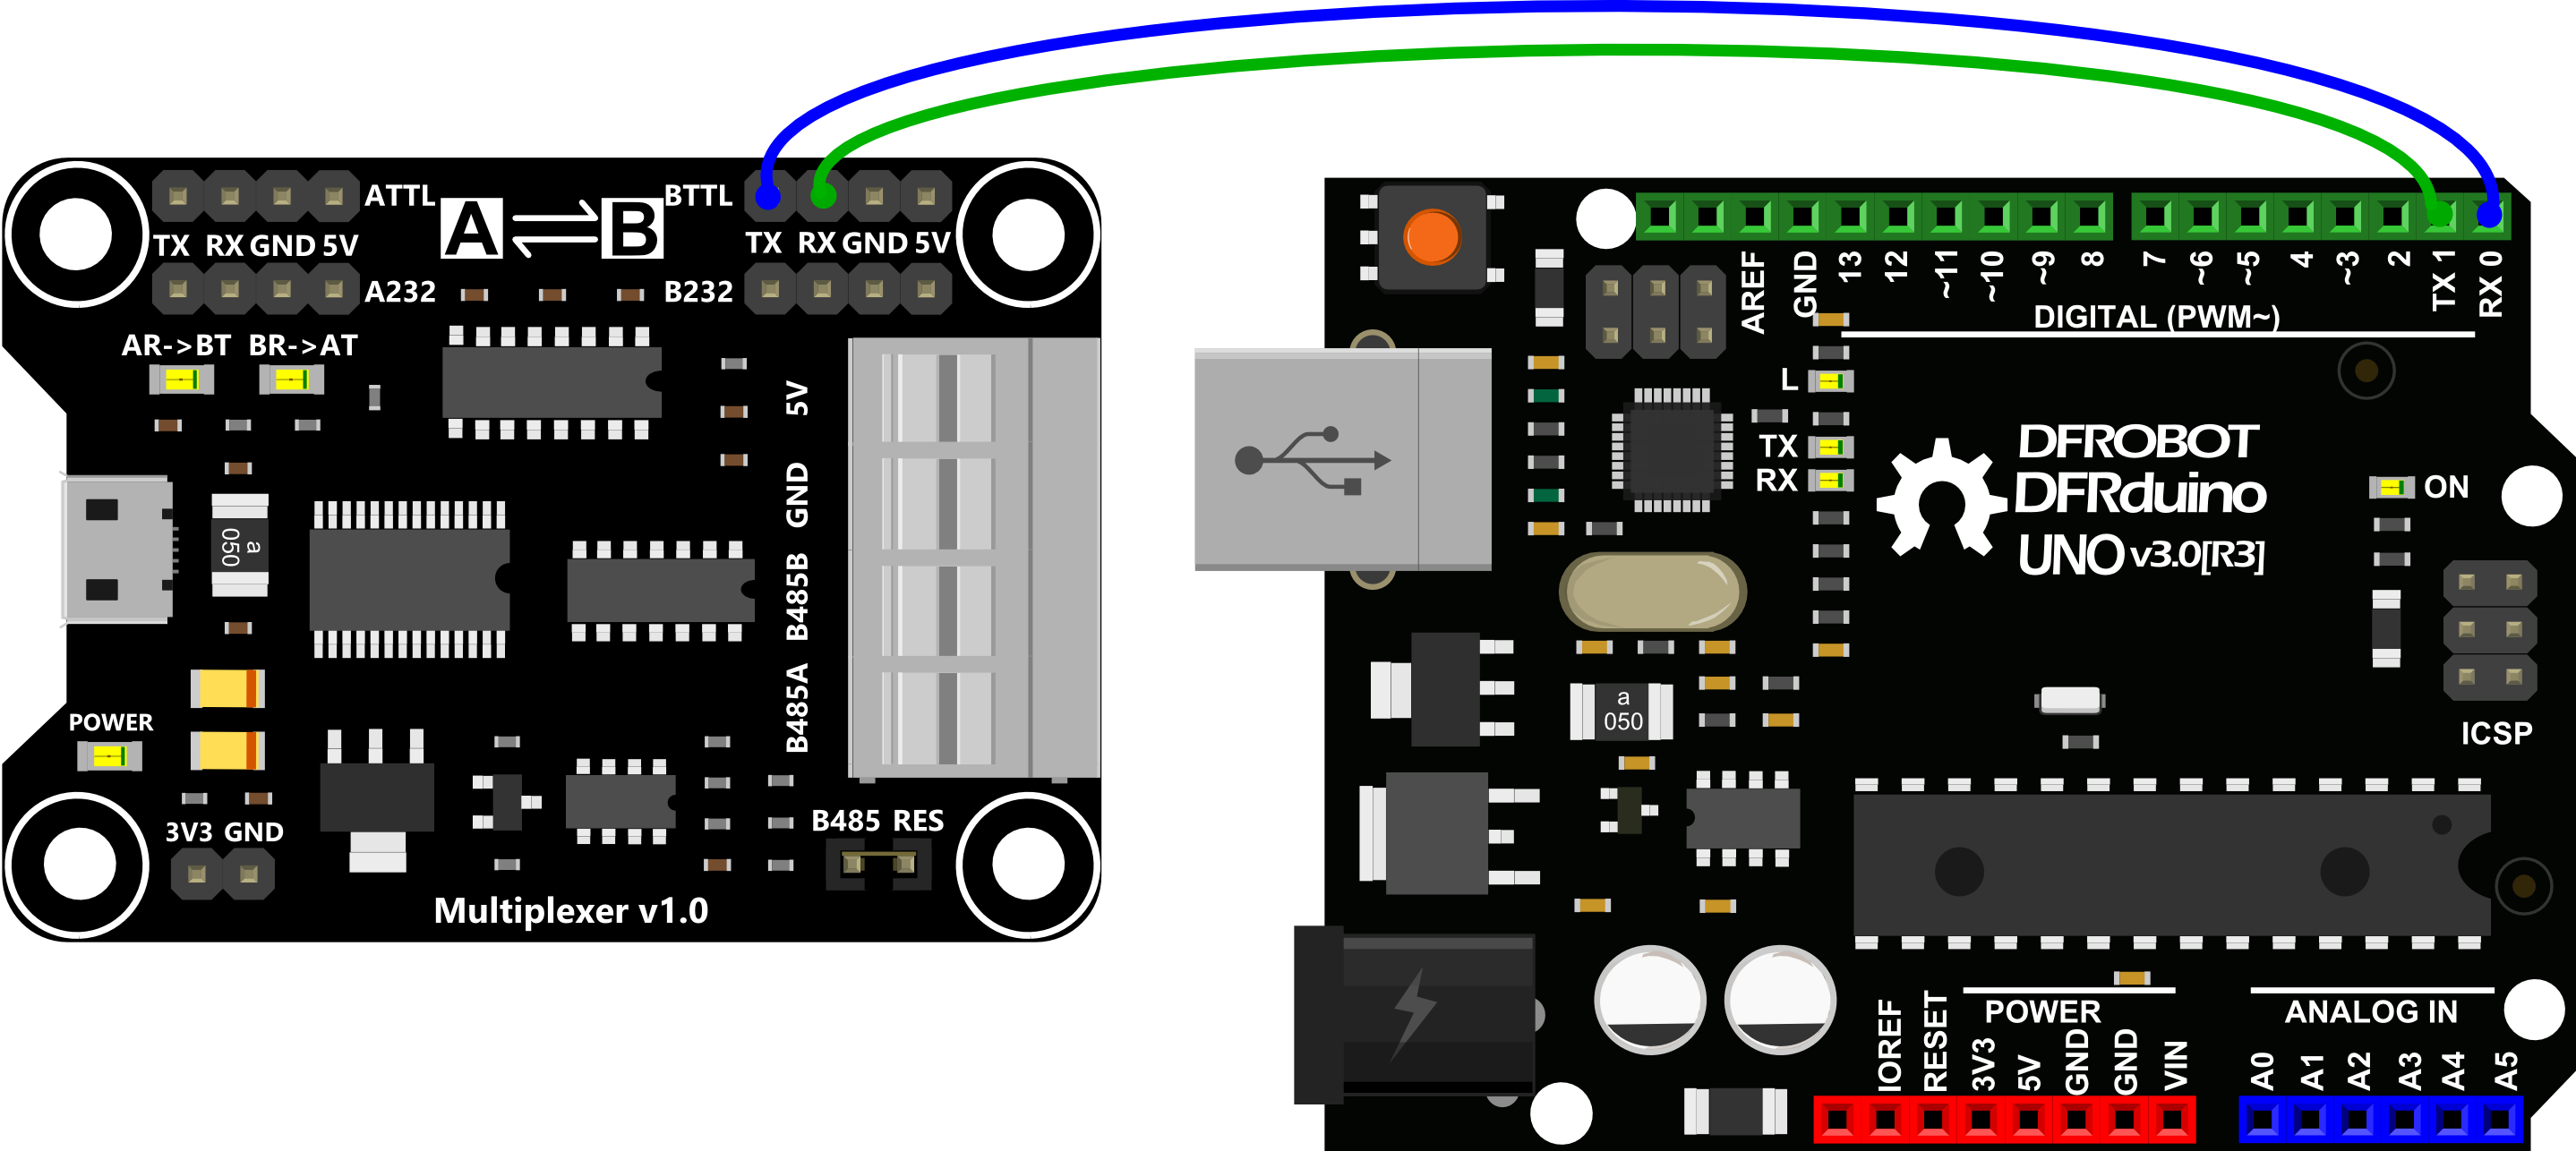
3. According to the following connection diagram,connect it.
4. Plugin the A to B USB to UNO
Sample Code
void setup()
{
  Serial.begin(115200);
}
void loop()
{
  if(Serial.available()){
  Serial.write(Serial.read());
  }
}
Expected Results
We need a serial monitor for monitoring data. There're lots of good tools like putty,CoolTerm and so on.In this case, we choose CoolTerm to do this.
Please set the baud rate to 115200 bps and com port.Back to the main interface, click Connection--Send String, the following dialog will open.
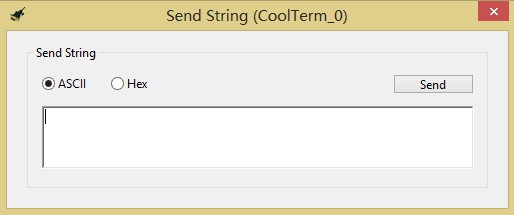
You can send the string in this dialog. The string received can be showed in the other port(UNO port).
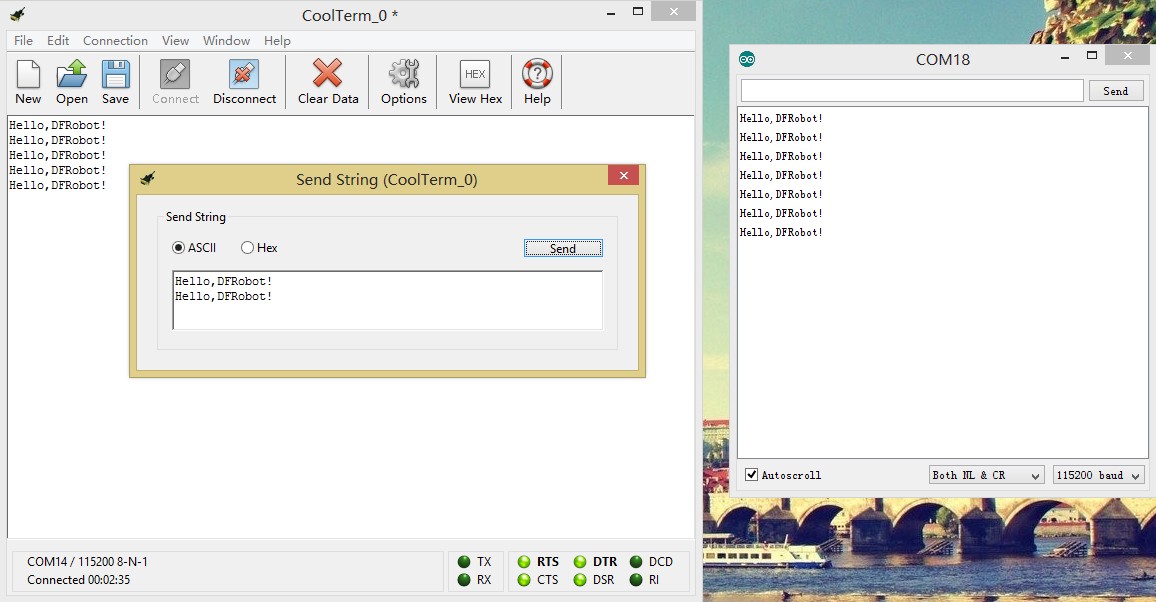
Thus far,you achieve the function USB to TTL.
However, you can test reversed converter based on this function, being B to A converter. You only need to change the UNO code. You will see the change that coolterm will receive data from UNO.
Refer to the test code:
void setup()
{
  Serial.begin(115200);
}
void loop()
{
  Serial.print("Hello,DFRobot!");
  Serial.println();
  delay(500);
}
Other Reference Connection
1.TTL to 232 converter
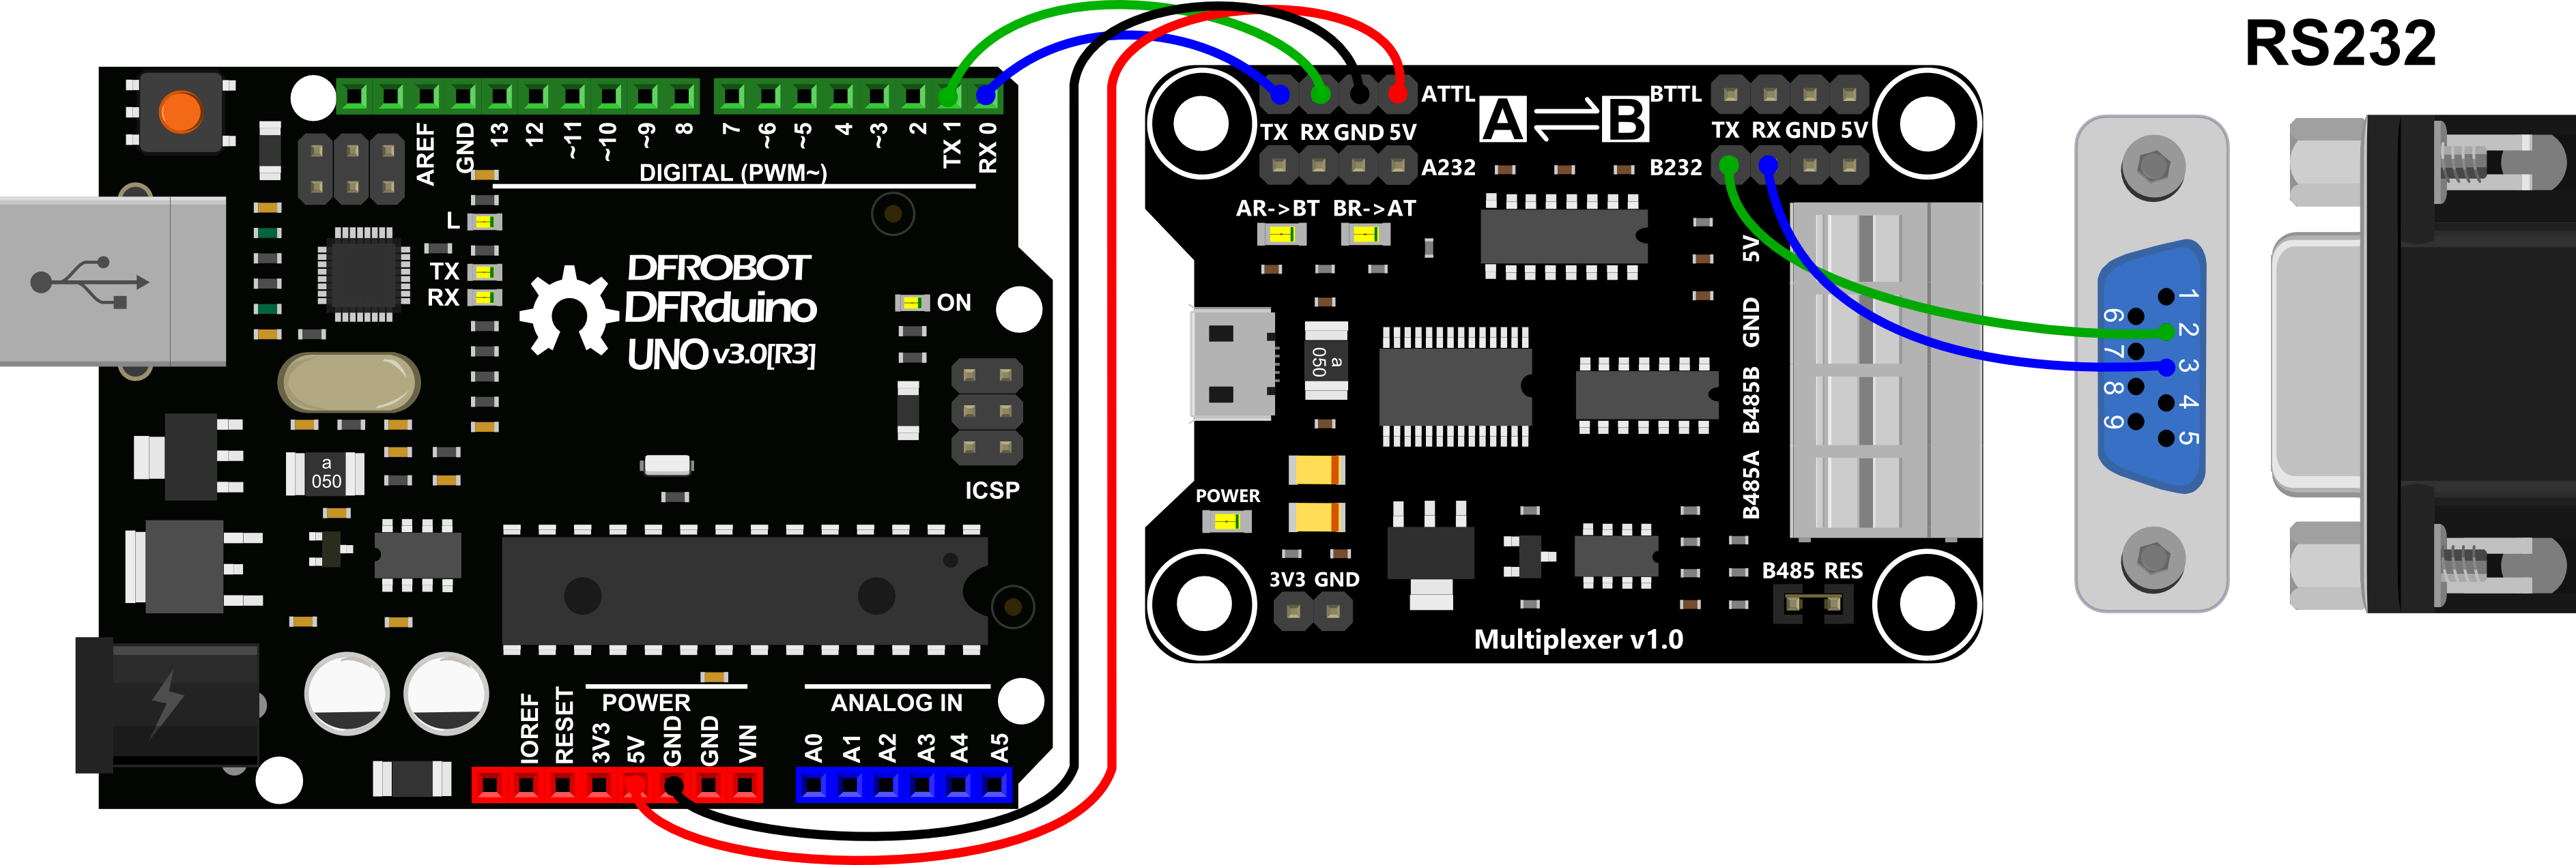
| PIN | RS-232 |
|---|---|
| 1 | DCD |
| 2 | RXD |
| 3 | TXD |
| 4 | DTR |
| 5 | GND |
| 6 | DSR |
| 7 | RTS |
| 8 | CTS |
| 9 | RI |
2.USB to 485 converter
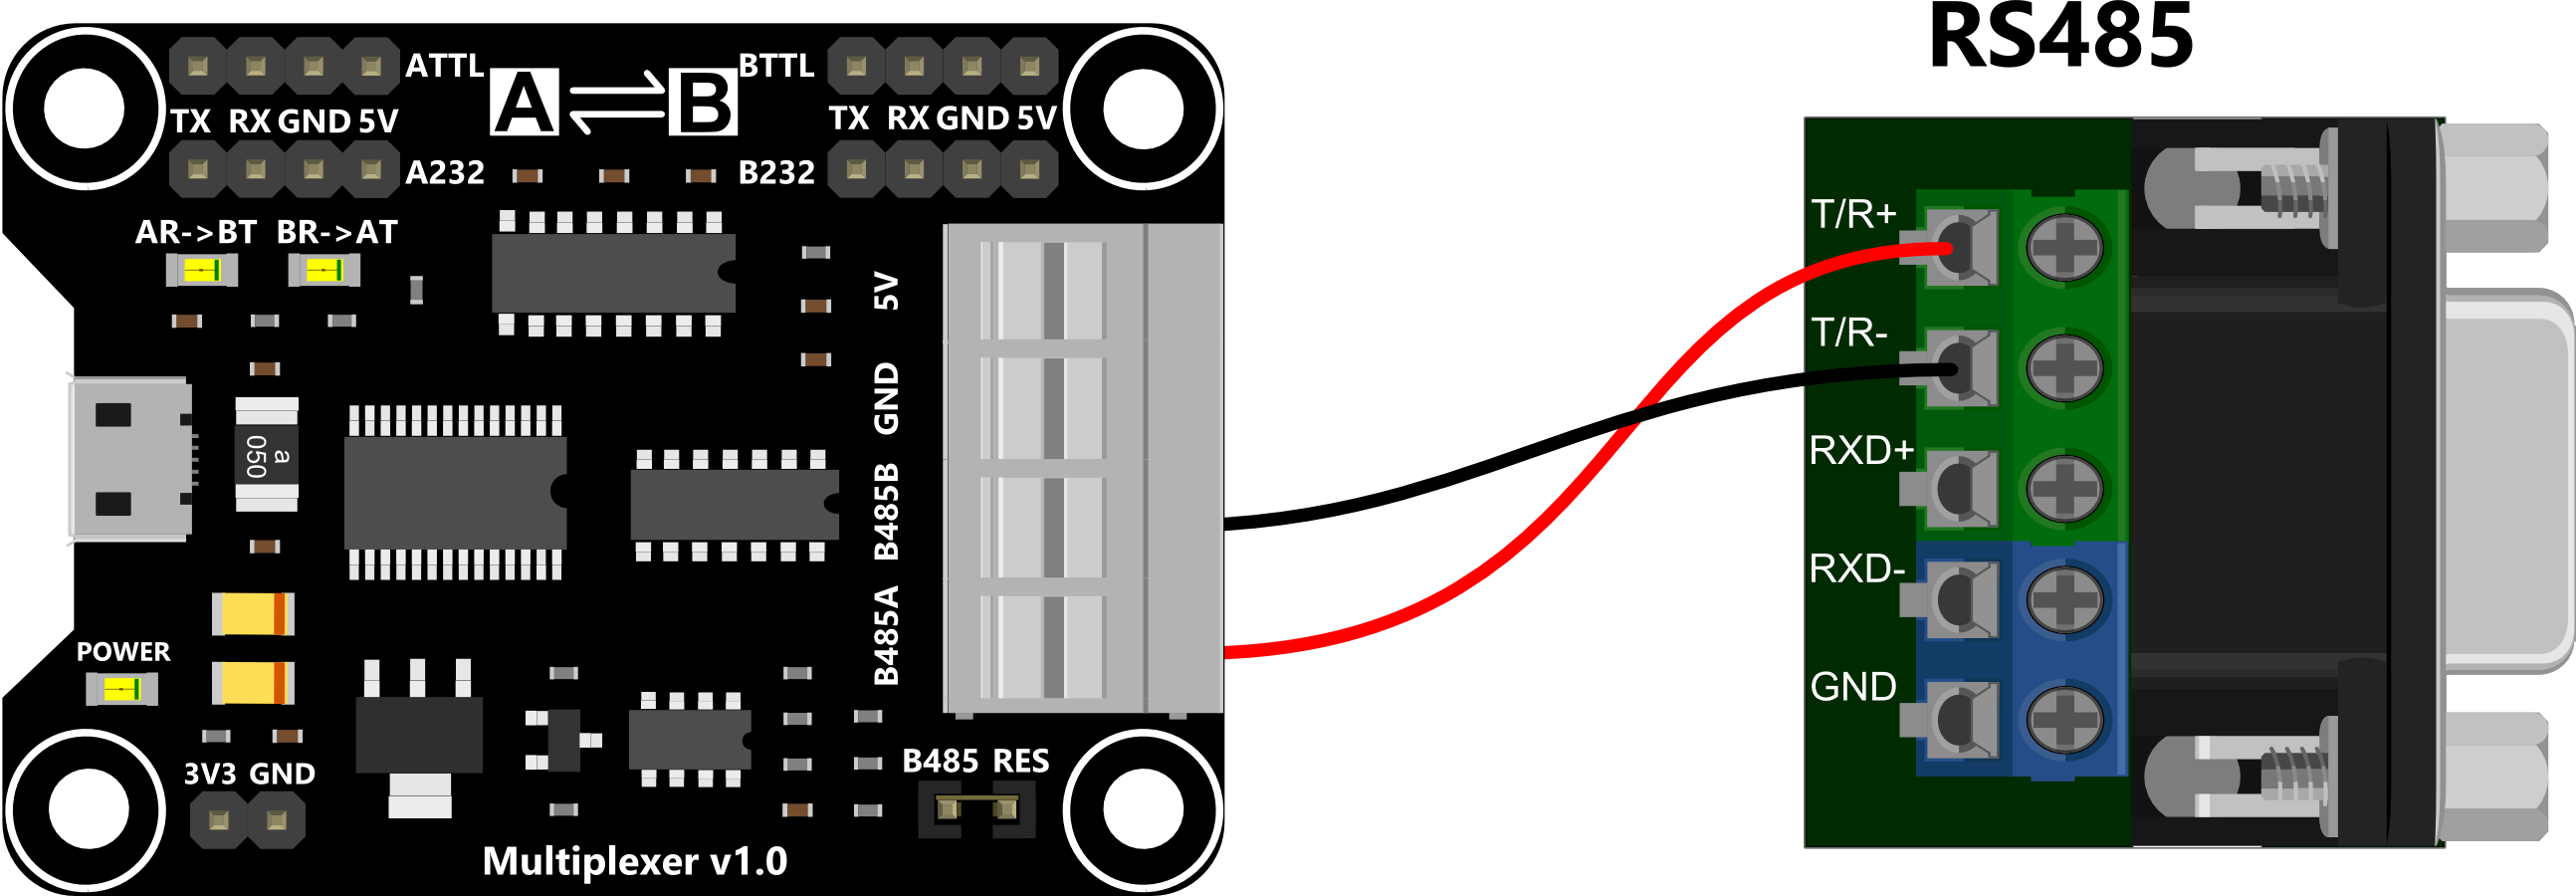
FAQ
| Q&A | Some general Arduino Problems/FAQ/Tips |
|---|---|
| A | For any questions, advice or cool ideas to share, please visit the DFRobot Forum. |
