Introduction
Ultrasonic sensors emit ultrasonic pulses, and by measuring the time of ultrasonic pulse reaches the object and back to the transducer, the distance of sensor from the target object is calculated. They are widely used in detecting displacement, thickness, distance, water level, material level and transparent objects.
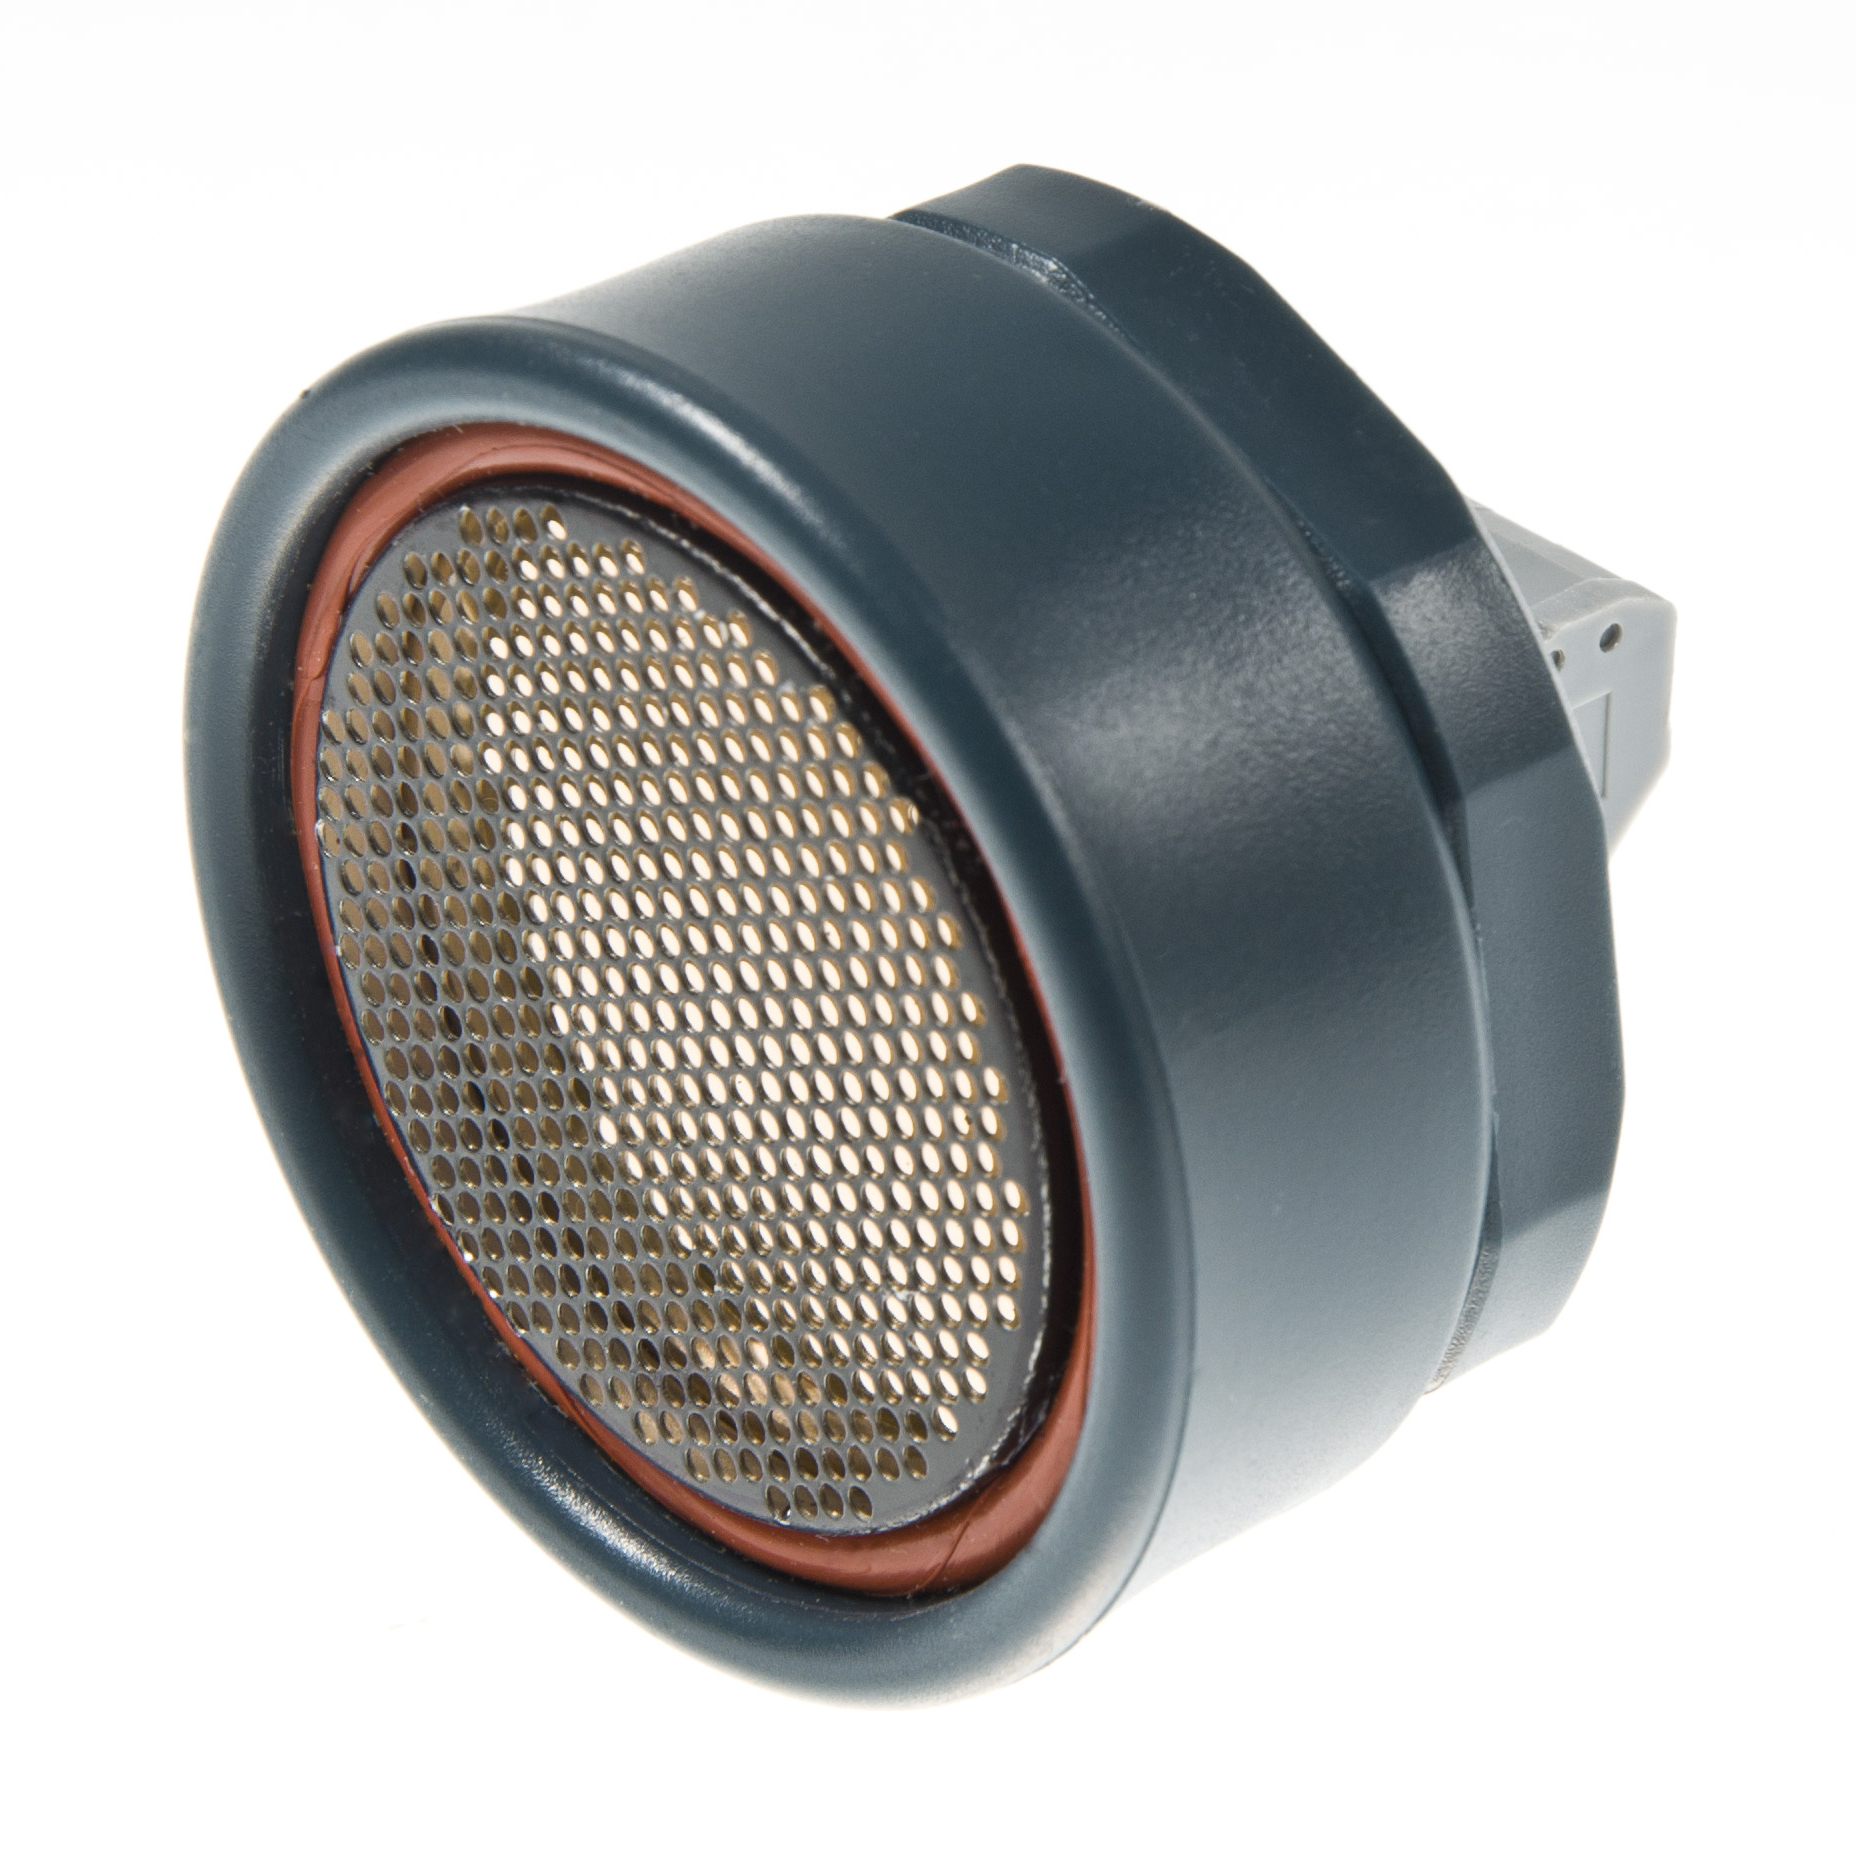
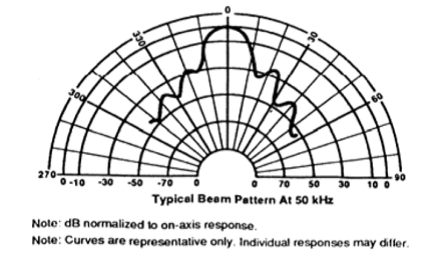
The URM06 - UART Ultrasonic sensor provides very short to long-range detection and ranging from 20cm ~ 10m, comes in a compact, robust PVC housing and matches 35mm electrical pipe mounting. It comes with UART interface and works at high output acoustic power. The ultrasonic sensor detects objects from 20cm to 1000cm and provides range information with 1cm resolution. The URM06 has 15 degree beam angle which has excellent receive sensitivity. And it works best when detecting soft targets. The similar sensors are widely used in professional mobile robot systems such as Pioneer robots.
The URM06 series sensors are the best ultrasonic sensor available in the market regarding its beam angle, senstivity and accuracy.
Specification

- Working Voltage: 6V-12V (5V is acceptable but not recommended)
- Rated Current: 16mA
- Peek Current: 2A
- Interface: UART
- Working Frequency: 49.5KHZ
- Working Temperature: -10℃ ~ +70℃
- Detecting Angle: 15°(-6dB)
- Detecting Range: 20cm ~ 10m
- Size: 50mm(diameter)*43mm(length)
- Mounting Thread Diameter: 35mm
- Weight: 50g
Applications
- robot navigation
- obstacle avoidance
- measuring distance devices
- engineering measurement tools
- industrial control system
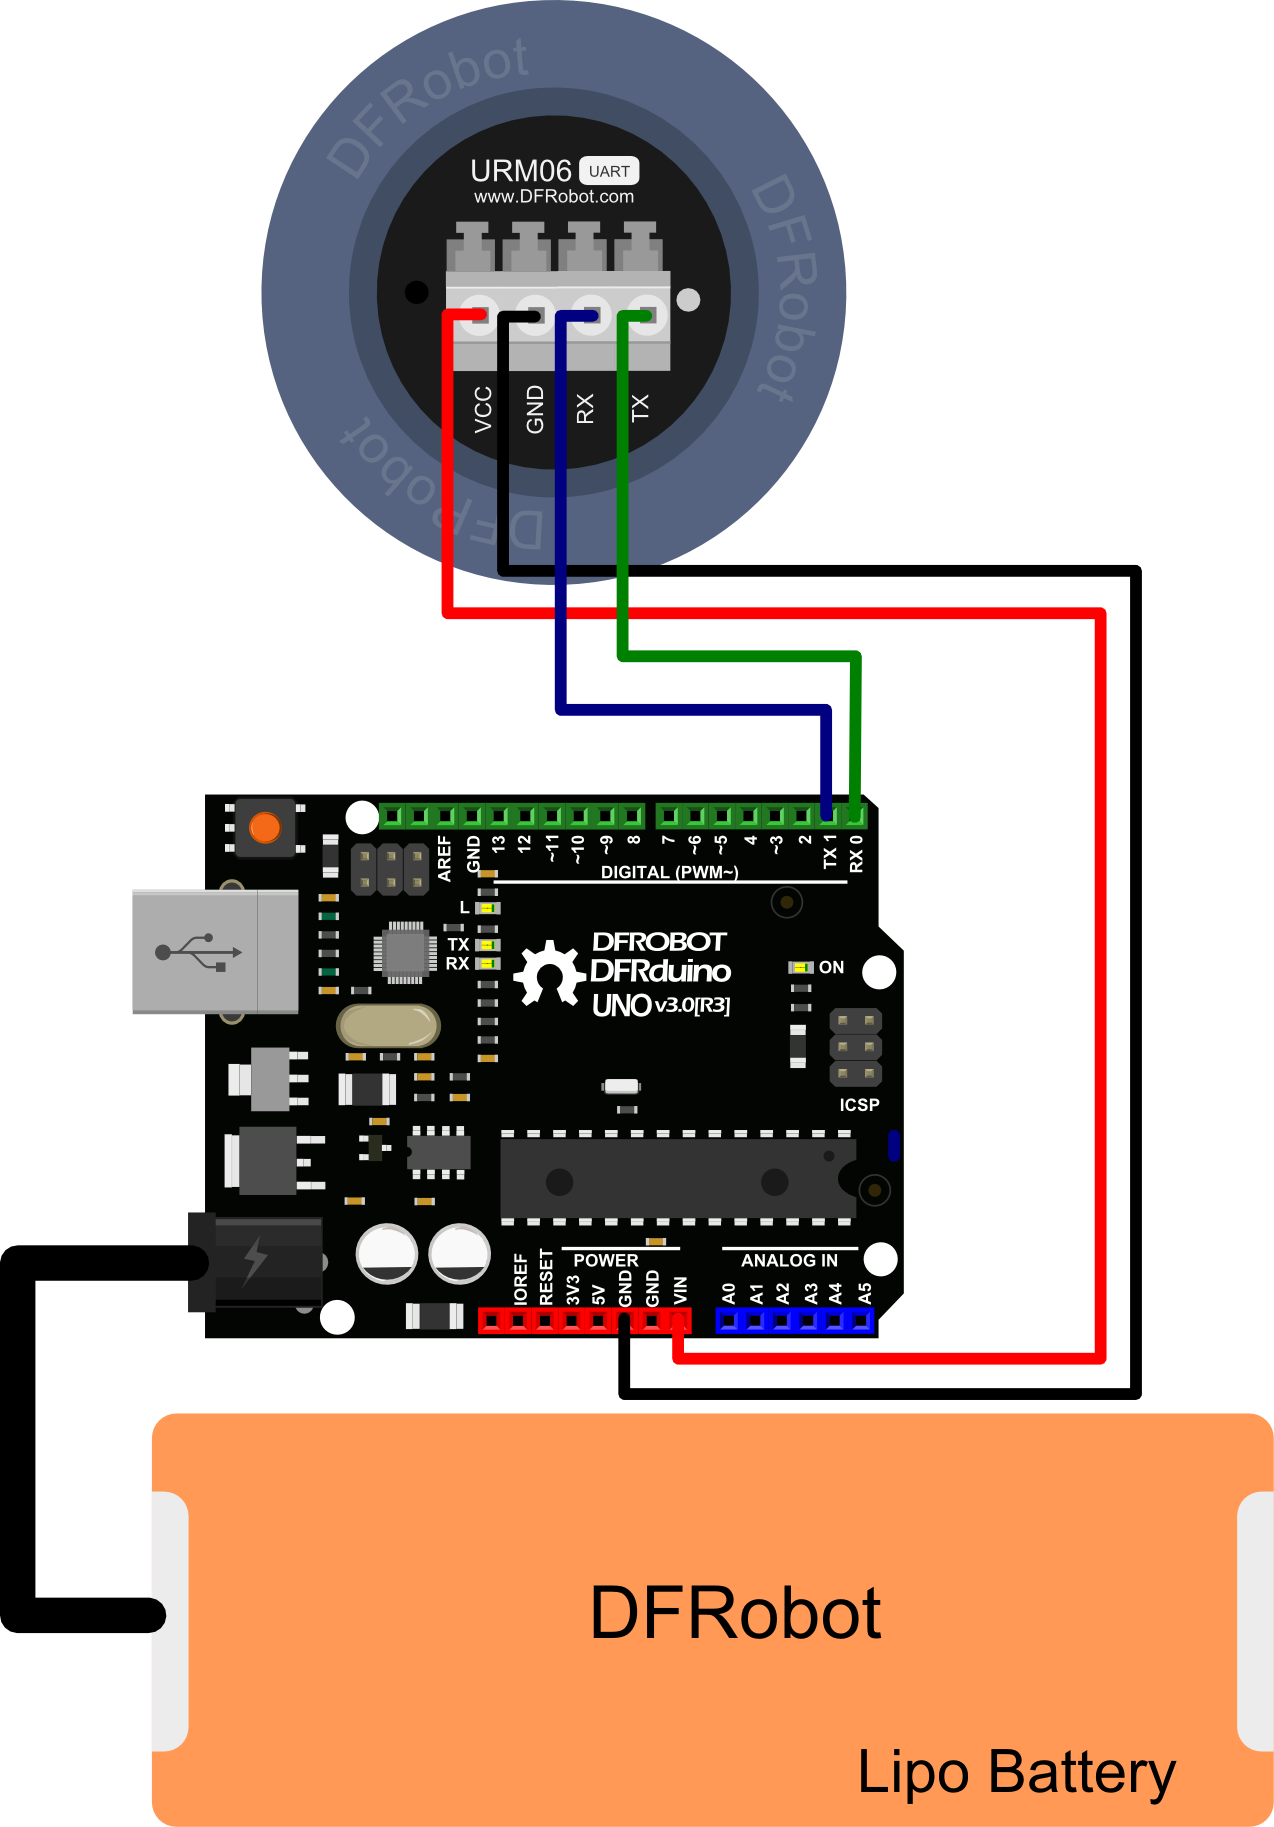
Connection Diagram

Pin Definition
- VCC: 6~12V@Max 2A (5V is acceptable but not recommended)
- GND: Ground
- RX: UART RX pin
- TX: UART TX pin
Communication Protocol
Default Information:
- Default Baudrate: 19200,8,N,1
- Default Address: 0x11
- Communication Command Format
Communication Commands and Returns frame Format:
| Header | Address | Length | Cmd | Data | SUM |
|---|---|---|---|---|---|
| 55 | AA | 11 | N | 01 | Data1~DataN |
PS: The sum byte value is the sum of all the byte value before. Just keep one byte from the total sum value.
Measure Distance
You could send a measure command to the Ultrasonic module. It will measure the distance, and send the value back through UART port.
For example:
Send Command: 0x55 0xAA 0x11 0x00 0x02 0x12
Instruction:
- Header----------------0x55
- Header----------------0xAA
- Address---------------0x11
- Length-----------------0x00
- Read Distance-------0x02
- Check Sum-----------0x12
Return Command:0x55 0xAA 0x11 0x02 0x02 0x12 0x34 0x5A
High 8-bit: 0x12;
Low 8-bit: 0x34
So the distance value is “0x1234”, which convert to decimal is 4660mm.
“0x5A” is low 8-bit of the check sum.
Measure Temperature
You could send a measure command to the Ultrasonic module. It will measure the temperature, and send the value back through UART port.
For example:
Send Command: 0x55 0xAA 0x11 0x00 0x03 0x13
Instruction:
- Header-----------------------0x55
- Header-----------------------0xAA
- Address-----------------------0x11
- Length------------------------0x00
- Read Temperature----------0x03
- Check Sum-------------------0x13
Return Command:0x55 0xAA 0x11 0x02 0x03 0x00 0xFF 0x14
High 8-bit: 0x00;
Low 8-bit: 0xFF
The output value will be “0x00FF”, which convert to decimal is 255. As the real temperature is 10% of the output value, so it is 25.5℃.
NOTE:
The measuring range is -10~70℃, it is a 16-signed integer. Negative digits are stored in two's complement' as in bitwise complement(~2). The method is judging whether BIT15 is “1”. If it is “1”, it means it is a negative number, the data will be inverted, and “1” should be added to the result.
Further information: https://www.arduino.cc/reference/en/language/structure/bitwise-operators/bitwisenot/
Set Address Command
The module default address is “0x11”. And the broadcast address is “0xAB”. If you don’t know the current address, but you want to set its address, you could use broadcast address to set the target address.
For example:
Send Command: 0x55 0xAA 0xAB 0x01 0x55 0x11 0x11
Instruction:
- Header-----------------------0x55
- Header-----------------------0xAA
- Broadcast Address---------0xAB
- Length------------------------0x01
- Address Setting CMD-----0x55
- Target Address---------------0x11
- Check Sum--------------------0x11
Return Command:0x55 0xAA 0x11 0x01 0x55 0xCC 0x32
The address of each device can be changed when multiple devices are connected. The new address must be between “0x11” and “0x80”. If you change it successfully, the module will return “0xCC”. If you fail, it will return “0xEE”.
Set the Detecting Range of the Ultrasonic Module
You could set the detecting range through UART interface. The proper range will increase sonar frequency and improve its accuracy.
For example:
If the module address is “0x11”, the range limit is 3840mm
Send Command: 0x55 0xAA 0x11 0x02 0x04 0x0F 0x00 0x25 //3840=0xF00
Instruction:
- Header-----------------------0x55
- Header-----------------------0xAA
- Address-----------------------0x11
- Length------------------------0x02
- Set Value CMD--------------0x04
- High 8-bit---------------------0x0F
- Low 8-bit----------------------0x00
- Check Sum--------------------0x25
Return Command: 0x55 0xAA 0x11 0x00 0x04 0xCC 0xE0
If you change it successfully, the module will return “0xCC”. If you fail, it will return “0xEE”.
Note: the default setting is the maximum value.
Read the Detecting Range of the Ultrasonic Module
You could read the detecting range through UART interface.
For example:
If the module address is “0x11”.
Send Command: 0x55 0xAA 0x11 0x00 0x05 0x15
Instruction:
- Header-----------------------0x55
- Header-----------------------0xAA
- Address-----------------------0x11t
- Length------------------------0x00
- Read value CMD-----------0x05
- Check Sum-------------------0x15
Return Command:0x55 0xAA 0x11 0x02 0x05 0x0F 0x00 0x26
So the return value is “0x0F00”, which convert to decimal is 3840mm
The unit of the distance is “mm”.
Set the UART Baudrate of the Ultrasonic Module
You could set communication baudrate of the ultrasonic module through UART interface.
For example:
If the module address is “0x11”.
Send Command: 0x55 0xAA 0x11 0x01 0x08 0x05 0x1E //set baudrate to 19200BPS
Instruction:
- Header-----------------------0x55
- Header-----------------------0xAA
- Address----------------------0x11
- Length------------------------0x01
- Baudrate Setting CMD----0x08
- Target baudrate-------------0x05
- Check Sum--------------------0x1E
Return Command:0x55 0xAA 0x11 0x01 0x08 0xCC 0xE4
If you change it successfully, the module will return “0xCC”. If you fail, it will return “0xEE”.
Baudrate List:
| Command | Description |
|---|---|
| 55 AA 11 01 08 00 19 | Set baudrate to 1200BPS |
| 55 AA 11 01 08 01 1A | Set baudrate to 2400BPS |
| 55 AA 11 01 08 02 1B | Set baudrate to 4800BPS |
| 55 AA 11 01 08 03 1C | Set baudrate to 9600BPS |
| 55 AA 11 01 08 04 1D | Set baudrate to 14400BPS |
| 55 AA 11 01 08 05 1E | Set baudrate to 19200BPS |
| 55 AA 11 01 08 06 1F | Set baudrate to 28800BPS |
| 55 AA 11 01 08 07 20 | Set baudrate to 38400BPS |
| 55 AA 11 01 08 08 21 | Set baudrate to 57600BPS |
| 55 AA 11 01 08 09 22 | Set baudrate to 115200BPS |
| 55 AA 11 01 08 0A 23 | Set baudrate to 128000BPS |
| 55 AA 11 01 08 0B 24 | Set baudrate to 256000BPS |
Sample Code
''' Please download the Library in the Document Section First '''
#include "Arduino.h"

// Include application, user and local libraries
#include "URM_UART.h"


#define DefaultBaudrate 19200UL         //the Default Baudrate for the Urm06_UART
#define DefaultAddress 0x11             //the Default Address for the Urm06_UART
#define DefaultMaxDistance (-1)         //the Default Max Distance for the Urm06_UART. "-1" means there is no Max Distance limitation. Set the Max Distance can limit the Distance range and speed up the detection.

#define CustomizedTimeOutDuration 500   //Time Out Duration can be Customized in "ms" unit

// Define variables and constants
//URM_UART urm(Serial);  //select the Serial port for communication with Urm_UART sensor
URM_UART urm(Serial);  //select the Serial port for communication with Urm_UART sensor

void onTimeOut()
{
    //If there is no reply from Urm_UART lasting for 1 second, this function will run. The time duration can be Customized
    //TODO write your code here:
    Serial.println("onTimeOut");

}
void onRequestDistance(byte theAddress, int theDistance)
{
    //If received Distance reply, this function will run.
    //theDistance is in "mm" unit
    //TODO write your code here:
    Serial.print("Address:");
    Serial.println(theAddress);
    Serial.print("Distance:");
    Serial.print(theDistance);
    Serial.println("mm");

}
void onRequestTemperature(byte theAddress, float theTemperature)
{
    //If received Temperature reply, this function will run.
    //theTemperature is in "°C" unit
    //TODO write your code here:
    Serial.print("Address:");
    Serial.println(theAddress);
    Serial.print("Temperature:");
    Serial.print(theTemperature);
    Serial.println(" C");

}
void onRequestMaxDistance(byte theAddress, int theMaxDistance)
{
    //If received Max Distance reply, this function will run.
    //theMaxDistance is in "mm" unit
    //TODO write your code here:
    Serial.print("Address:");
    Serial.println(theAddress);
    Serial.print("MaxDistance:");
    Serial.print(theMaxDistance);
    Serial.println("mm");
}
void onSetMaxDistance(byte theAddress, boolean isOperationSuccess)
{
    //After setting the Max Distance and getting a reply, this function will run.
    //Set the Max Distance can limit the Distance range and speed up the detection.
    //TODO write your code here:
    Serial.print("Address:");
    Serial.println(theAddress);
    Serial.print("SetMaxDistance:");
    if (isOperationSuccess) {
        Serial.println("Success");
    }
    else{
        Serial.println("Failure");
    }
}
void onSetBaudrate(byte theAddress, boolean isOperationSuccess)
{
    //After setting the Baudrate and getting a reply, this function will run.
    //TODO write your code here:
    Serial.print("Address:");
    Serial.println(theAddress);
    Serial.print("SetBaudrate:");
    if (isOperationSuccess) {
        Serial.println("Success");
    }
    else{
        Serial.println("Failure");
    }
}
void onSetAddress(byte theAddress, boolean isOperationSuccess)
{
    //After setting the Address and getting a reply, this function will run.
    //TODO write your code here:
    Serial.print("Address:");
    Serial.println(theAddress);
    Serial.print("SetAddress:");
    if (isOperationSuccess) {
        Serial.println("Success");
    }
    else{
        Serial.println("Failure");
    }
}
void onWrongStack()
{
    //If received wrong command, this function will run.
    //TODO write your code here:
    Serial.println("WrongStack");
}

//Run the proper function based on the different kinds of states
void commandProcess()
{
    if (urm.available()) {
        switch (urm.callBackState) {
            case URM_UART::OnTimeOut:
                onTimeOut();
                break;
            case URM_UART::OnRequestDistance:
                onRequestDistance(urm.receivedAddress, urm.receivedContent);
                break;
            case URM_UART::OnRequestTemperature:
                onRequestTemperature(urm.receivedAddress, urm.receivedContent/10.0);
                break;
            case URM_UART::OnRequestMaxDistance:
                onRequestMaxDistance(urm.receivedAddress, urm.receivedContent);
                break;
            case URM_UART::OnSetMaxDistance:
                onSetMaxDistance(urm.receivedAddress, urm.receivedContent);
                break;
            case URM_UART::OnSetBaudrate:
                onSetBaudrate(urm.receivedAddress, urm.receivedContent);
                break;
            case URM_UART::OnSetAddress:
                onSetAddress(urm.receivedAddress, urm.receivedContent);
                break;
            case URM_UART::OnWrongStack:
                onWrongStack();
                break;
            default:
                break;
        }
    }
}

// Add setup code
void setup()
{
    urm.begin(DefaultBaudrate);
}

// Add loop code
void loop()
{
    commandProcess();

    static unsigned long sendingTimer=millis();
    if (millis()-sendingTimer>=1000) {
        sendingTimer=millis();

        //Each function below from URM_UART returns the state whether UART Bus is busy or not.
        //If the Bus is busy, wait until the bus is released.
        while(!urm.requestDistance(DefaultAddress)) {
            commandProcess();
        }
        //
        //    while(!urm.requestTemperature(DefaultAddress)) {
        //      commandProcess();
        //    }
        //
        //    while(!urm.requestMaxDistance(DefaultAddress)) {
        //      commandProcess();
        //    }
        //
        //    while(!urm.setAddress(DefaultAddress)) {
        //      commandProcess();
        //    }
        //
        //    while(!urm.setBaudrate(DefaultAddress, DefaultBaudrate)) {
        //      commandProcess();
        //    }
        //
        //    while(!urm.setMaxDistance(DefaultAddress, DefaultMaxDistance)) {
        //      commandProcess();
        //    }
        //


        //Time Out Duration can be Customized
        //    while(!urm.requestDistance(DefaultAddress, CustomizedTimeOutDuration)) {
        //      commandProcess();
        //    }
        //
        //    while(!urm.requestTemperature(DefaultAddress, CustomizedTimeOutDuration)) {
        //      commandProcess();
        //    }
        //
        //    while(!urm.requestMaxDistance(DefaultAddress, CustomizedTimeOutDuration)) {
        //      commandProcess();
        //    }
        //
        //    while(!urm.setAddress(DefaultAddress, CustomizedTimeOutDuration)) {
        //      commandProcess();
        //    }
        //
        //    while(!urm.setBaudrate(DefaultAddress, DefaultBaudrate, CustomizedTimeOutDuration)) {
        //      commandProcess();
        //    }
        //
        //    while(!urm.setMaxDistance(DefaultAddress, DefaultMaxDistance, CustomizedTimeOutDuration)) {
        //      commandProcess();
        //    }

    }
}
FAQ
For any questions, advice or cool ideas to share, please visit the DFRobot Forum.