Introduction
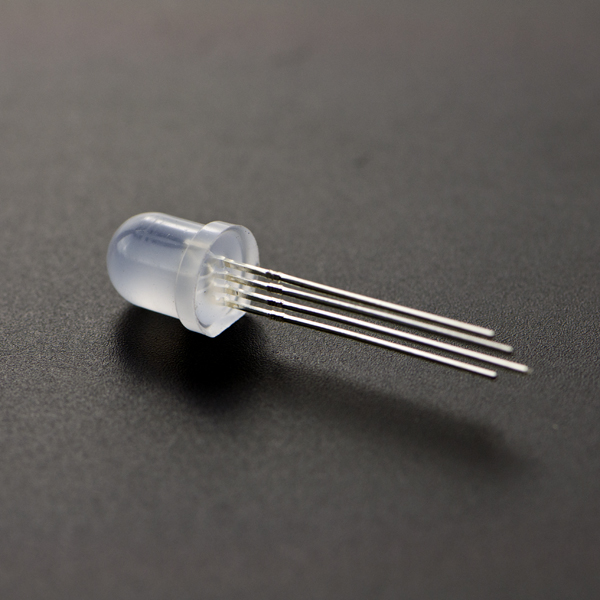
This is a kind of chip_inside LED, so you can control each LED individually! It will be great wonderful when you change the color. And for the control of the LEDs, it only need one digital pin of your Arduino whose MCU power supplies from 3.3V-5V. It is using single thread zero yards communication protocol,"DIN" will receive the contrtol signal and transmit to the next LED via "DOUT" port. So these LED could be cascade connection, and individual control. It is amazing if you want to show some beatuy with LEDs.
Features
- Intelligent reverse connection protection
- Built-in signal shaping circuit
- Built-in POR and BOR circuit
- 256 brightness level
- 16777216 kinds of full true color display
- Sacnning frequency >=400Hz/s
Specification
- Model: Φ8MM full-color light emitting diode LED lights
- Package: DIP type
- Color: tri-color, with IC control is adjustable to a myriad of color
- Operating Voltage: 3.3V~5V
- Operating Current IF: 20mA
- Maximum transmitting data speed: 800Kbps
LED Brightness
| Color | Wave length (nm) | Luminance (mcd) | Voltage (V) |
|---|---|---|---|
| Blue | 465-467 | 180-200 | 3.0-3.2 |
| Green | 522-525 | 660-720 | 2.8-3.0 |
| Red | 620-625 | 390-420 | 1.9-2.1 |
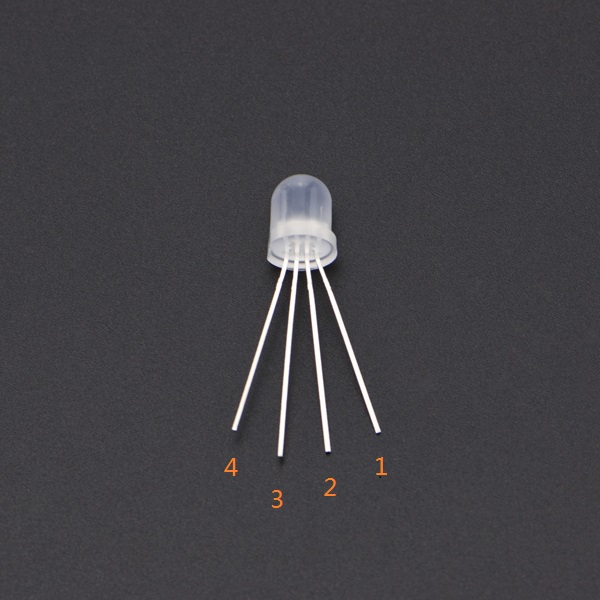
Pin Defination

1: DIN
2: VDD
3: GND
4: DOUT
Tutorial
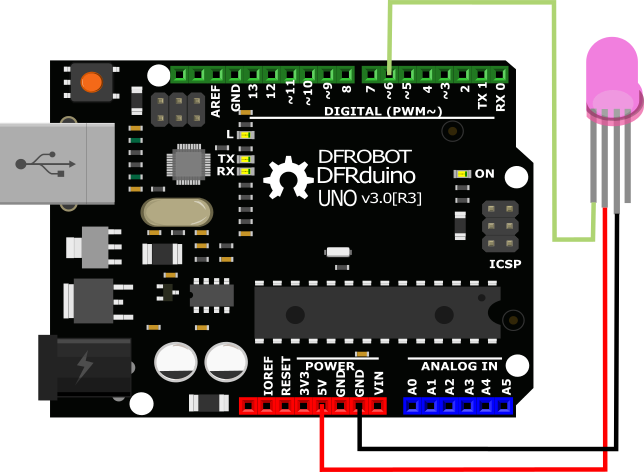
Connection Diagram

Sample Code
Please download the related Arduino library: Adafruit_NeoPixel
void setup(){
 #include <Adafruit_NeoPixel.h>

#define PIN 6

// Parameter 1 = number of pixels in strip
// Parameter 2 = pin number (most are valid)
// Parameter 3 = pixel type flags, add together as needed::
//   NEO_RGB     Pixels are wired for RGB bitstream
//   NEO_GRB     Pixels are wired for GRB bitstream
//   NEO_KHZ400  400 KHz bitstream (e.g. FLORA pixels)
//   NEO_KHZ800  800 KHz bitstream (e.g. High Density LED strip)
Adafruit_NeoPixel strip = Adafruit_NeoPixel(60, PIN, NEO_GRB + NEO_KHZ800);

void setup() {
  strip.begin();
  strip.show(); // Initialize all pixels to 'off'
}

void loop() {
  // Some example procedures showing how to display to the pixels:
  colorWipe(strip.Color(255, 0, 0), 50); // Red
  colorWipe(strip.Color(0, 255, 0), 50); // Green
  colorWipe(strip.Color(0, 0, 255), 50); // Blue
  rainbow(20);
  rainbowCycle(20);
}

// Fill the dots one after the other with a color
void colorWipe(uint32_t c, uint8_t wait) {
  for(uint16_t i=0; i<strip.numPixels(); i++) {
    strip.setPixelColor(i, c);
    strip.show();
    delay(wait);
  }
}

void rainbow(uint8_t wait) {
  uint16_t i, j;

  for(j=0; j<256; j  ) {
    for(i=0; i<strip.numPixels(); i++) {
      strip.setPixelColor(i, Wheel((i+j) & 255));
    }
    strip.show();
    delay(wait);
  }
}

// Slightly different, this makes the rainbow equally distributed throughout
void rainbowCycle(uint8_t wait) {
  uint16_t i, j;

  for(j=0; j<256*5; j++) { // 5 cycles of all colors on wheel
    for(i=0; i< strip.numPixels(); i++) {
      strip.setPixelColor(i, Wheel(((i * 256 / strip.numPixels()) + j) & 255));
    }
    strip.show();
    delay(wait);
  }
}

// Input a value 0 to 255 to get a color value.
// The colours are a transition r - g - b - back to r.
uint32_t Wheel(byte WheelPos) {
  if(WheelPos < 85) {
    return strip.Color(WheelPos * 3, 255 - WheelPos * 3, 0);
  }
  else if(WheelPos < 170) {
    WheelPos -= 85;
    return strip.Color(255 - WheelPos * 3, 0, WheelPos * 3);
  }
  else {
    WheelPos -= 170;
    return strip.Color(0, WheelPos * 3, 255 - WheelPos * 3);
  }
}

}
