4.7-inch E Ink Display
SKU: DFR0835
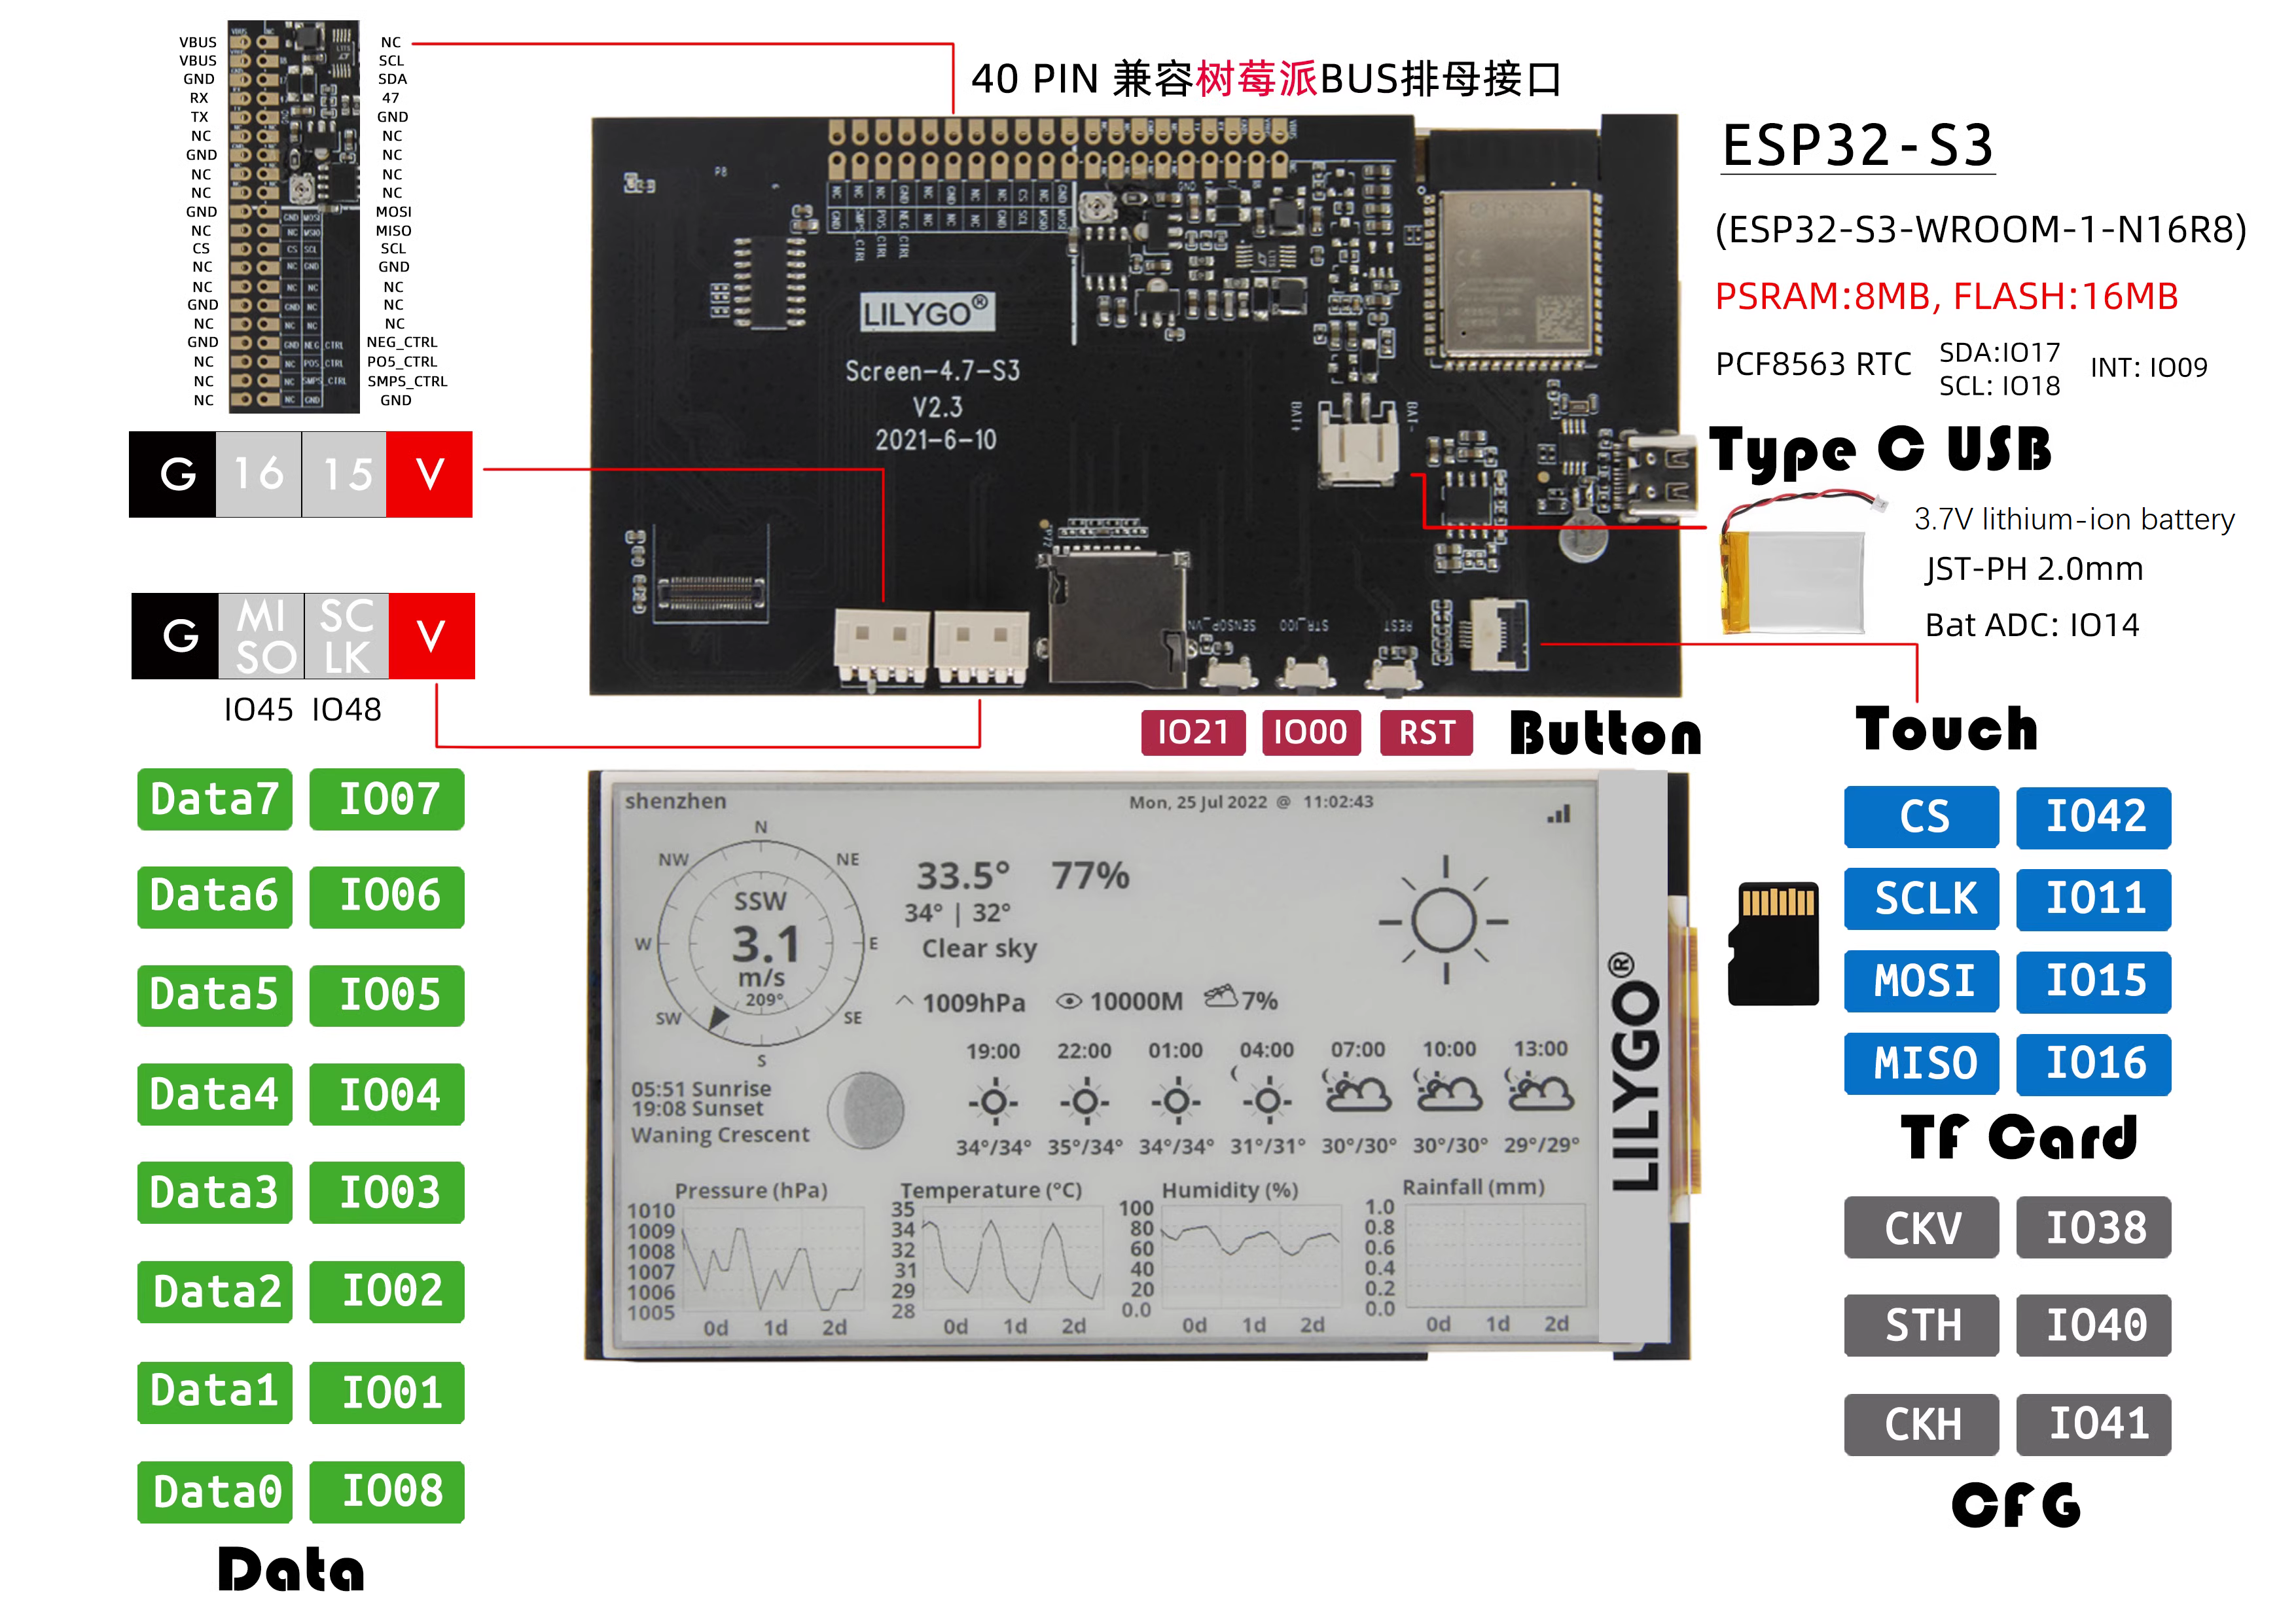
This E Ink display controller uses the ESP32-S3-WROOM-1-N16R18 (16MB Flash, 8MB PSRAM) and features a 4.7-inch 540x960 16-level grayscale display with partial refresh. Compared to LCD, it offers better text reading, low power, and image retention when off. It has a 6-pin touch interface, 3 side buttons (2 customizable, 1 reset), a 40-pin Raspberry Pi-compatible header, and a 3.7V battery socket on the back.