Introduction
The Insect Bot mini is an easy to assemble robot for young engineers from 6 to 100 years. With assembling this robot you will learn the basic robotics in terms of how all the components work together. There is a microcontroller which is working as the robot brain and two servo motors for the movement. The IR sensor on it's head will act as an eye to detect obstacles in front. The programming can be done by simply connecting the Beetle controller with the USB port on your computer and using the free Arduino IDE software from the arduino.cc website.
Tutorial
Connection Diagram
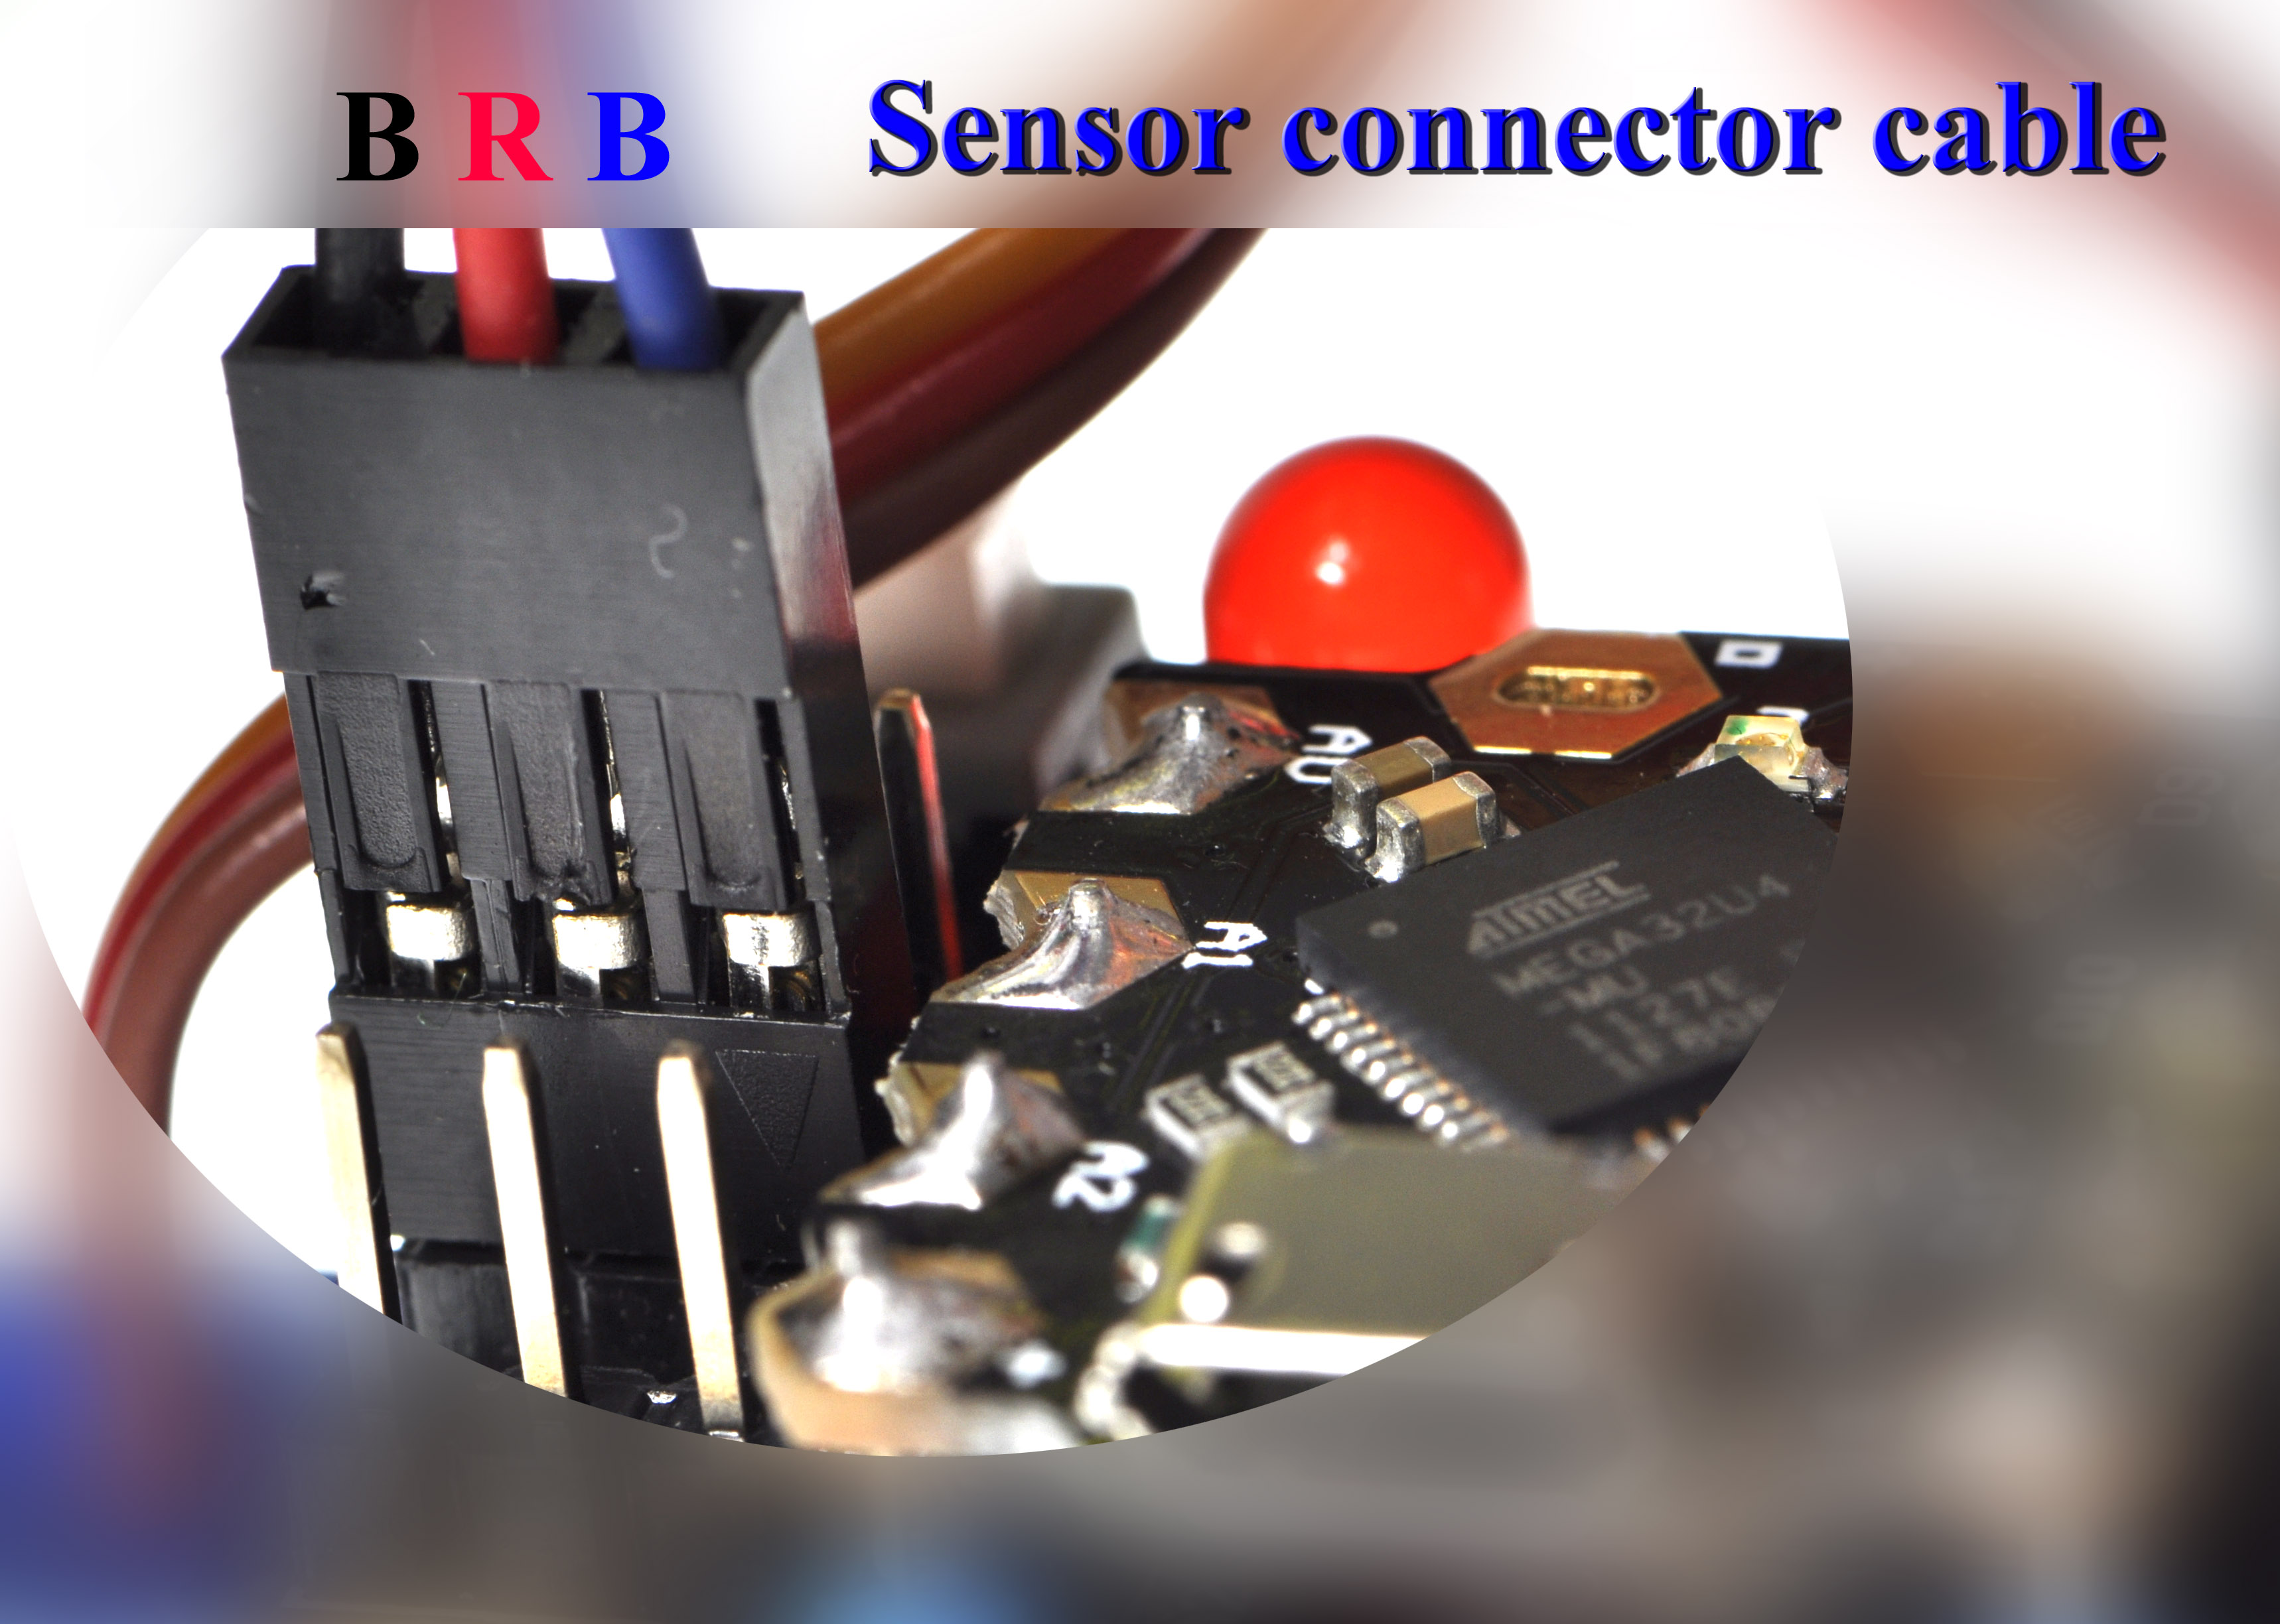
Please make sure that your sensor cable complies with the pin arrangement on the Beetle_shield. The pins are (starting from the microcontroller board to the outside). Please check the Beetle shield Wiki for more details.
- Signal
- VCC
- GND

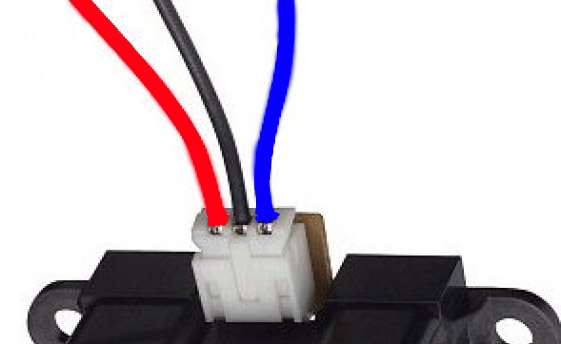
The white plug which connects with the sensor has the following order of colored wires (looking at the sensor from the front side with socket facing up):
- RED
- BLACK
- BLUE

Tutorial
What's the purpose of this tutorial?
Requirements
-
Hardware
- DFRduino UNO R3 (or similar) x 1
- XXX x #
- M-M/F-M/F-F Jumper wires
-
Software
- Arduino IDE
- Download and install the XXX Library. (About how to install the library?)
Connection Diagram
Sample Code
The code below shows how to make the Insect Bot mini walking and avoiding obstacles.
// //////////////////////////////////////////////////////////////////////////////////////
// INSECT BOT MINI (Insectbot Kit Product Code: KIT0051                                //
// https://www.dfrobot.com/index.php?route=product/product&product_id=1055              //
//                                                                                     //
// modified by Lumi for DFRobot.com                                                    //
// 2013/12/23                                                                          //
/////////////////////////////////////////////////////////////////////////////////////////

// Servo Library
#include <Servo.h>
// Servo name
Servo frontServo;
Servo rearServo;
// time delay between steps
int walkSpeed = 500;
// center servos
int centerPos = 90;
// servo angles for walking pattern
int frontRightUp = 70;
int frontLeftUp = 110;
int backRightForward = 70;
int backLeftForward = 110;
// another center position
int centerTurnPos = 81;
// servo angles for walking pattern
int frontTurnRightUp = 70;
int frontTurnLeftUp = 110;
int backTurnRightForward = 70;
int backTurnLeftForward = 110;
// variable for distance value
int distance = 0;
// average distance value
int distanceCheck = 0;
// Array for distance values
int collectDistance[5];
// Variables for counters
int i;
int f;
int r;
// assign analog pin A1
int sensorPin = A1;
// distance value for danger close. Bigger values are greater distance and smaller values are lower distance
int dangerDistance = 350;
/* Setup function */
void setup()
{
// attach servos
  frontServo.attach(9);
  rearServo.attach(10);
  // assign sensor
  pinMode(sensorPin, INPUT);
  // center servos
  frontServo.write(centerPos);
  rearServo.write(centerPos);
  // wait 3 seconds for start walking
  delay(3000);
  //Serial.begin(9600); // serial data setup
}
/* distance check function */
void scan()
{
    // read 5 distance values
            for (i = 0; i < 5; i = i + 1) {
        distanceCheck = analogRead(sensorPin);
        collectDistance[i] = distanceCheck;
        // serial output for testing
                //Serial.print (i);
                //Serial.print(" = ");
        //Serial.println(collectDistance[i]);
        }
      // checksum of the 5 distance values for getting an average value. This will prevent the robot to change behavior by reading one wrong value
      distance = (collectDistance[0]+collectDistance[1]+collectDistance[2]+collectDistance[3]+collectDistance[4])/5;
      delay(20);
}
// walk forward
void moveForward()
{
  // loop for the servo angels to smoothen the steps
  for (f = 0; f < 39; f++){
   frontRightUp++;
   backLeftForward--;
   frontServo.write(frontRightUp);
   rearServo.write(backLeftForward);
   delay(10);
  }
  // loop for the servo angels to smoothen the steps
  for (r = 0; r < 39; r++){
   frontRightUp--;
   backLeftForward++;
   frontServo.write(frontRightUp);
   rearServo.write(backLeftForward);
   delay(10);
  }
}
// walk backwards to the left
void moveBackRight()
{
frontServo.write(frontRightUp);
rearServo.write(backRightForward-6);
delay(110);
frontServo.write(centerPos);
rearServo.write(centerPos-6);
delay(80);
frontServo.write(frontLeftUp+9);
rearServo.write(backLeftForward-6);
delay(110);
frontServo.write(centerPos);
rearServo.write(centerPos);
delay(80);
}
// walk forward to the left
void moveTurnLeft()
{
frontServo.write(frontTurnRightUp);
rearServo.write(backTurnLeftForward);
delay(110);
frontServo.write(centerTurnPos);
rearServo.write(centerTurnPos);
delay(80);
frontServo.write(frontTurnLeftUp);
rearServo.write(backTurnRightForward);
delay(110);
frontServo.write(centerTurnPos);
rearServo.write(centerTurnPos);
delay(80);
}
// blink LED. This function can be called in any situation you want. Just add led(); in the code where you want to blink the LED.
void led(){
  // loop for the LED to blink it 5 times for 0.05 sec on and 0.1 sec off
    for(int l=0; l<=5; l++) {
      digitalWrite(13, HIGH);
      delay(50);
      digitalWrite(13, LOW);
      delay(100);
    }
}
// that's the loop. This is repeatedly called as long as the robot is powered on
void loop()
{
  // call function for checking the distance
  scan();
  //Serial.println(distance);
    if (distance > 1){ // filters out the zero readings
    // an obstacle is being detected
    if (distance > dangerDistance) {
      // LED at Pin 13 (standard) blinks 5x
      led();
        // 4 steps backward left
        for(int i=0; i<=3; i++) {
        moveBackRight();
        delay(walkSpeed);
    }
      // 4 steps forward left
      for(int i=0; i<=3; i++) {
      moveTurnLeft();
      delay(walkSpeed);
    }
    } else {
      // all clear, no obstacle detected. Just walk forward
      moveForward();
        delay(walkSpeed/100);
    }
    }
}
More Documents
 Get Insectbot Kit from DFRobot Store or DFRobot Distributor.
