LattePanda PCIex1 to PCIex16 Adapter Board
SKU: FIT0972
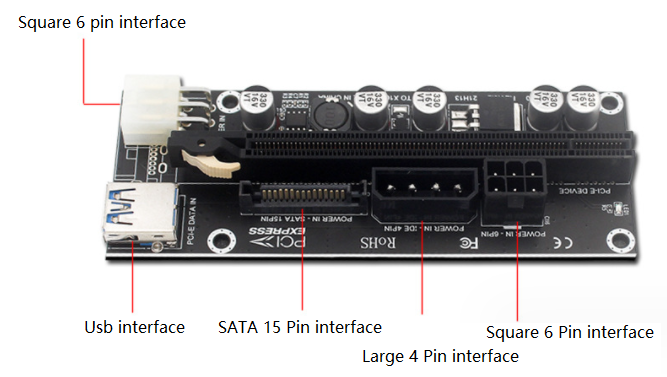
This PCIex1 to PCIex16 adapter is for LattePanda Sigma users, featuring a PCIex16 slot. Plug-and-play (no drivers needed), it pairs with M.2 M Key to PCIex4 Expansion Card (FIT0971) to add external GPUs and boost Sigma’s performance. It uses 3 power interfaces (6 PIN + 4 PIN + SATA 15 PIN) and a high-speed USB3.0 (transmits PCIe signals, not ordinary USB) for fast data transfer. Includes a SATA-to-6-pin GPU power cable and USB3.0 cable. Note: Must use with FIT0971 for external GPUs.