
Introduction
The Obloq IoT module is an ESP8266-based serial to WIFi IoT module for connecting your devices to Internet.
For guys who want to monitor the real-time temperature, humidity, formaldehyde concentration in your home, or remotely control your lamp, electric curtain, DIYs, ect., then this Obloq IoT module would be an excellent choice for you! The Obloq module is designed to be simple-to-use, and no complex coding required. Just with our micro:bit expansion board, Mind+ graphical programming software, DFRobot easy IoT platform and avalibale WiFi, you can easily connect your projects to the IoT world.

Specification
- Power Supply: 3.3V
- Interface Speed: 9600bps
- Wi-Fi Direct(P2P), soft-AP
- Built-in TCP/IP protocol stack
- WiFi Frequency: 2.4GHz
- Connector: PH2.0 ×2
- WiFi Mode: IEEE802.11b/g/n
- Support Low Power: <240mA
- Product Dimension: 35×32mm / 1.38×1.26inch
- Weight: 16g
- RGB LED ×1
- micro Touch Button ×2
Board Overview

| Label | Description |
|---|---|
| TX | Serial transmit |
| RX | Serial receive |
| Reset | Reset button |
| Upgrade | Firmware upgrade shortcut key |
Tutorial
Measure real-time temperature via micro:bit, and transmit the data by IoT Platform and then when the IoT module receives the data, switch the fan module on/off by micro:bit.
Knowledge Point: learn how to use the Obloq IoT module and the communication process of commands in the background.
The Obloq IoT module has two basic functions: transmit data to IoT platfrom and receive IoT data. The tutorial below demonstrates how to use the Obloq IoT module with micro:bit and its expansion board combining Mind+ and IoT platform.
Requirements
-
Hardware
- micro:bit board x 1
- micro:bit expansion board for Boson x1
- Obloq IoT module x1
- Fan module x1
- 3pin Connector Wires
-
Software
Easy IoT Platform
- Easy IoT from DFRobot is dedicated to simple solutions for Internet of Things.
- Features Included:
- Get started in 10 minutes, plug and operate
- OBLOQ supported, serial port transmission
- Real time monitoring, data analysis
Sign in and Setting Easy IoT
- Open the easy IoT website:http://iot.dfrobot.com.cn/

-
With a micro:bit board, a micro:bit IoT expansion board and Easy IoT, a whole IoT system will be ready.
-
Sign up and Sign In
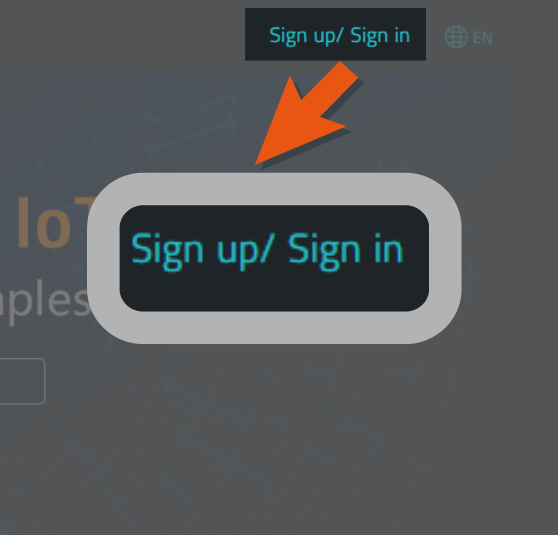
- Click the Sign up/Sign in at the upper right corner of the webpage to register a account.
- Fill in the black with your personal information, you can register via phone or email.
- Sign in the Easy IoT, then it will enter into Workshop interface. You need to add a new device to match your micro:bit.

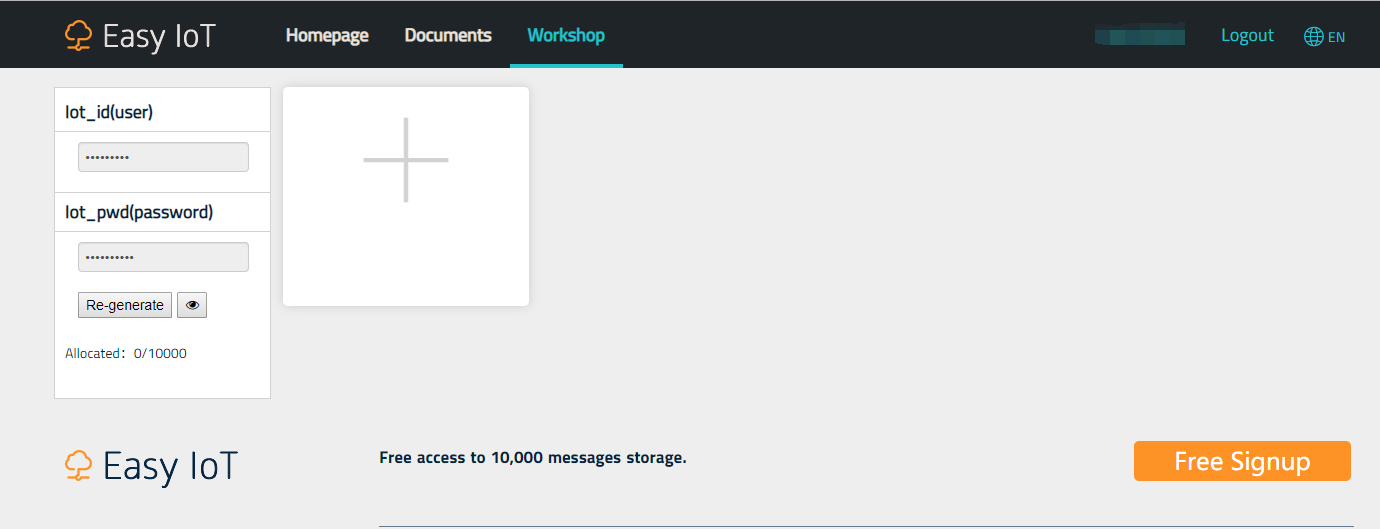
- Easy IoT Setting
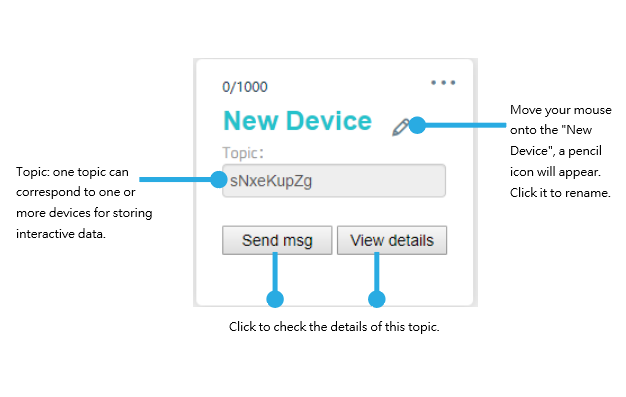
- When added a new device, a device topic Topic: elJA7JHZg will be generated randomly, and you can click the device name to change it.
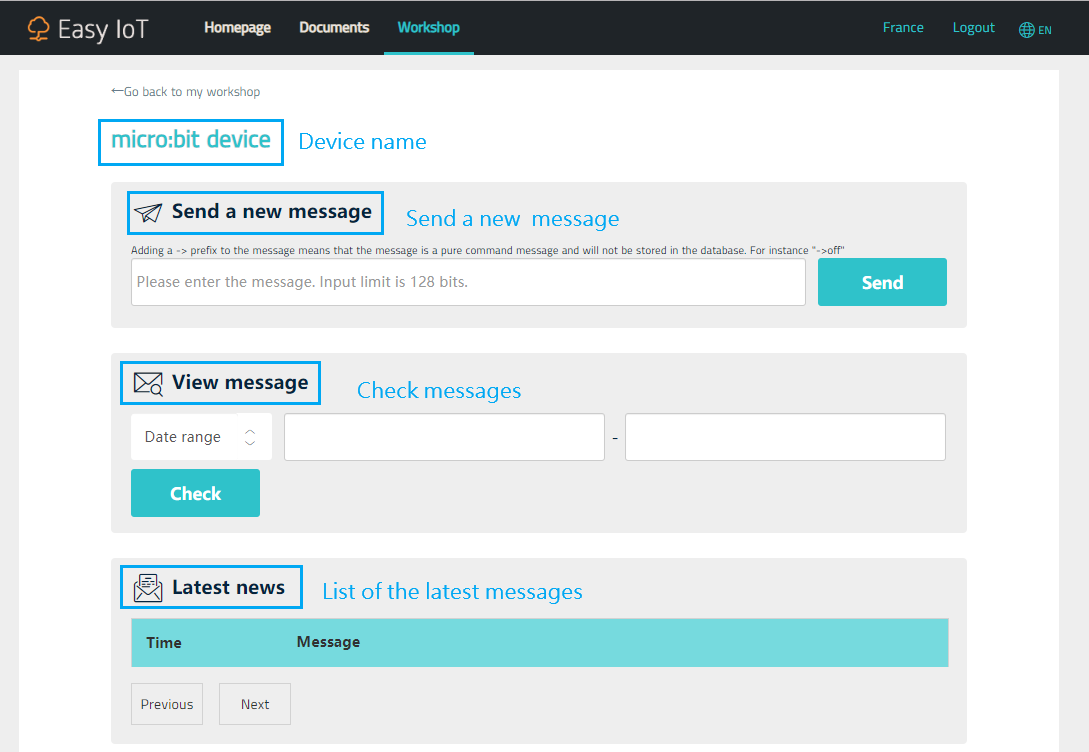
- Click "send message", then the webpage of message receiving and transmitting will appear. You can find the details of the received data.
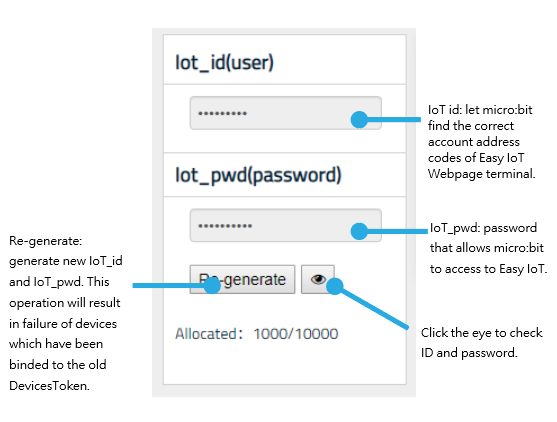
- Get to know other information in this page- ID account interface
Connection Diagram
The Tx and Rx have been encapsulated onto two independent 3Pin connectors, which can be connected two random ports of micro:bit expansion board. Of course you should select the corresponding pins in code. Here we connect RX to P1, Tx to P0, the fan module to P8. As shown below:
Mind+ Graphical Programming
- Initial Setup
Open Mind+ graphical programming software, first load micro:bit block in "extension", then add the Obloq IoT module related block(Load micro:bit first, otherwise, you may cannot find IoT block when open communication).


- Programming
You can directly drag and snap the block from the command section, the final program is shown as below:

Click the setting icon in the block to set IoT parameters. They should be consistent with setting in the IoT Platform. Input your WiFi and password, and configure the Tx/Rx as the hardware connection.
Results
When downloaded the program, the RGB LED on the Obloq IoT module changes from red to blue, and to green and stays green, which indicates the IoT communicaton works well. The indications of the RGB LED are as below:
| Color | Function |
|---|---|
| Red | Not work properly |
| Blue | Connecting to WiFI |
| Green | Work well |
| Purple | MQTT disconnected |
Fan module pinout

Open the workshop to view the details.
Click send message in the workshop to remotely control the operation of the fan through the network. When the Obloq IoT Module received the data, the micro:bit get and process it to control the fan. Here the Obloq IoT module works as a transfer station. For controlling other different actuators, you only need to adjust the program in the receiving part.
FAQ
For any questions, advice or cool ideas to share, please visit the DFRobot Forum
Turn to the Boson Kit Page