ESP32-S3R8 1.85-inch Round Display Board
SKU: DFR1221
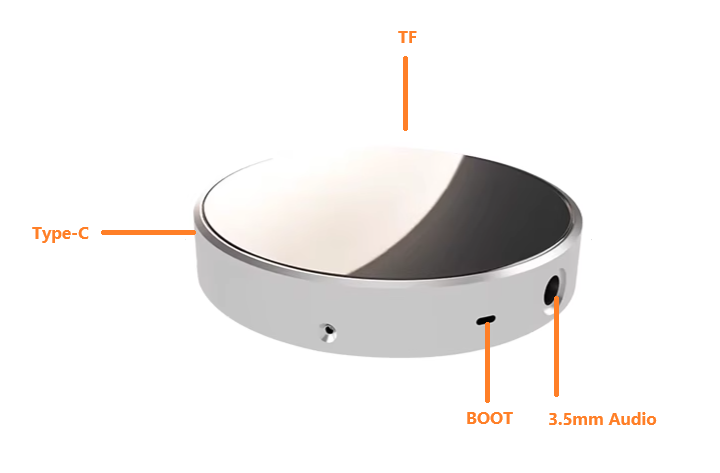
The 1.85-inch round display uses ESP32-S3R8 (dual-core MCU, WiFi/BLE5.0, 240MHz, 520KB SRAM, 8MB PSRAM, 448KB ROM, 16MB Flash). It features 262K-color 360x360 display, wide angle, capacitive touch. Onboard mic/3.5mm audio enable AI voice interaction. Built-in circuits include backlight, touch, I2S mic/DAC, TF, wireless power. Supports secondary dev via Arduino, ESP-IDF, MicroPython, GUITION.