
Introduction
DF presents the all-new Raspberry Pi multifunctional motor driver expansion board, a full-featured robot motor expansion board suitable for Raspberry Pi Zero/Zero W/A+/B+/2B/3B/3B+/4B. It can simultaneously support multiple motors, stepper motors, servos, leaving out camera and DIP display screen ribbon interfaces. It can be stacked to extend more control interfaces, especially suitable for DIY robots, smart cars, robotic arms, smart cloud platforms, and various applications. The control interface simply uses the I2C interface, compatible with 3.3V/5V levels. It provides simple driver routines, users can modify, add their own required functions, and also has a UART interface, which can conveniently achieve communication with external devices. It has a built-in DC-DC regulator circuit, and the power supply current for Raspberry Pi can reach 3A.
Product Parameters
- Supply voltage: 6 ~ 25V
- Power interface: DC2.1 interface or 3.5mm wiring column
- PWM servo interface ×8
- DC motor interface ×4
- Encoder motor drive interface ×4 6 ~ 25V
- Driver board IIC address is 0x60
Features
- Supports driving 8-way servos simultaneously. 3Pin (black red blue GVS) standard interface wiring, convenient for connecting servos, servo power can switch to external independent power supply
- 12-bit resolution, adjustable PWM frequency up to 1.6KHz, configurable push-pull or open-drain output
- Supports 4-way 6~24V DC motors, PH2.0 interface or screw terminal
- Suitable for Raspberry Pi Zero/Zero W/A+/B+/2B/3B/3B+/4B
- Reserved camera and DIP display screen ribbon interface
- The expansion board reserves 2 IIC expansion interfaces, 1 serial interface
- Onboard passive buzzer, onboard infrared receiver
Pin/Interface Explanation

Tutorial
Install I2C library and enable
Before using the driver board, you must first install the I2C library and enable it. Open the Raspberry Pi terminal and enter the command "sudo raspi-config", then follow the order of the pictures below.
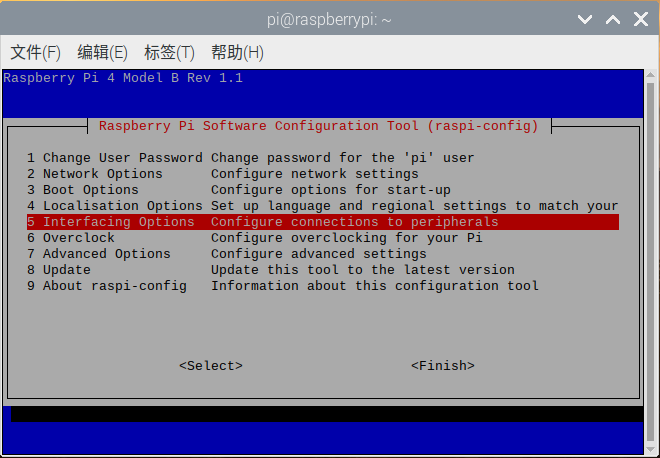
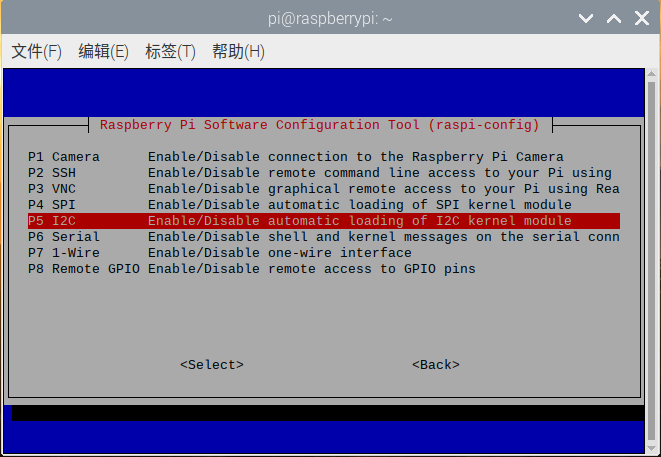
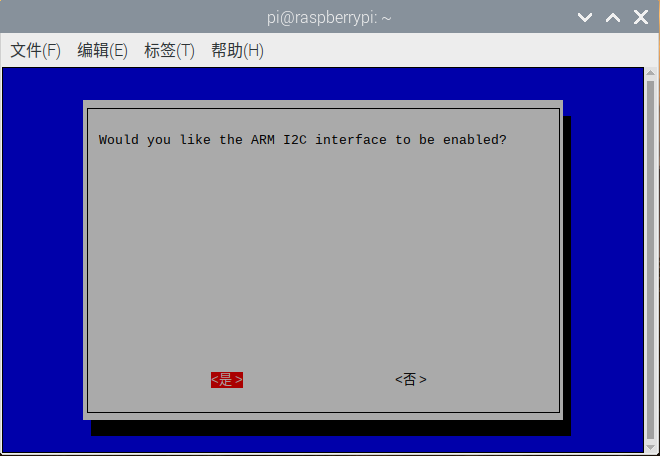
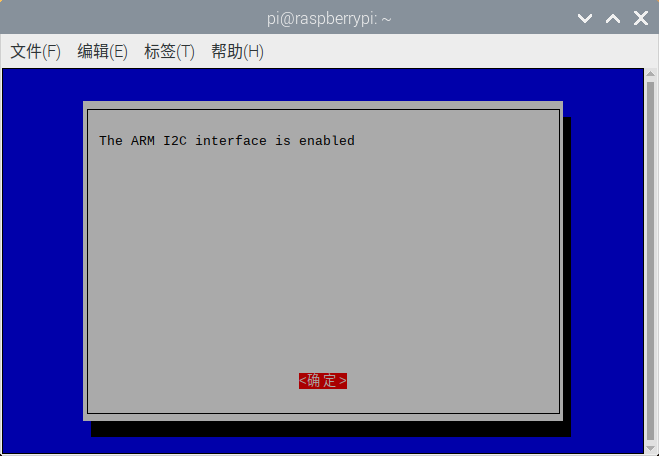
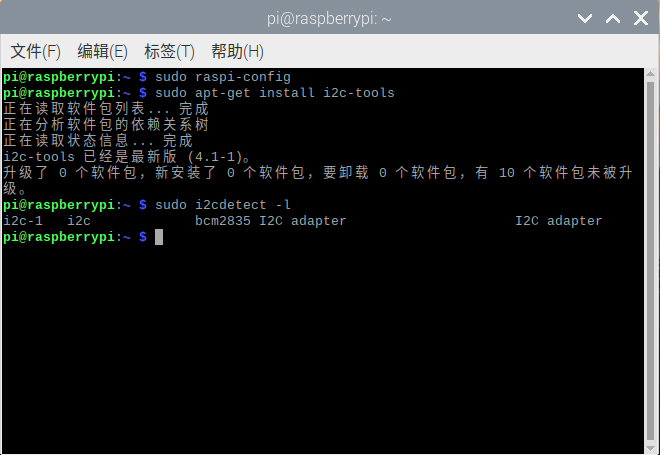
The above is to turn on the Raspberry Pi I2C, next, we install the Raspberry Pi I2C library in the terminal, enter “sudo apt-get install i2c-tools”, after entering, you can see the I2C library being downloaded. After the installation is complete, you can enter “sudo i2cdetect -l” in the terminal to check if it is installed correctly. If information similar to the following appears, it means the installation is normal.
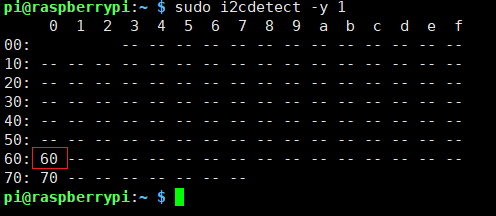
Enter “sudo i2cdetect -y 1” in the terminal to scan all I2C devices connected to the I2C bus, and print out the I2C bus address of the device. Our expansion board's I2C address is 0x60, as shown below.
Restart the Raspberry Pi to make the new settings effective:
sudo reboot
Download Programs
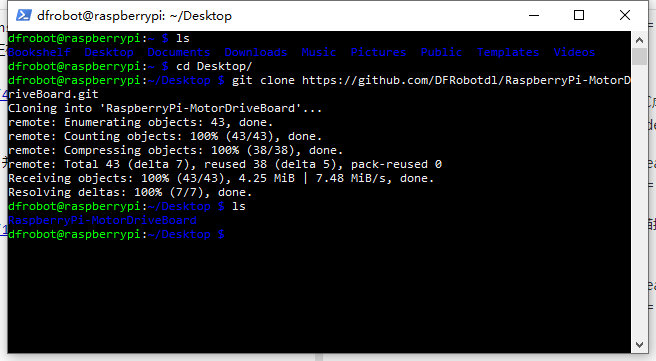
Enter the following commands in the terminal in order
cd ...
git clone https://github.com/DFRobotdl/RaspberryPi-MotorDriveBoard.git
Servo Drive
Connect as follows

Open the terminal and enter the following commands in order
cd RaspberryPi-MotorDriveBoard/Demo/Python/ServoTest/
python3 ./ServoTest.py

The servo will rotate back and forth from the minimum angle to the maximum angle
DC Motor Drive
Connect as follows

Open the terminal and enter the following commands in order
cd RaspberryPi-MotorDriveBoard/Demo/Python/DC_MotoTest/
python3 DCTest.py

The motor will rotate forward and backward at different speeds.
Stepper Motor Drive
Connect as follows

Open the terminal and enter the following commands in order
cd RaspberryPi-MotorDriveBoard/Demo/Python/StepperTest/
python3 StepperTest.py

Related Materials
- Schematic RaspBerryDriverBoard.pdf
Frequently Asked Questions
No customers have any questions about this product yet, feel free to contact us through qq or the forum! For more questions and interesting applications, you can visit the forum to check or post