1.Introduction
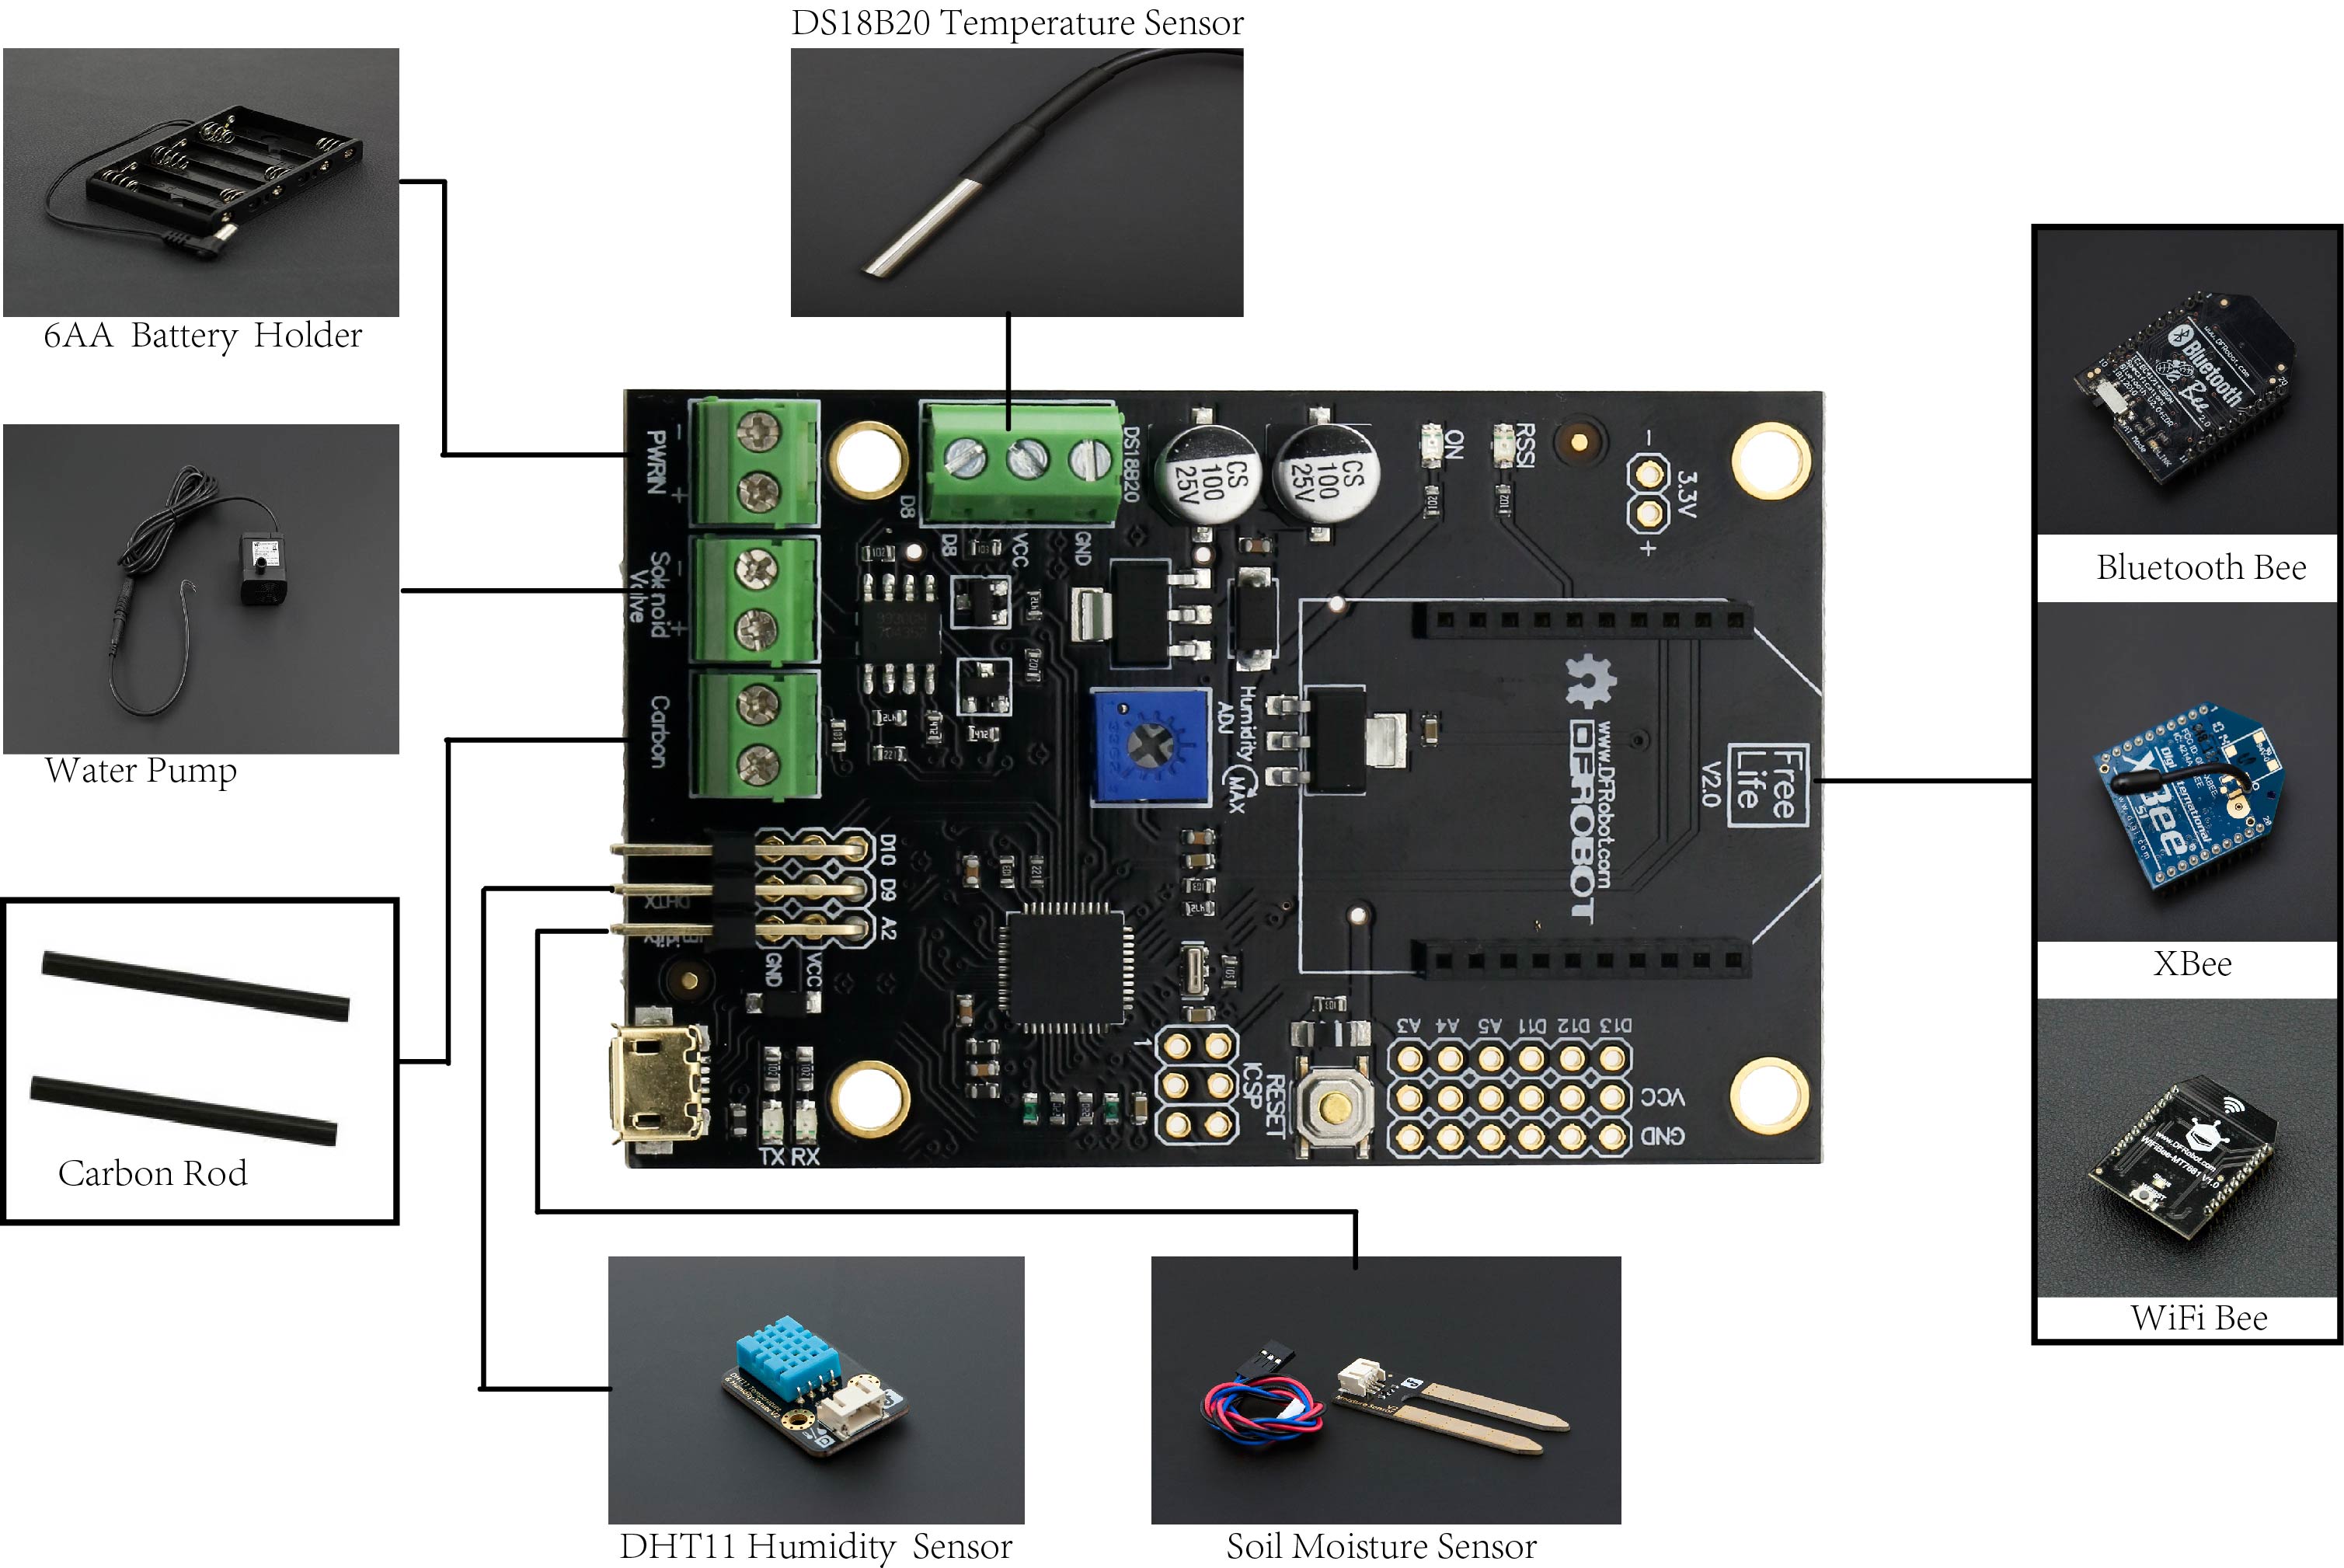
EcoDuino is evolving. Now the EcoDuino has a new enclosure. It is protected from water splashes, so it is safe to use beside your plants. The EcoDuino now sports an Atmega32U4 which eliminiates the requirement of an adapter. And sketches can simply uploaded via Mirco USB just like Arduino Leonado. Another improvment is that the DS18B20 sensor is now driectly supported.
EcoDuino is designed by DFRobot to help you grow plants. By using a series of microcontrollers, sensors and actuators, the EcoDuino system can make your efforts to grow plants much easier.
In this system, sensors are used to collect data which can show you plant conditions like temperature,humidity,light intensity, etc...
If you want, EcoDuino can message you and tell you how your plants are doing through wireless communications. It will also water your plants automatically when they are thirsty, or at a pre-determined interval.
The cool thing about the EcoDuino is that it is developed based on on Arduino which means you can not only program EcoDuino in Arduino IDE environment but also use any Arduino compatible hardware in your EcoDuino system.
NOTE: The cables packaged with the sensors is not correct,we suggest you use the orange cables attached.
2.Specification
- Board power supply: 6~12V DC
- Bootloader: leonardo
- 4 Analog I/O ports, 5 Digital I/O ports
- Terminal for interfacing a Carbon rod(Soil moisture sensor)
- Terminal for interfacing a DS18B20 temperature sensor(Soil temperature sensor)
- Terminal for interfacing a motor or a solenoid valve
- Potentiometer to set the threshold soil moisture value of watering
- Xbee slot
- Mirco USB
- 3.5mm screw terminal
- Board dimensions: 75 x 50 mm
- Diving pump power supply: 4.5~12V DC
- Pumping head: 200cm
- Flow capacity: 100-350L/H
- Power range: 0.5W-5W
- Pump dimensions: 38x38x29mm
3.Documents
Please install the libraries before you testing the sample codes
4.Projects
- Testing platform with Ecoduino by Damien Alexandre
- EcoDuino - Arduino based automatic water pump
- Сделал АвтоПолив Растений
- An Auto Planting Kit from Dfrobot unboxing
- Набор для автоматического полива растений EcoDuino
5.Diagram
NOTE: This kit does not contain carbon, XBEE, DS18B20.

tip:
- Soil moisture sensor:blue wire(A2),red wire(VCC),black wire(GND)
- DHT11 humidity sensor:green wire(D9),red wire(VCC),black wire(GND)
- Pump:brown wire( ),blue wire(-)
- Battery holder:red wire( ),black wire(-)
- The blue potentiometer is connected to the A1 pin of the main control board,The user can read the value and set the threshold for automatic watering.
Sensors wiki
6.Sample code
Read the sensor value
#include <dht11.h>
dht11 DHT;
#define MOISTURE_PIN A2  /soil Moisture sensor/
#define DHT11_PIN    9   //DHT11

int airHumidity;   //environment humidity
int airTemperature;  // environment temperature
int soilHumidity;   //soil moisture

void setup(){
  Serial.begin(9600);
}

void loop(){
  int chk;
  chk = DHT.read(DHT11_PIN);   //Read Data
  switch (chk){
    case DHTLIB_OK:
                Serial.print("OK,\t");
                break;
    case DHTLIB_ERROR_CHECKSUM:
                Serial.print("Checksum error,\t");
                break;
    case DHTLIB_ERROR_TIMEOUT:
                Serial.print("Time out error,\t");
                break;
    default:
                Serial.print("Unknown error,\t");
                break;
  }
  airHumidity=DHT.humidity;
  airTemperature=DHT.temperature;
  soilHumidity=analogRead(MOISTURE_PIN);

  Serial.print("airHumidity:");
  Serial.print(airHumidity);
  Serial.print(",\t");
  Serial.print("airTemperature:");
  Serial.print(airTemperature);
  Serial.print(",\t");
  Serial.print("soilHumidity:");
  Serial.println(soilHumidity);

  delay(1000);
}
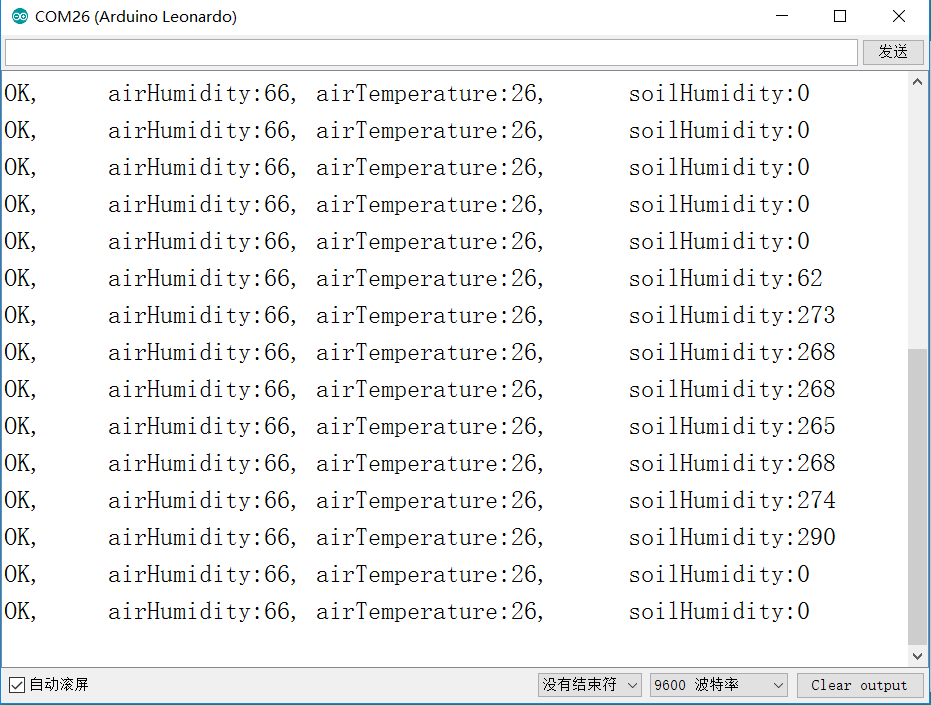
Result
Open the Serial monitor, Baud rate: 9600.

Test the pump
void setup() {
  pinMode(5, OUTPUT);
  pinMode(6, OUTPUT);

  digitalWrite(5, LOW);
  digitalWrite(6, LOW);
}

void loop() {
  pumpOn();
  delay(1000);
  pumpOff();
  delay(1000);
}
//open pump
void pumpOn()
{
  digitalWrite(5, HIGH);
  digitalWrite(6, HIGH);
}
//close pump
void pumpOff()
{
  digitalWrite(5, LOW);
  digitalWrite(6, LOW);
}
Example of auto flower watering
NOTE: This sample program does not use DHT11. You can set the threshold to turn ON/OFF the pump. When the soil moisture is lower than the threshold, it will turn ON the pump.
#define MOISTURE_PIN A2

int soilHumidity;
int setHumidity = 50;      //Set the pump trigger threshold
void setup() {
  pinMode(5, OUTPUT);
  pinMode(6, OUTPUT);

  digitalWrite(5, LOW);
  digitalWrite(6, LOW);
}

void loop() {
  soilHumidity = map(analogRead(MOISTURE_PIN), 0, 1023, 0, 100);    //Map analog value to 0~100% soil moisture value
  if (soilHumidity < setHumidity) {
    pumpOn();
  } else {
    pumpOff();
  }
}
//open pump
void pumpOn() {
  digitalWrite(5, HIGH);
  digitalWrite(6, HIGH);
}
//close pump
void pumpOff() {
  digitalWrite(5, LOW);
  digitalWrite(6, LOW);
}
7.Product List

| No | Name | Pieces |
|---|---|---|
| 1 | 6xAA Battery Holder with DC2.1 Power Jack (FIT0141) | 1 |
| 2 | Immersible Pump | 1 |
| 3 | Micro USB cable (FIT0265) | 1 |
| 4 | WaterTube | 1 |
| 5 | Free Life - EcoDuino Control Board | 1 |
| 6 | DHT11 Temperature and Humidity Sensor | 1 |
| 7 | Enclosure | 1 |
| 8 | sensor Cable | 2 |
| 9 | Moisture Sensor | 1 |
| 10 | DC adapter-Female | 1 |
| 11 | Screw driver flat head | 1 |
| 12 | Screw driver phillips head | 1 |
FAQ
For any questions, advice or cool ideas to share, please visit the DFRobot Forum.
